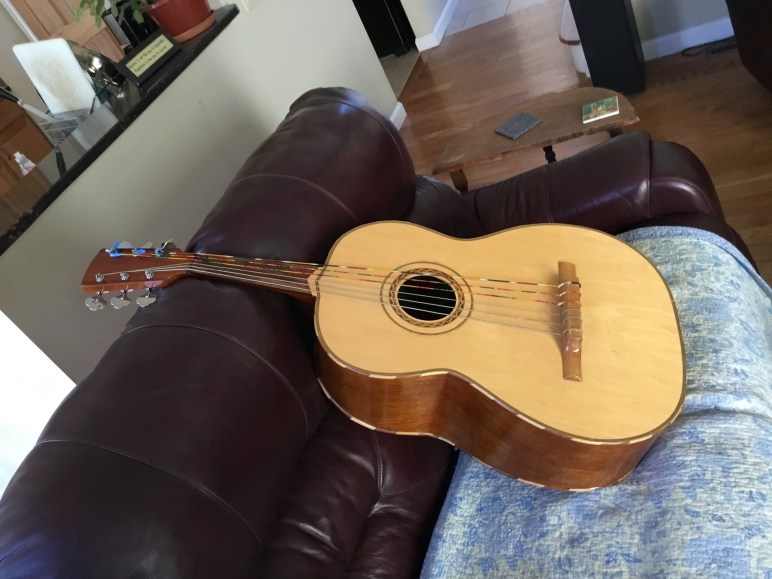
Occasionally some really cool instruments show up in the Wimberly Guitar & Luthiery workshop. Such is the case with this Guitarron, or Mariachi bass. You’ve seen and heard them in almost every mariachi band. It’s a very large acoustic 6 string bass, tuned A1, D2, G2, C3, E3, A2. The interval relationships the same as a guitar but starting on low A. But that, boys and girls, is where the similarities to a guitar (or a bass guitar) end.


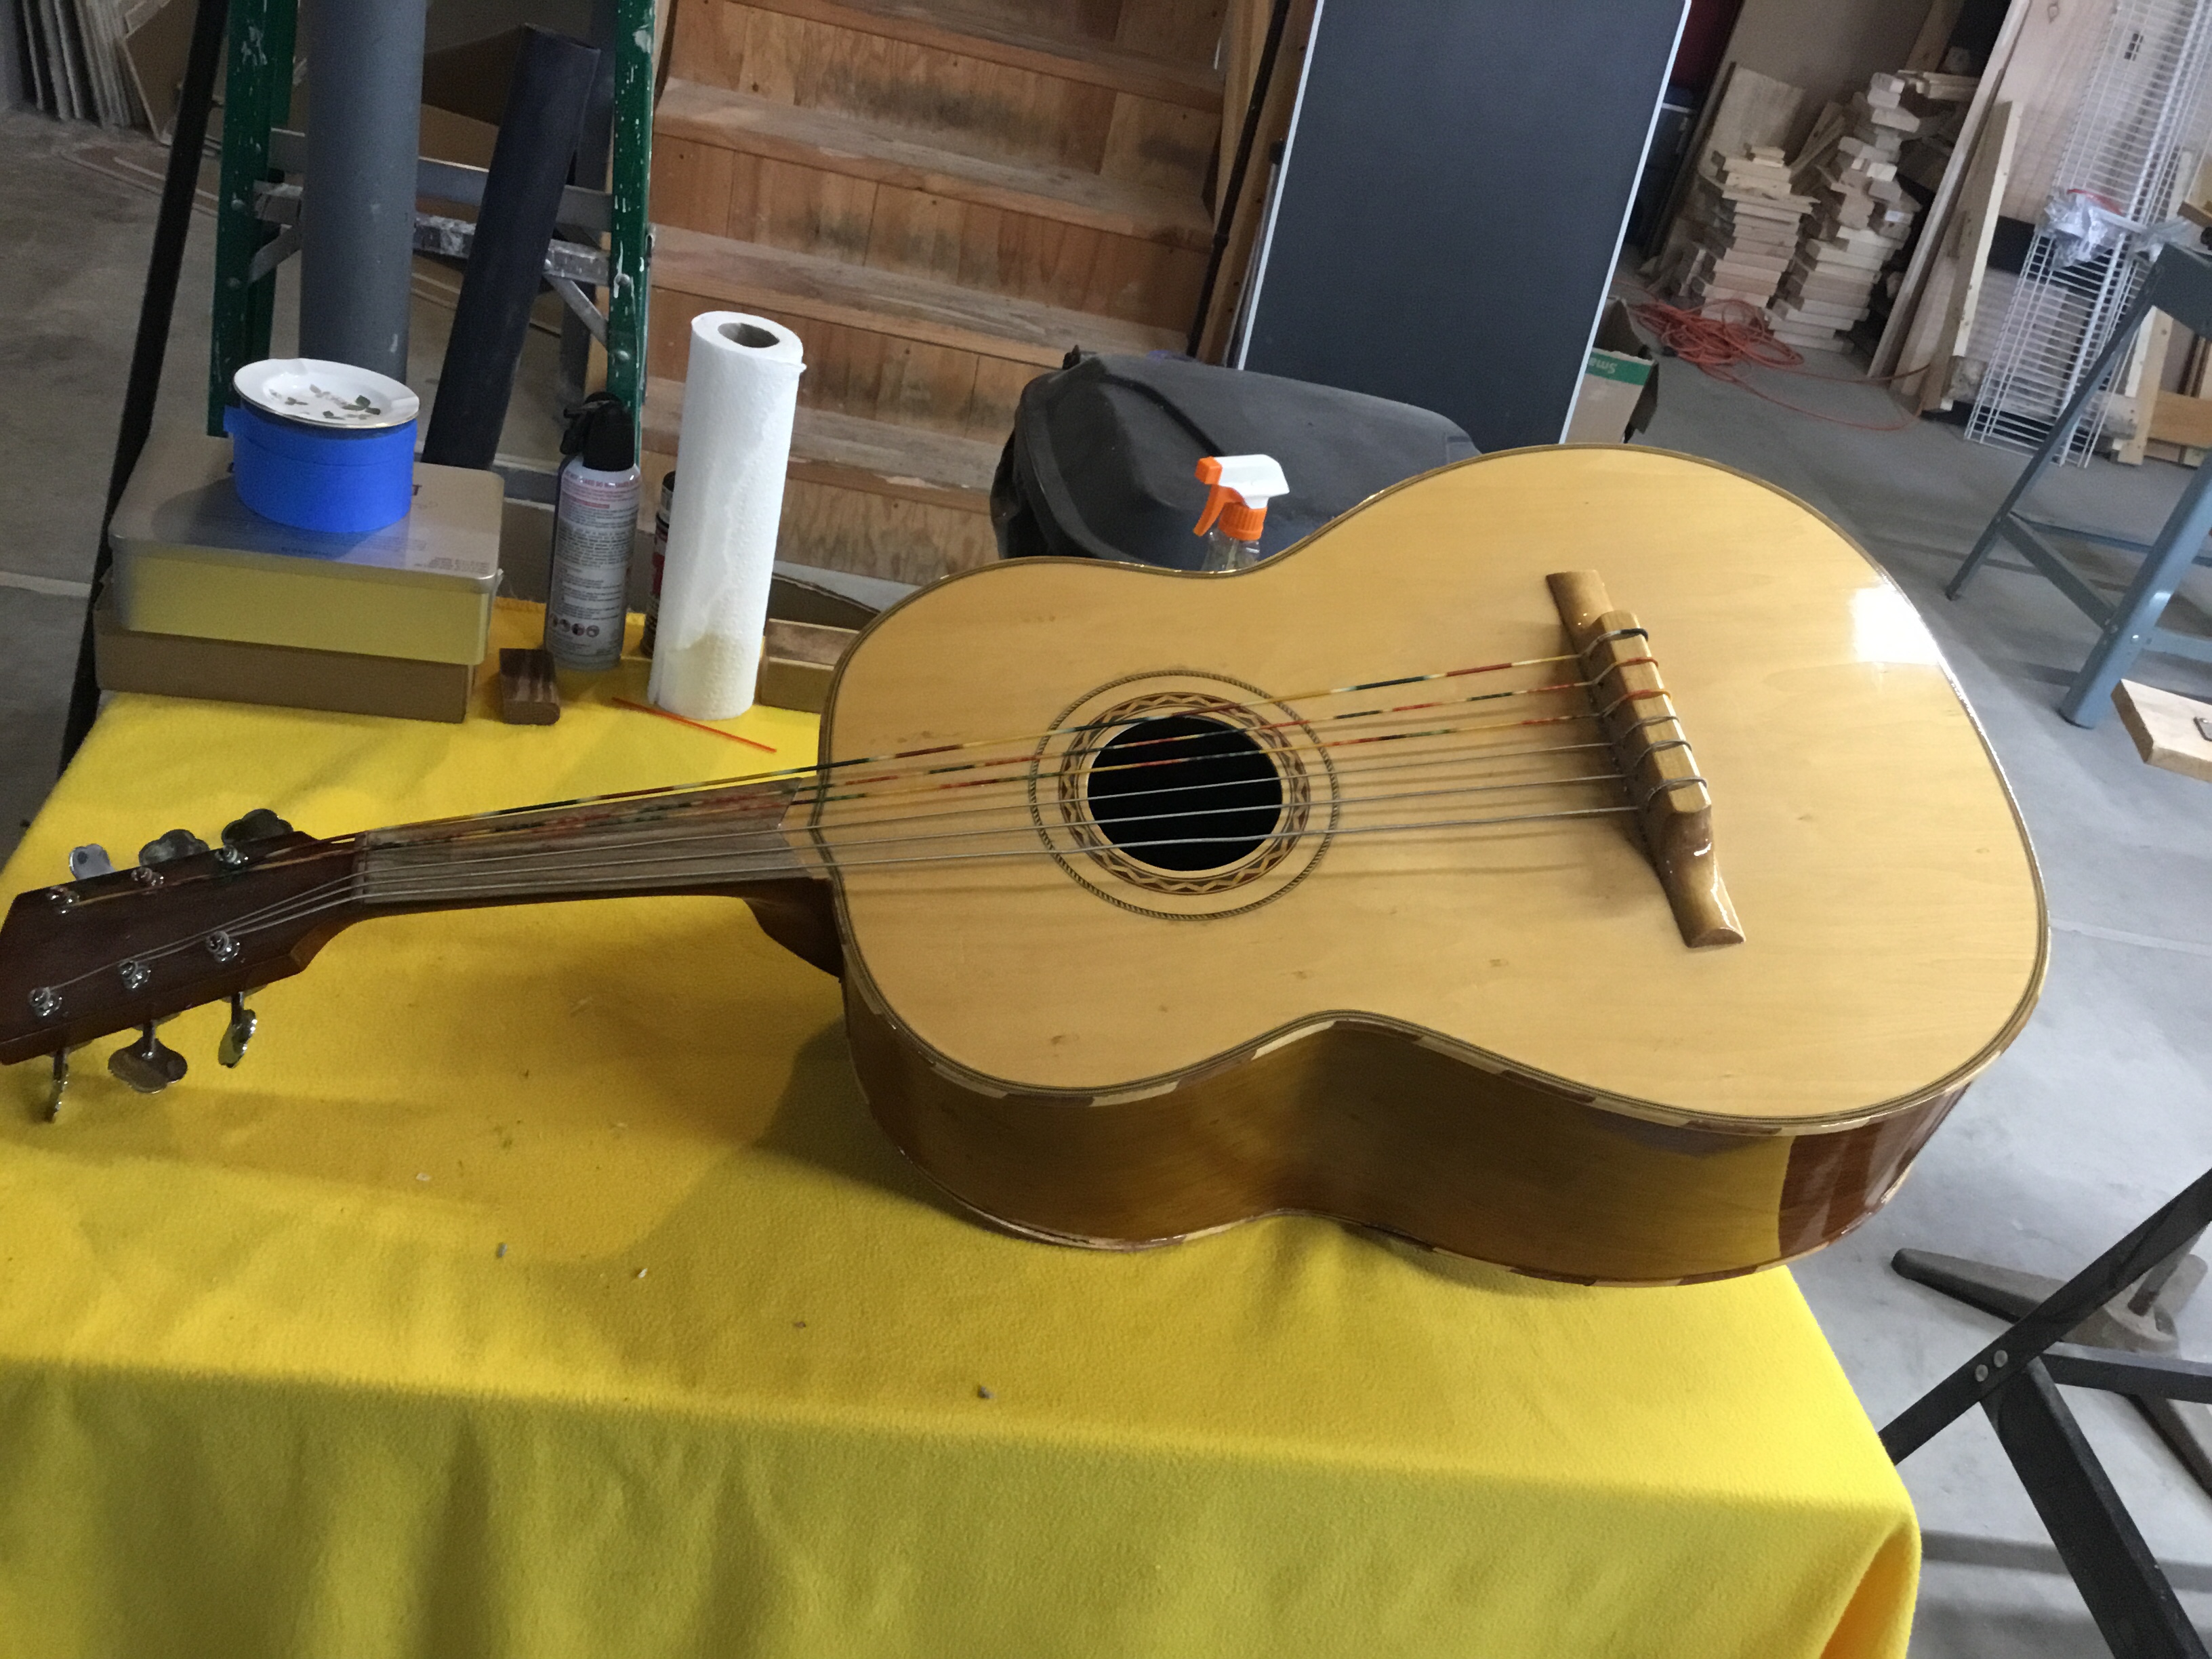
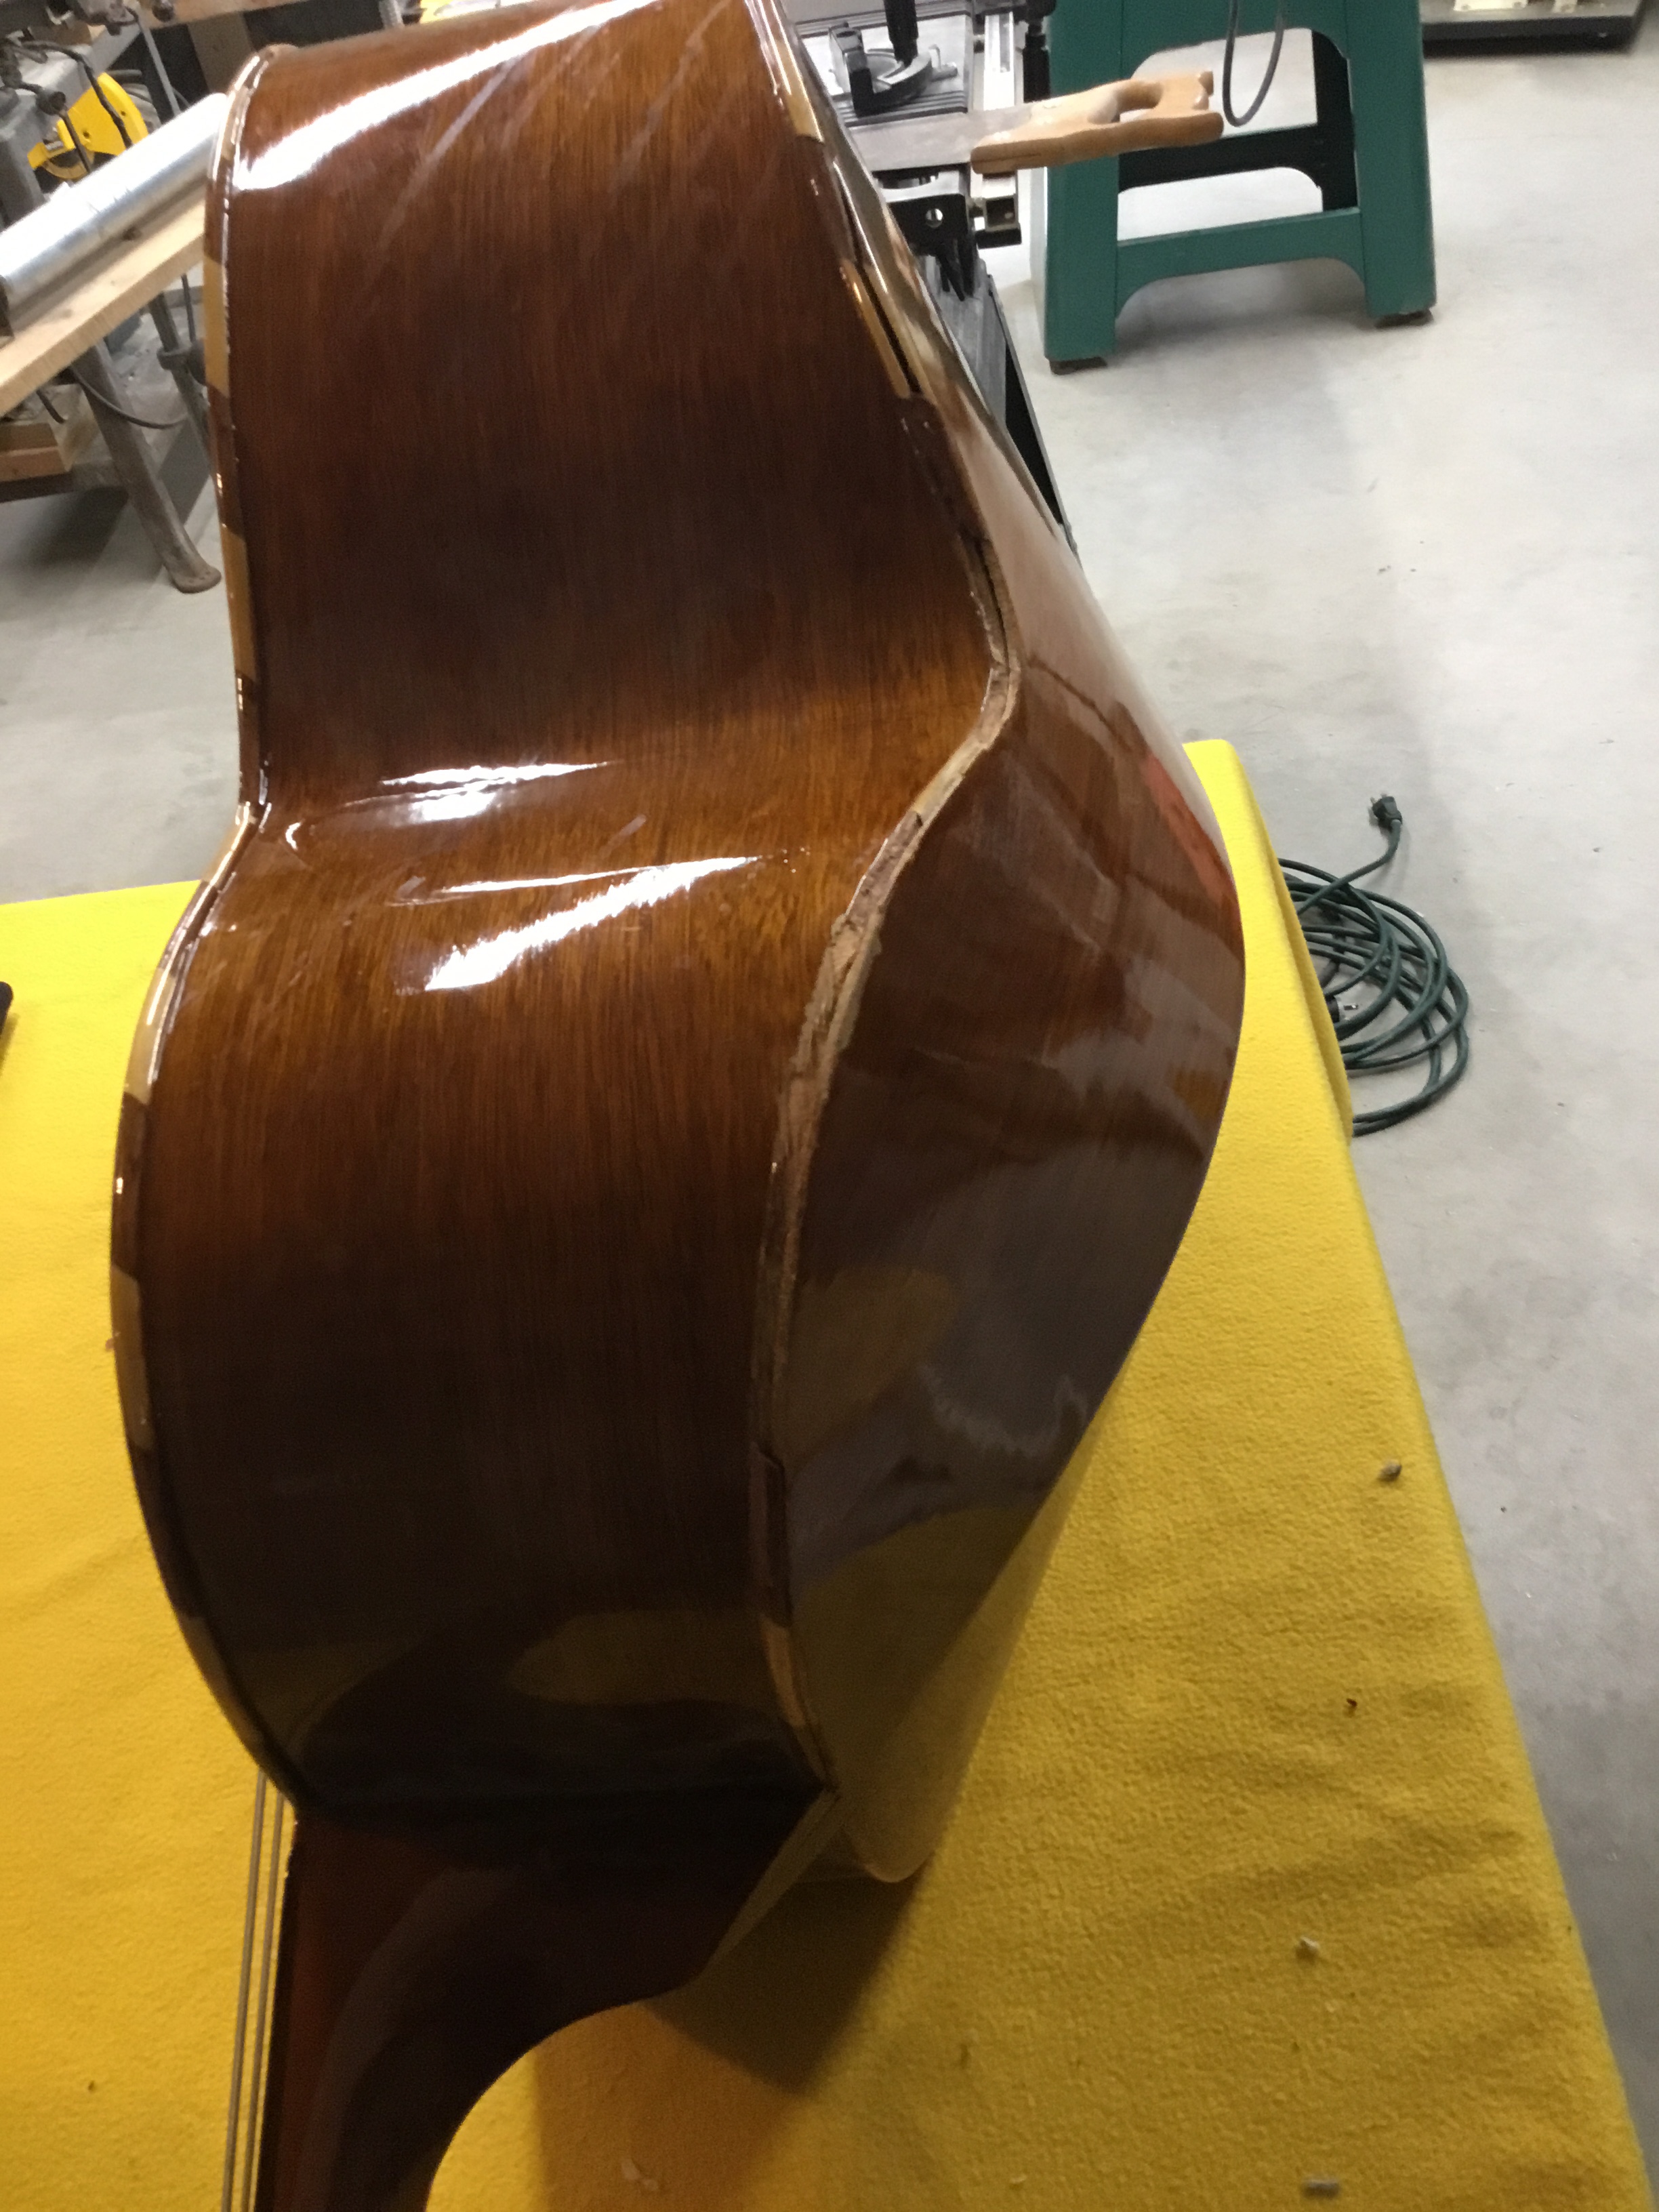
There is a farm near our home that has a regular barn sale every weekend in the fall. We regularly pass this place and often say “hey we should drop in on this some time”. Well, we finally did. There was some really cool stuff for sale in multiple different farm buildings. Being the curious cat that I am, I poked my head into one of these buildings and saw a big (I mean huge) sign on the wall in the shape of a guitar … and Mitch. I blurted out “how much for the sign?” … and Mitch responded “not for sale …. nothing in here’s for sale”. He went on to explain that his wife runs the sale, he was just working in his building. But it gave us an opening to start a conversation about guitars. I mentioned I was a luthier, and he mentioned he had a mariachi bass that needed repair. He bought it broken, because it was such a cool instrument, and was waiting to find someone to repair it. I told him I lived right down the street and he gave me his card and told me to call sometime about the Guitarron … which is, of course, exactly what I did. I came by later in the week and examined it. It appeared that somebody must have dropped this (pretty hard) because the top side and the back were completely separated. There was also a crack where the neck met the guitar, and the seam in the back was beginning to separate…. ouch!
“Think you can fix this?”
“Yup”
And we were off and running!
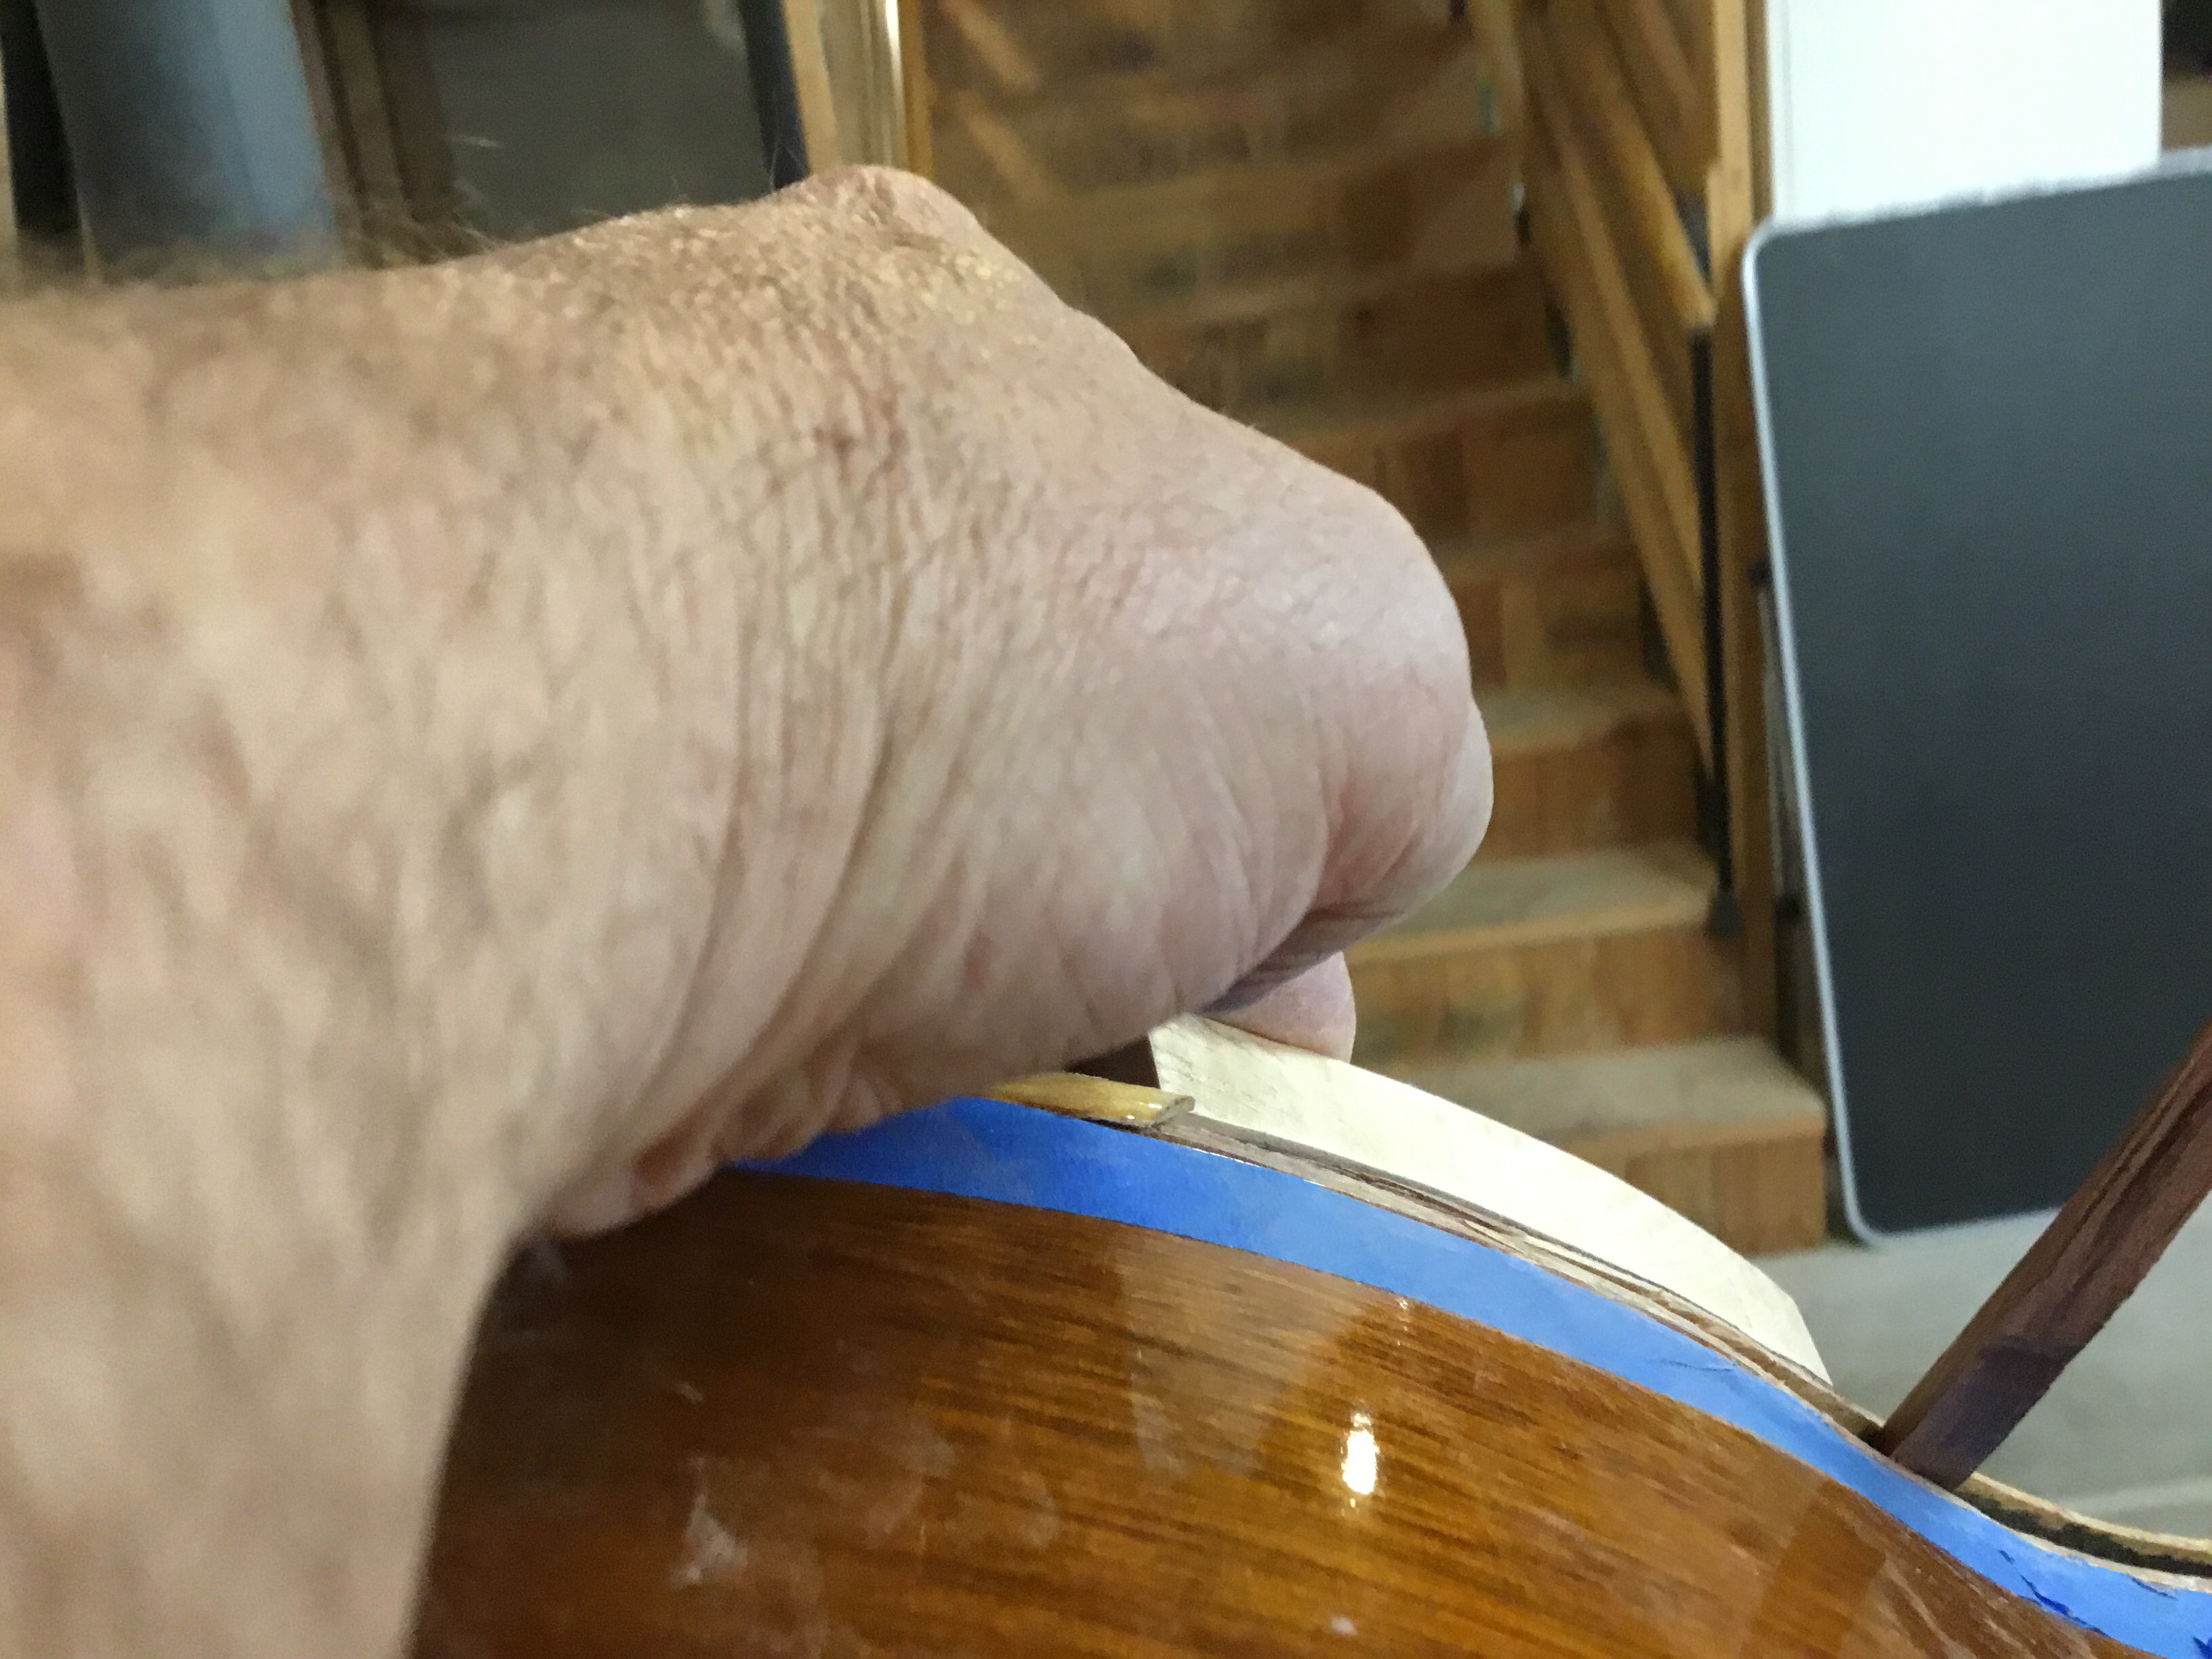
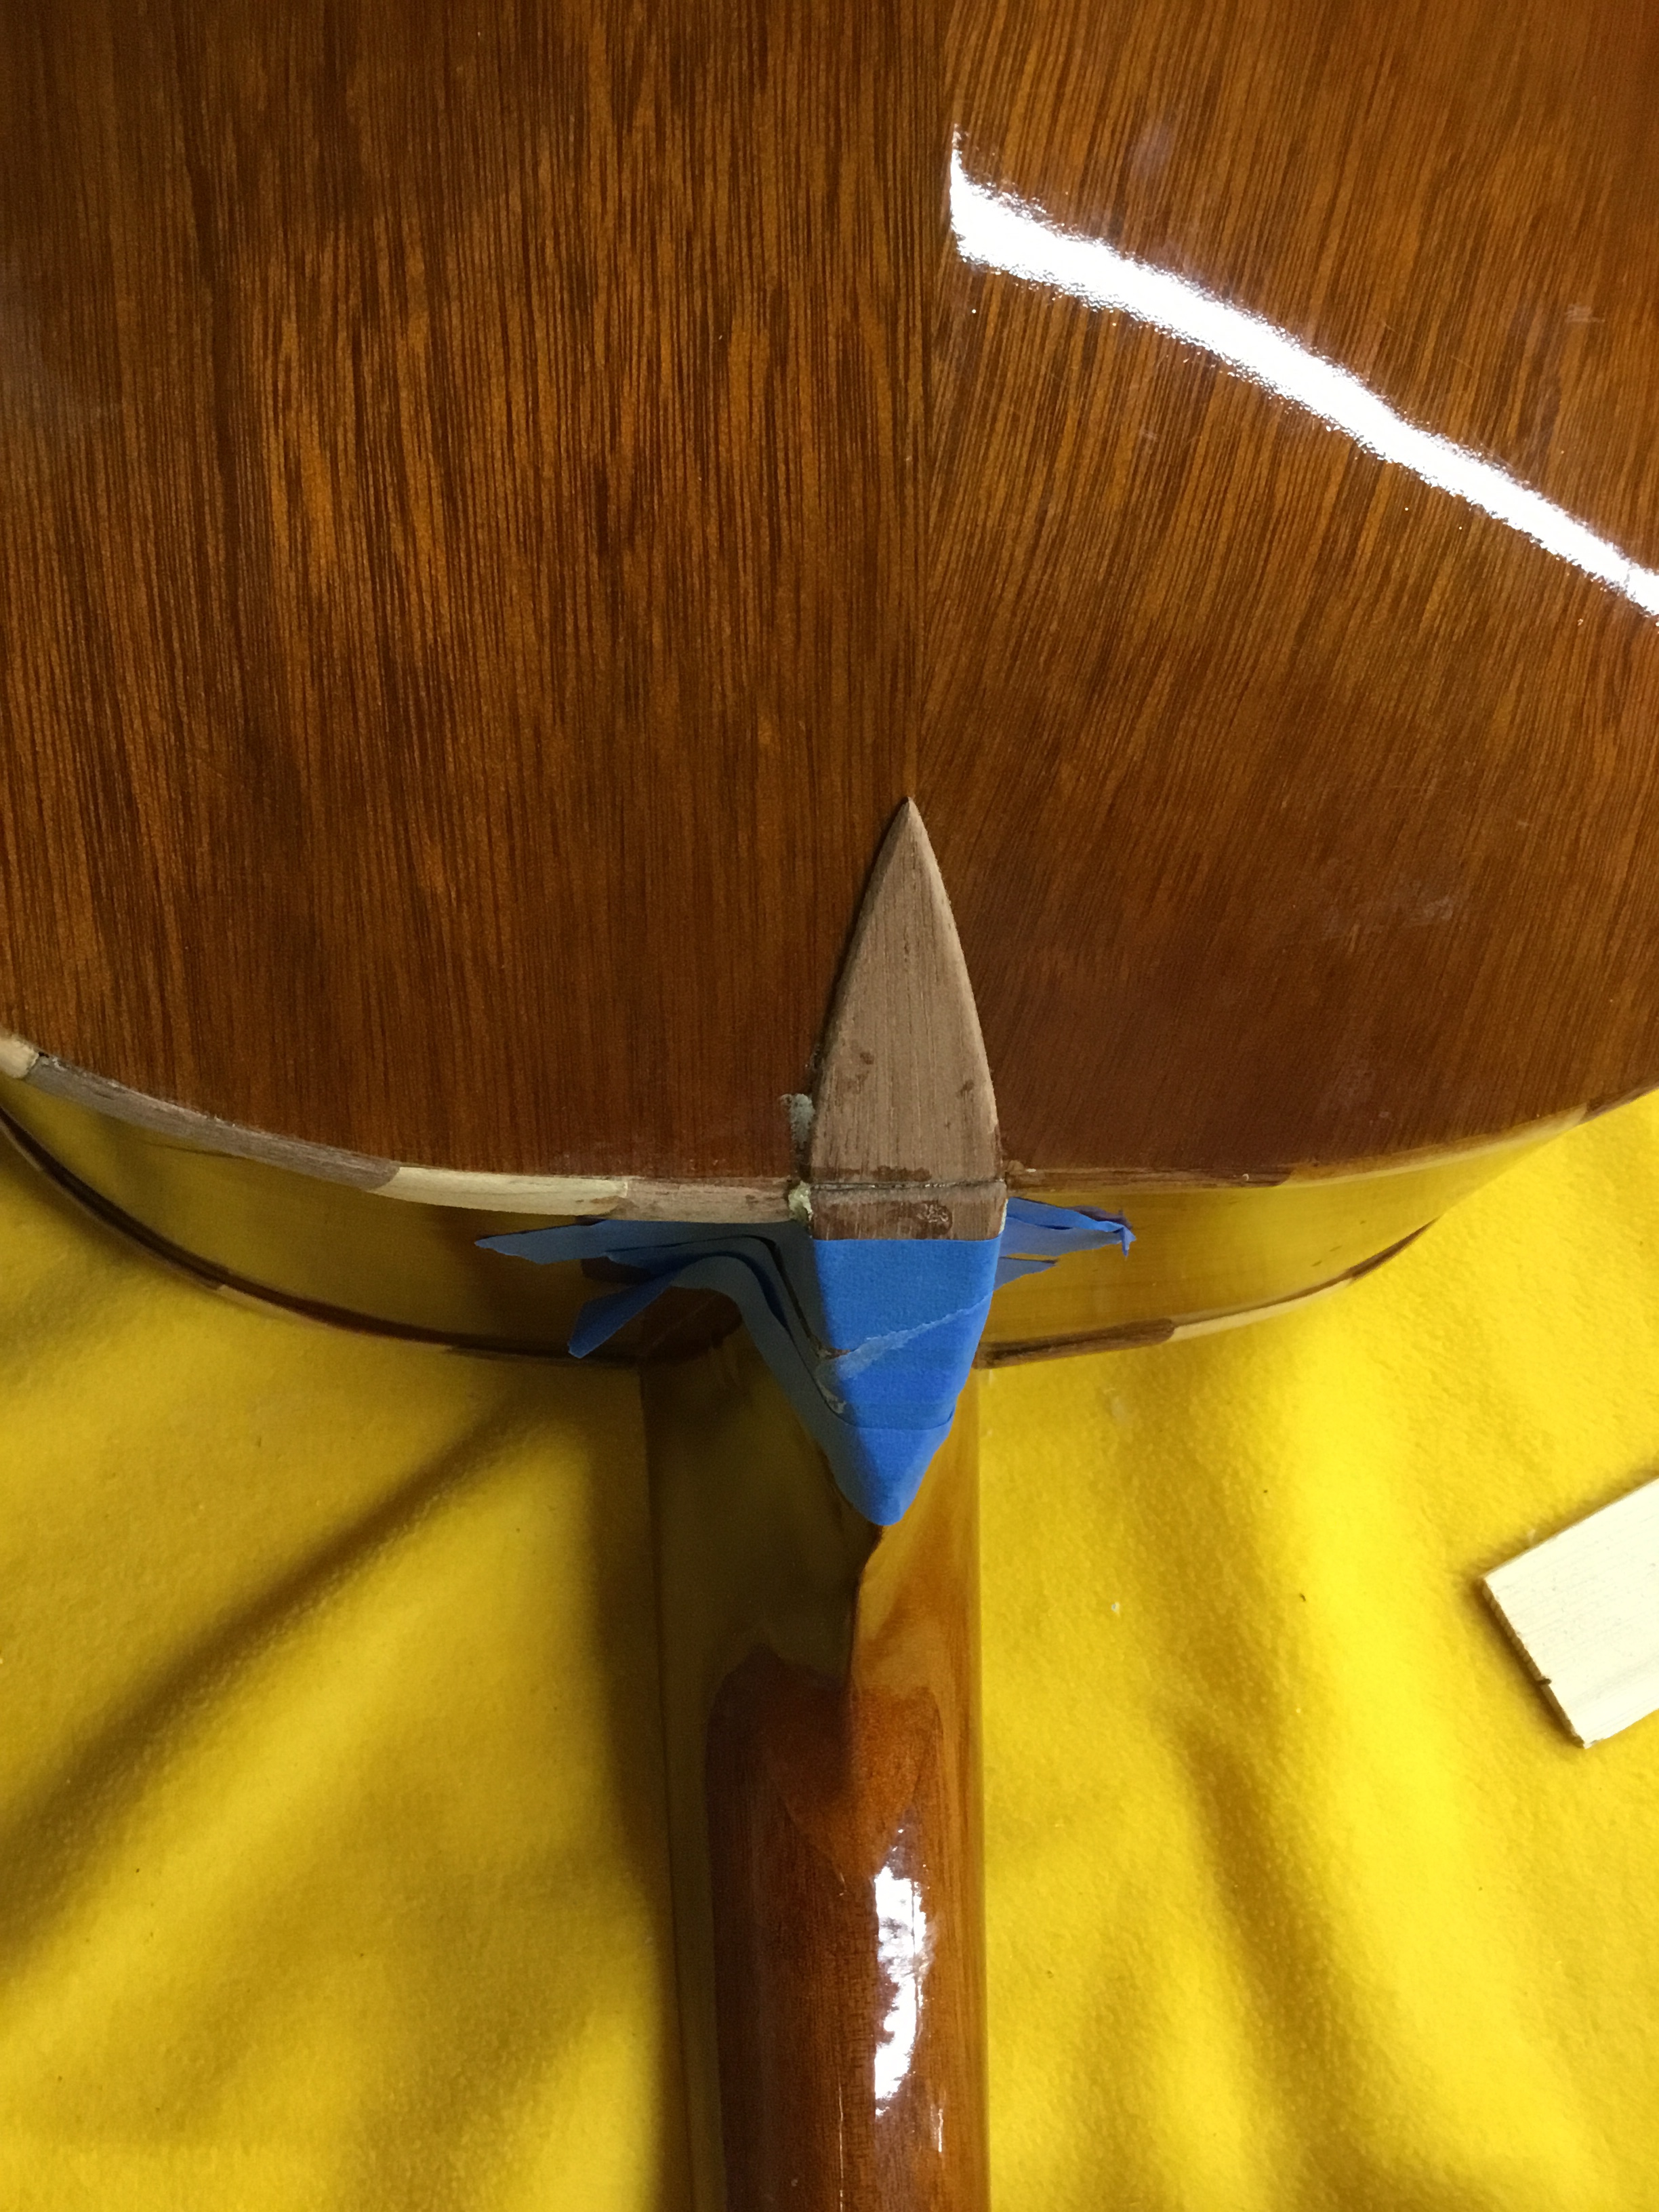
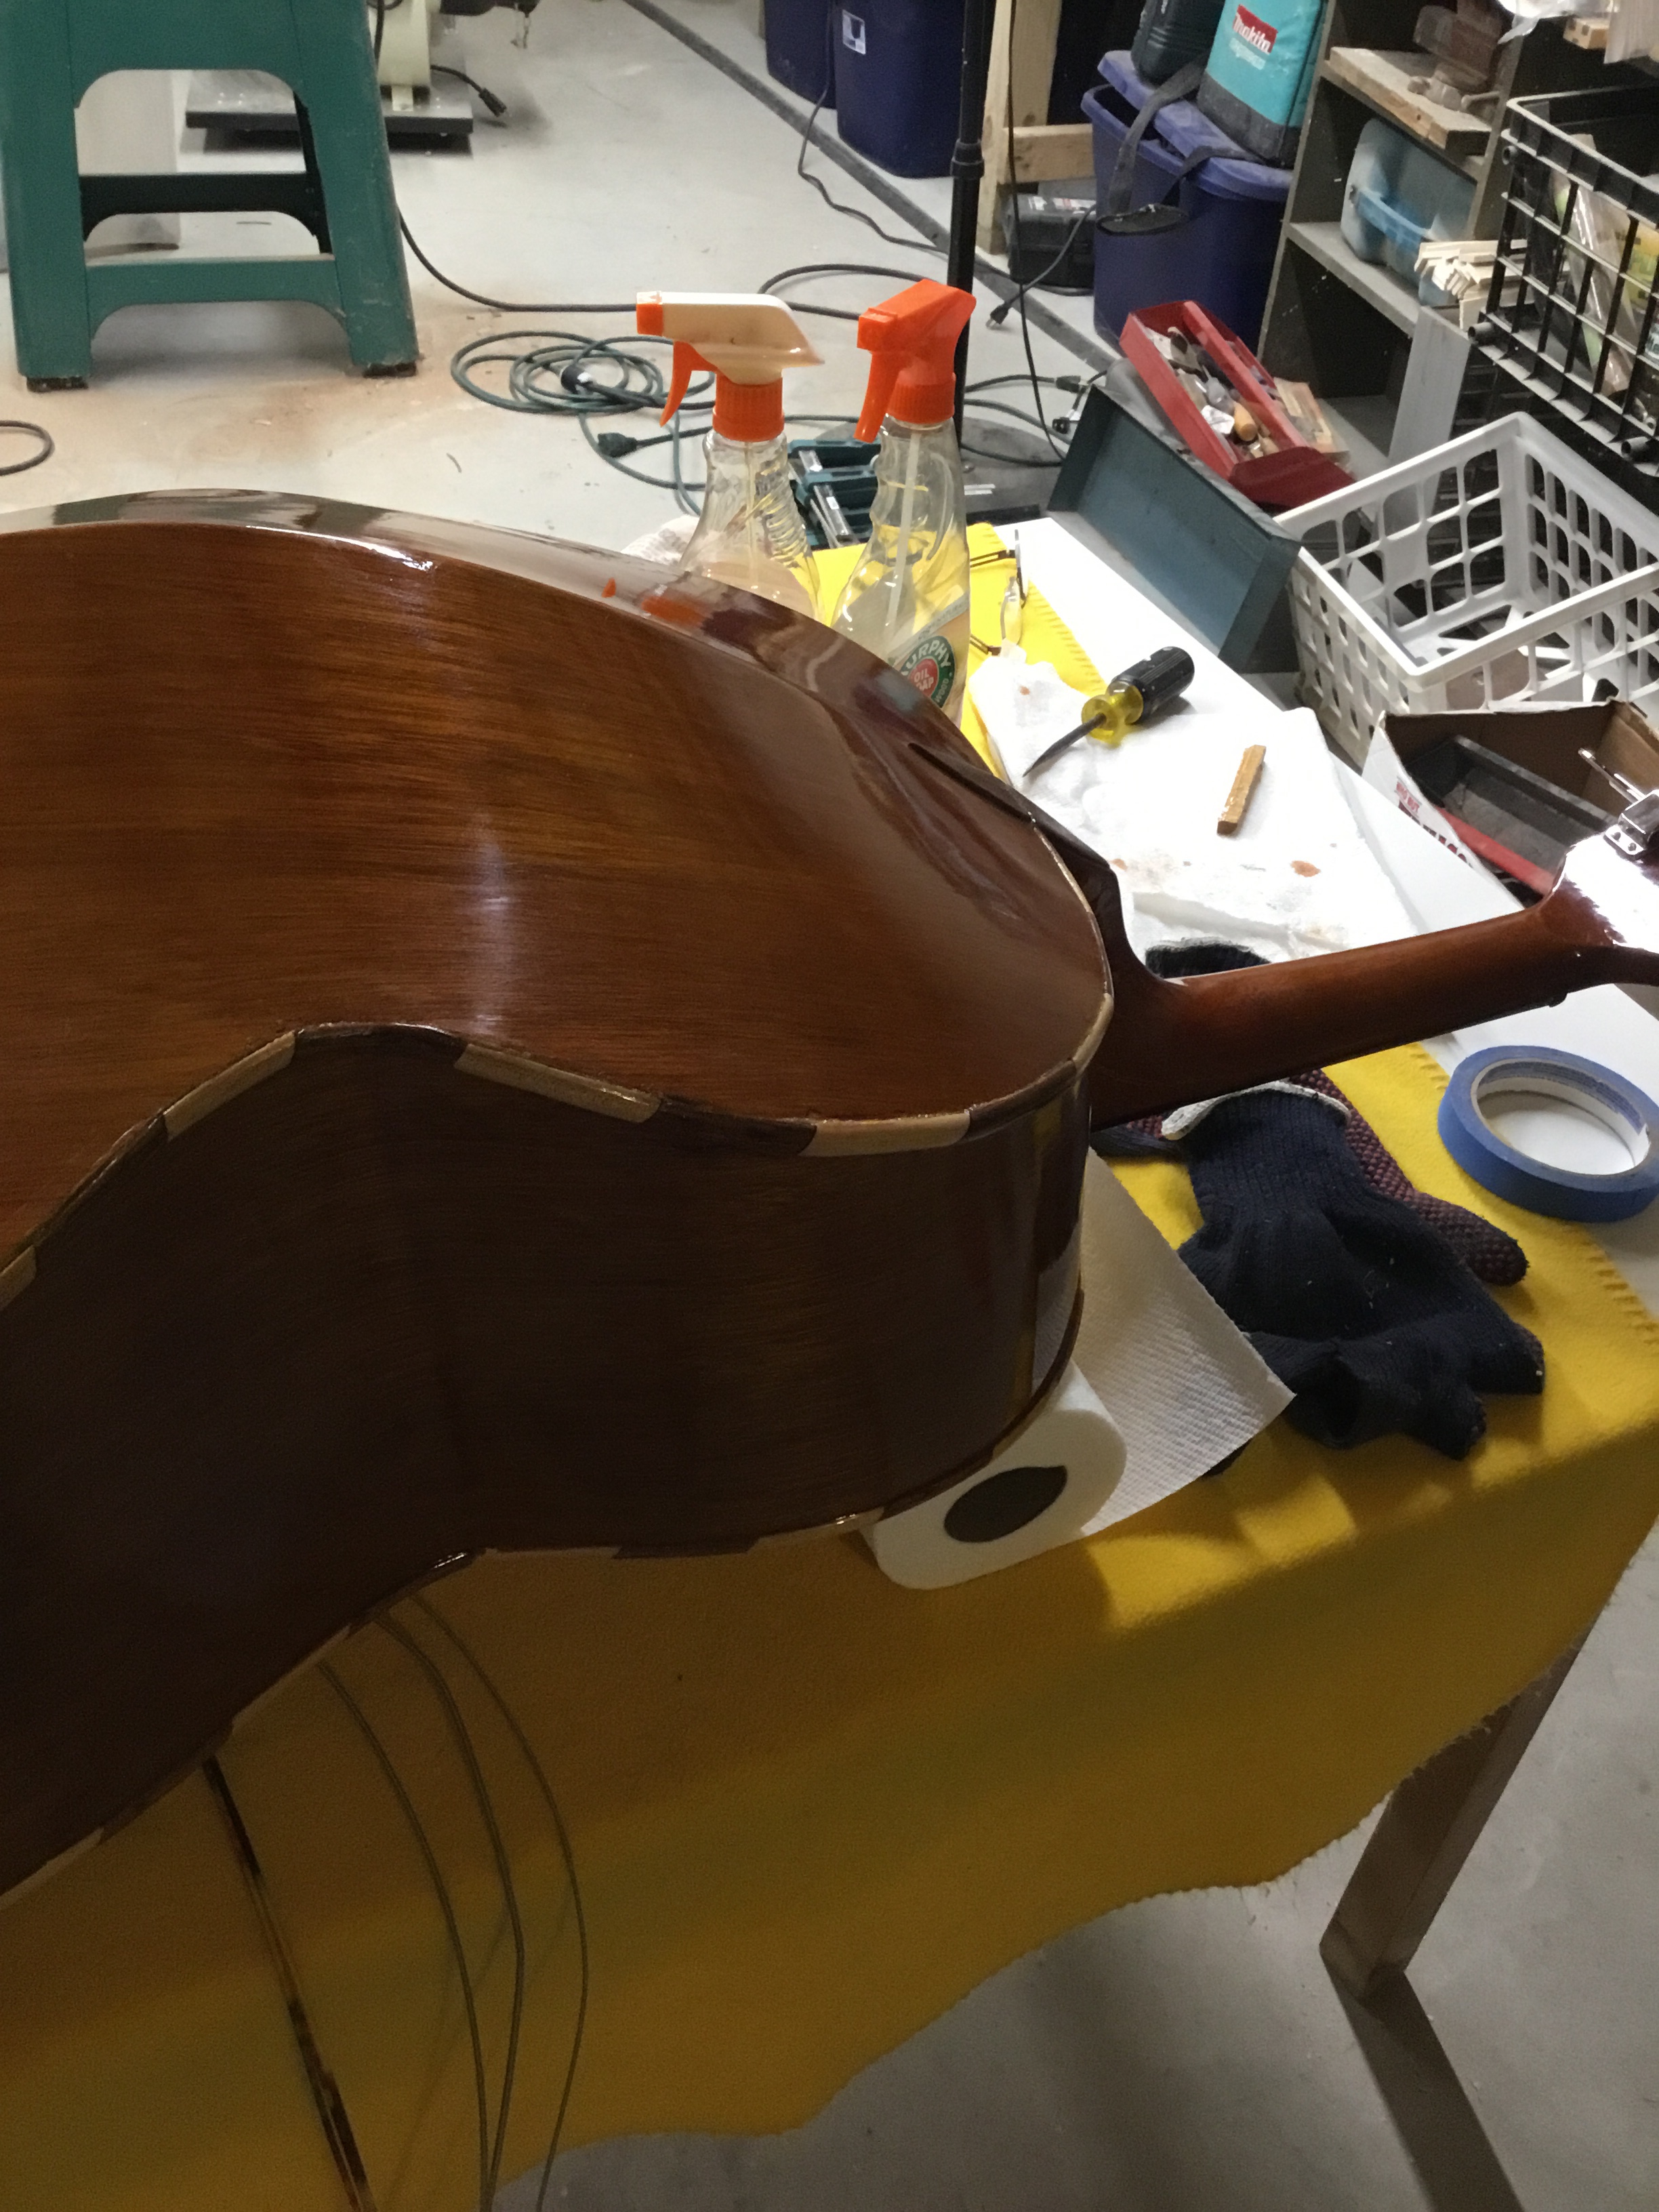
The first thing that needed to be done was to remove the binding where the back had separated. Much of it was already gone and what was left was split and splintered. I taped the edges (always tape the edges!) and went to work with chisels and razor blades to slowly and carefully remove the wood. There was some unavoidable tear out and I did slightly gouge the side with a chisel at one point but was able to hide the mistake (more on this later). Hey, no one’s perfect (especially yours truly)!
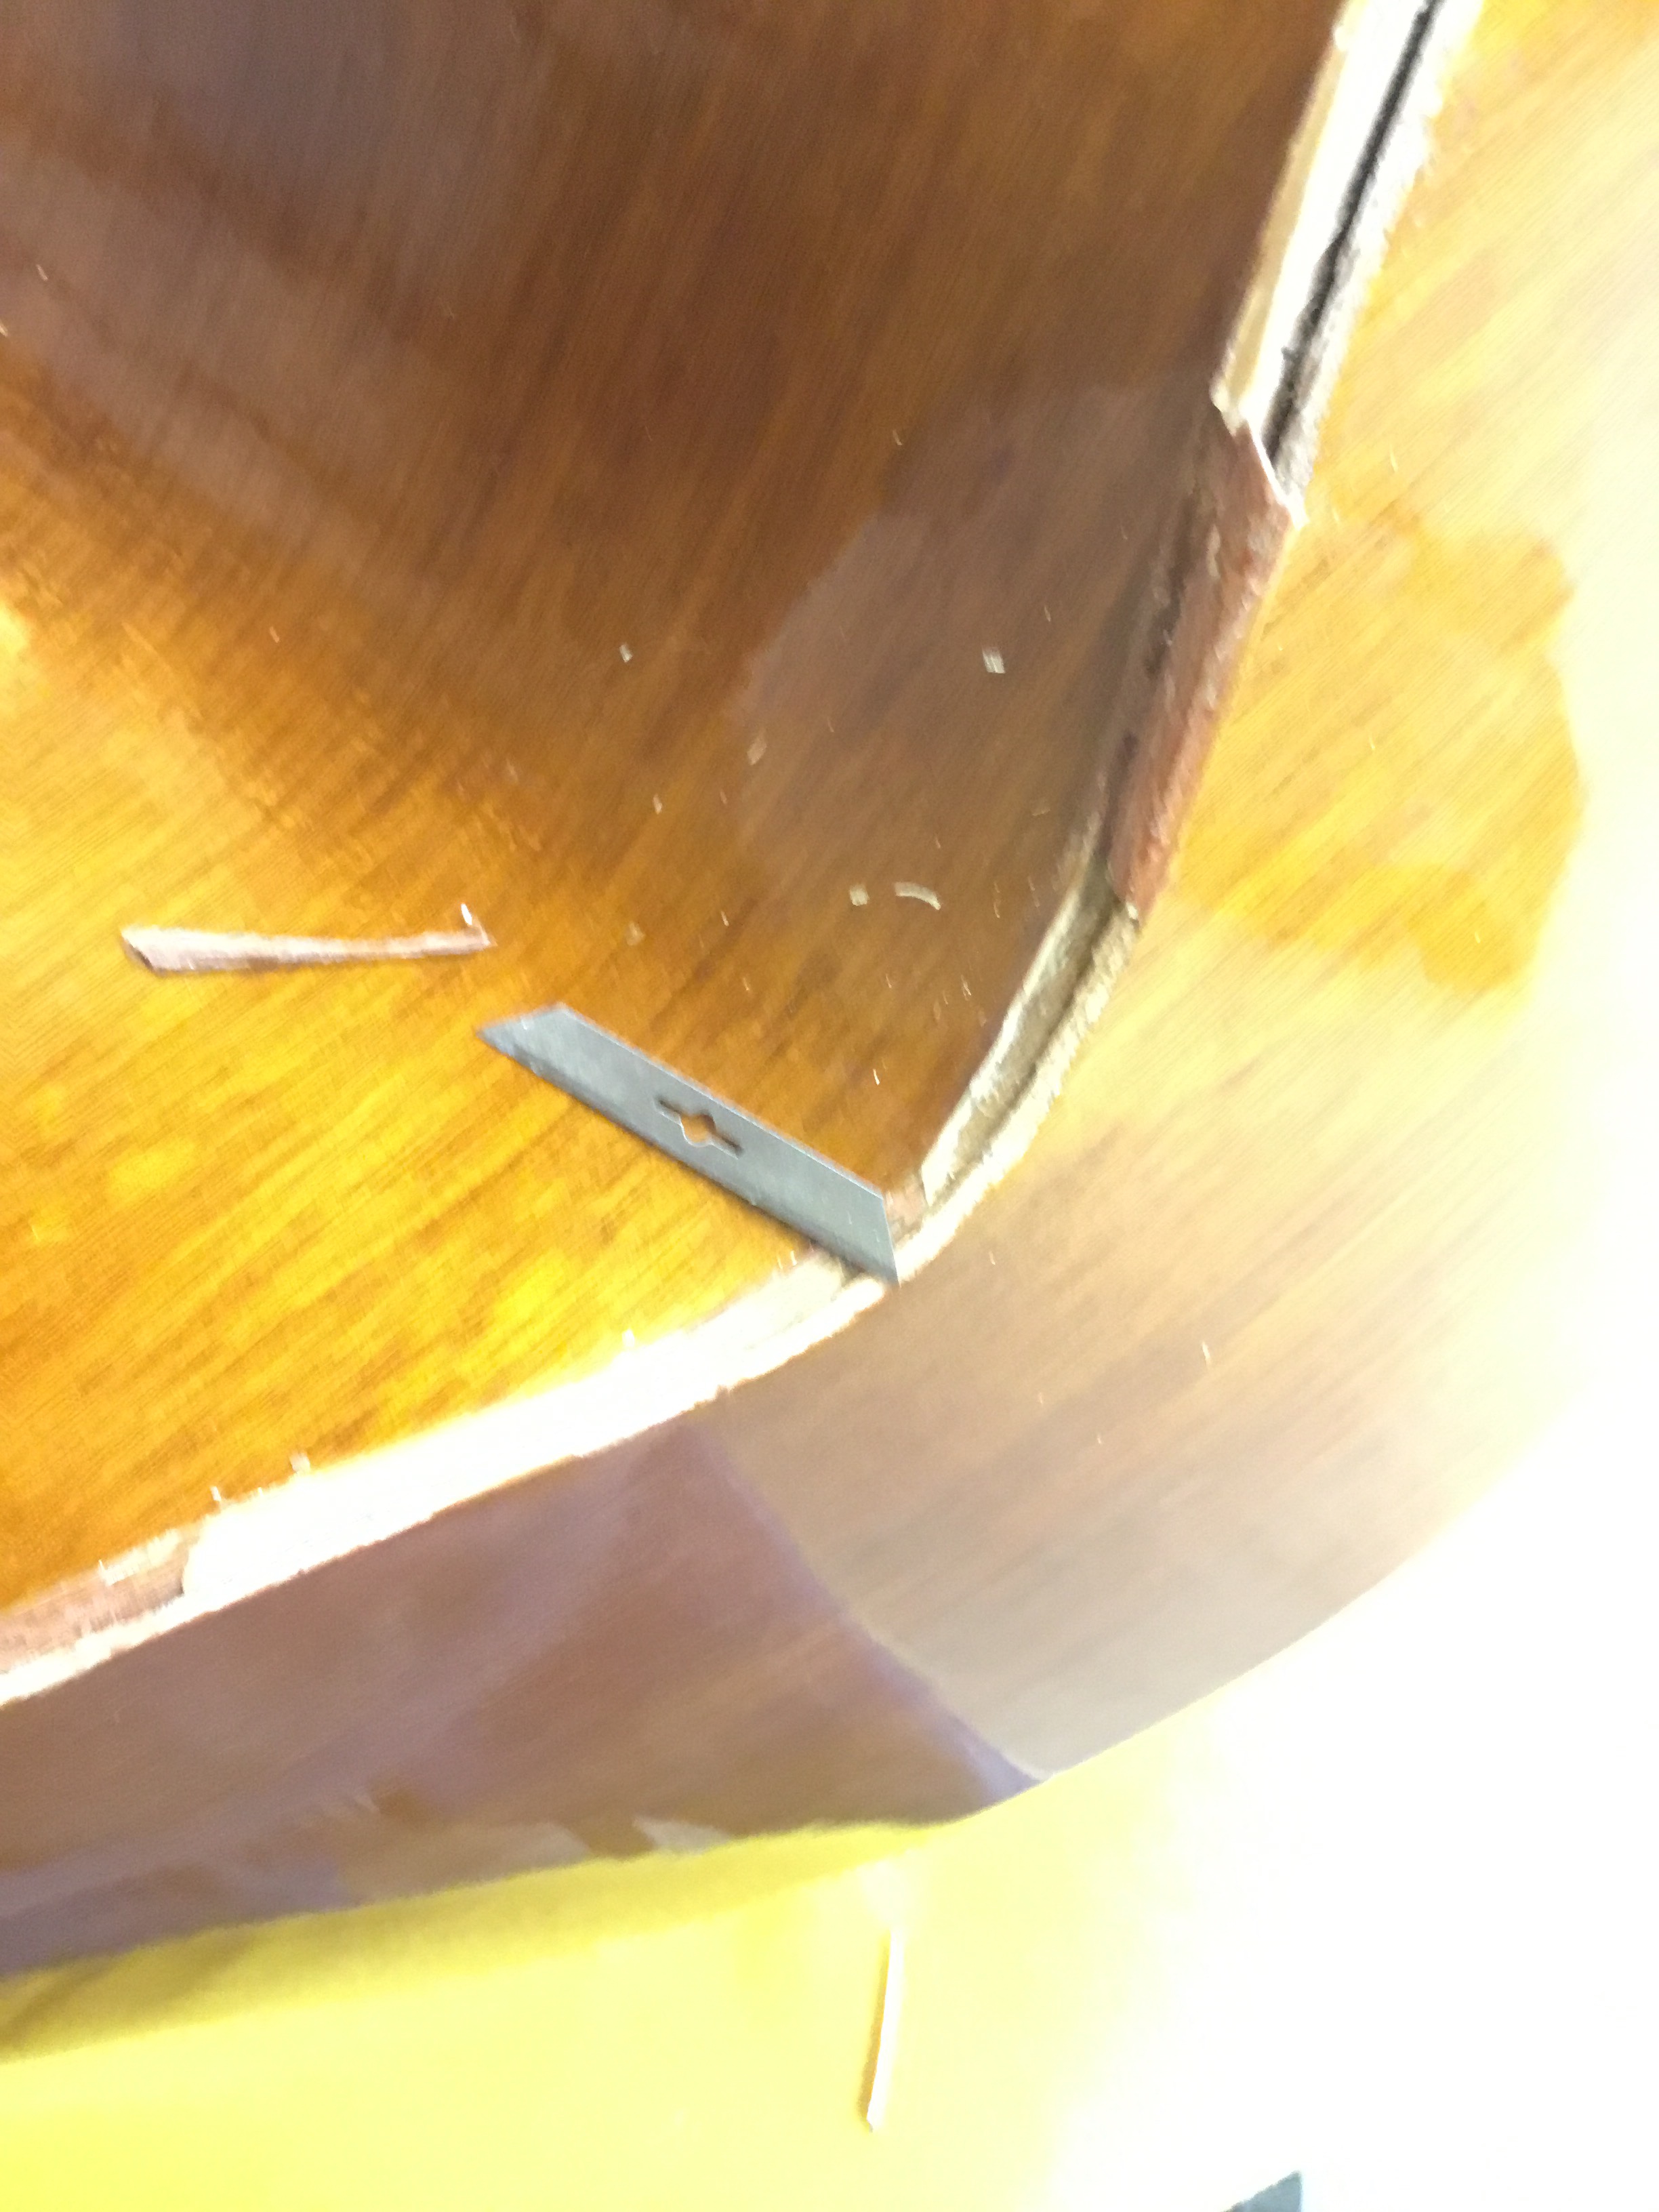
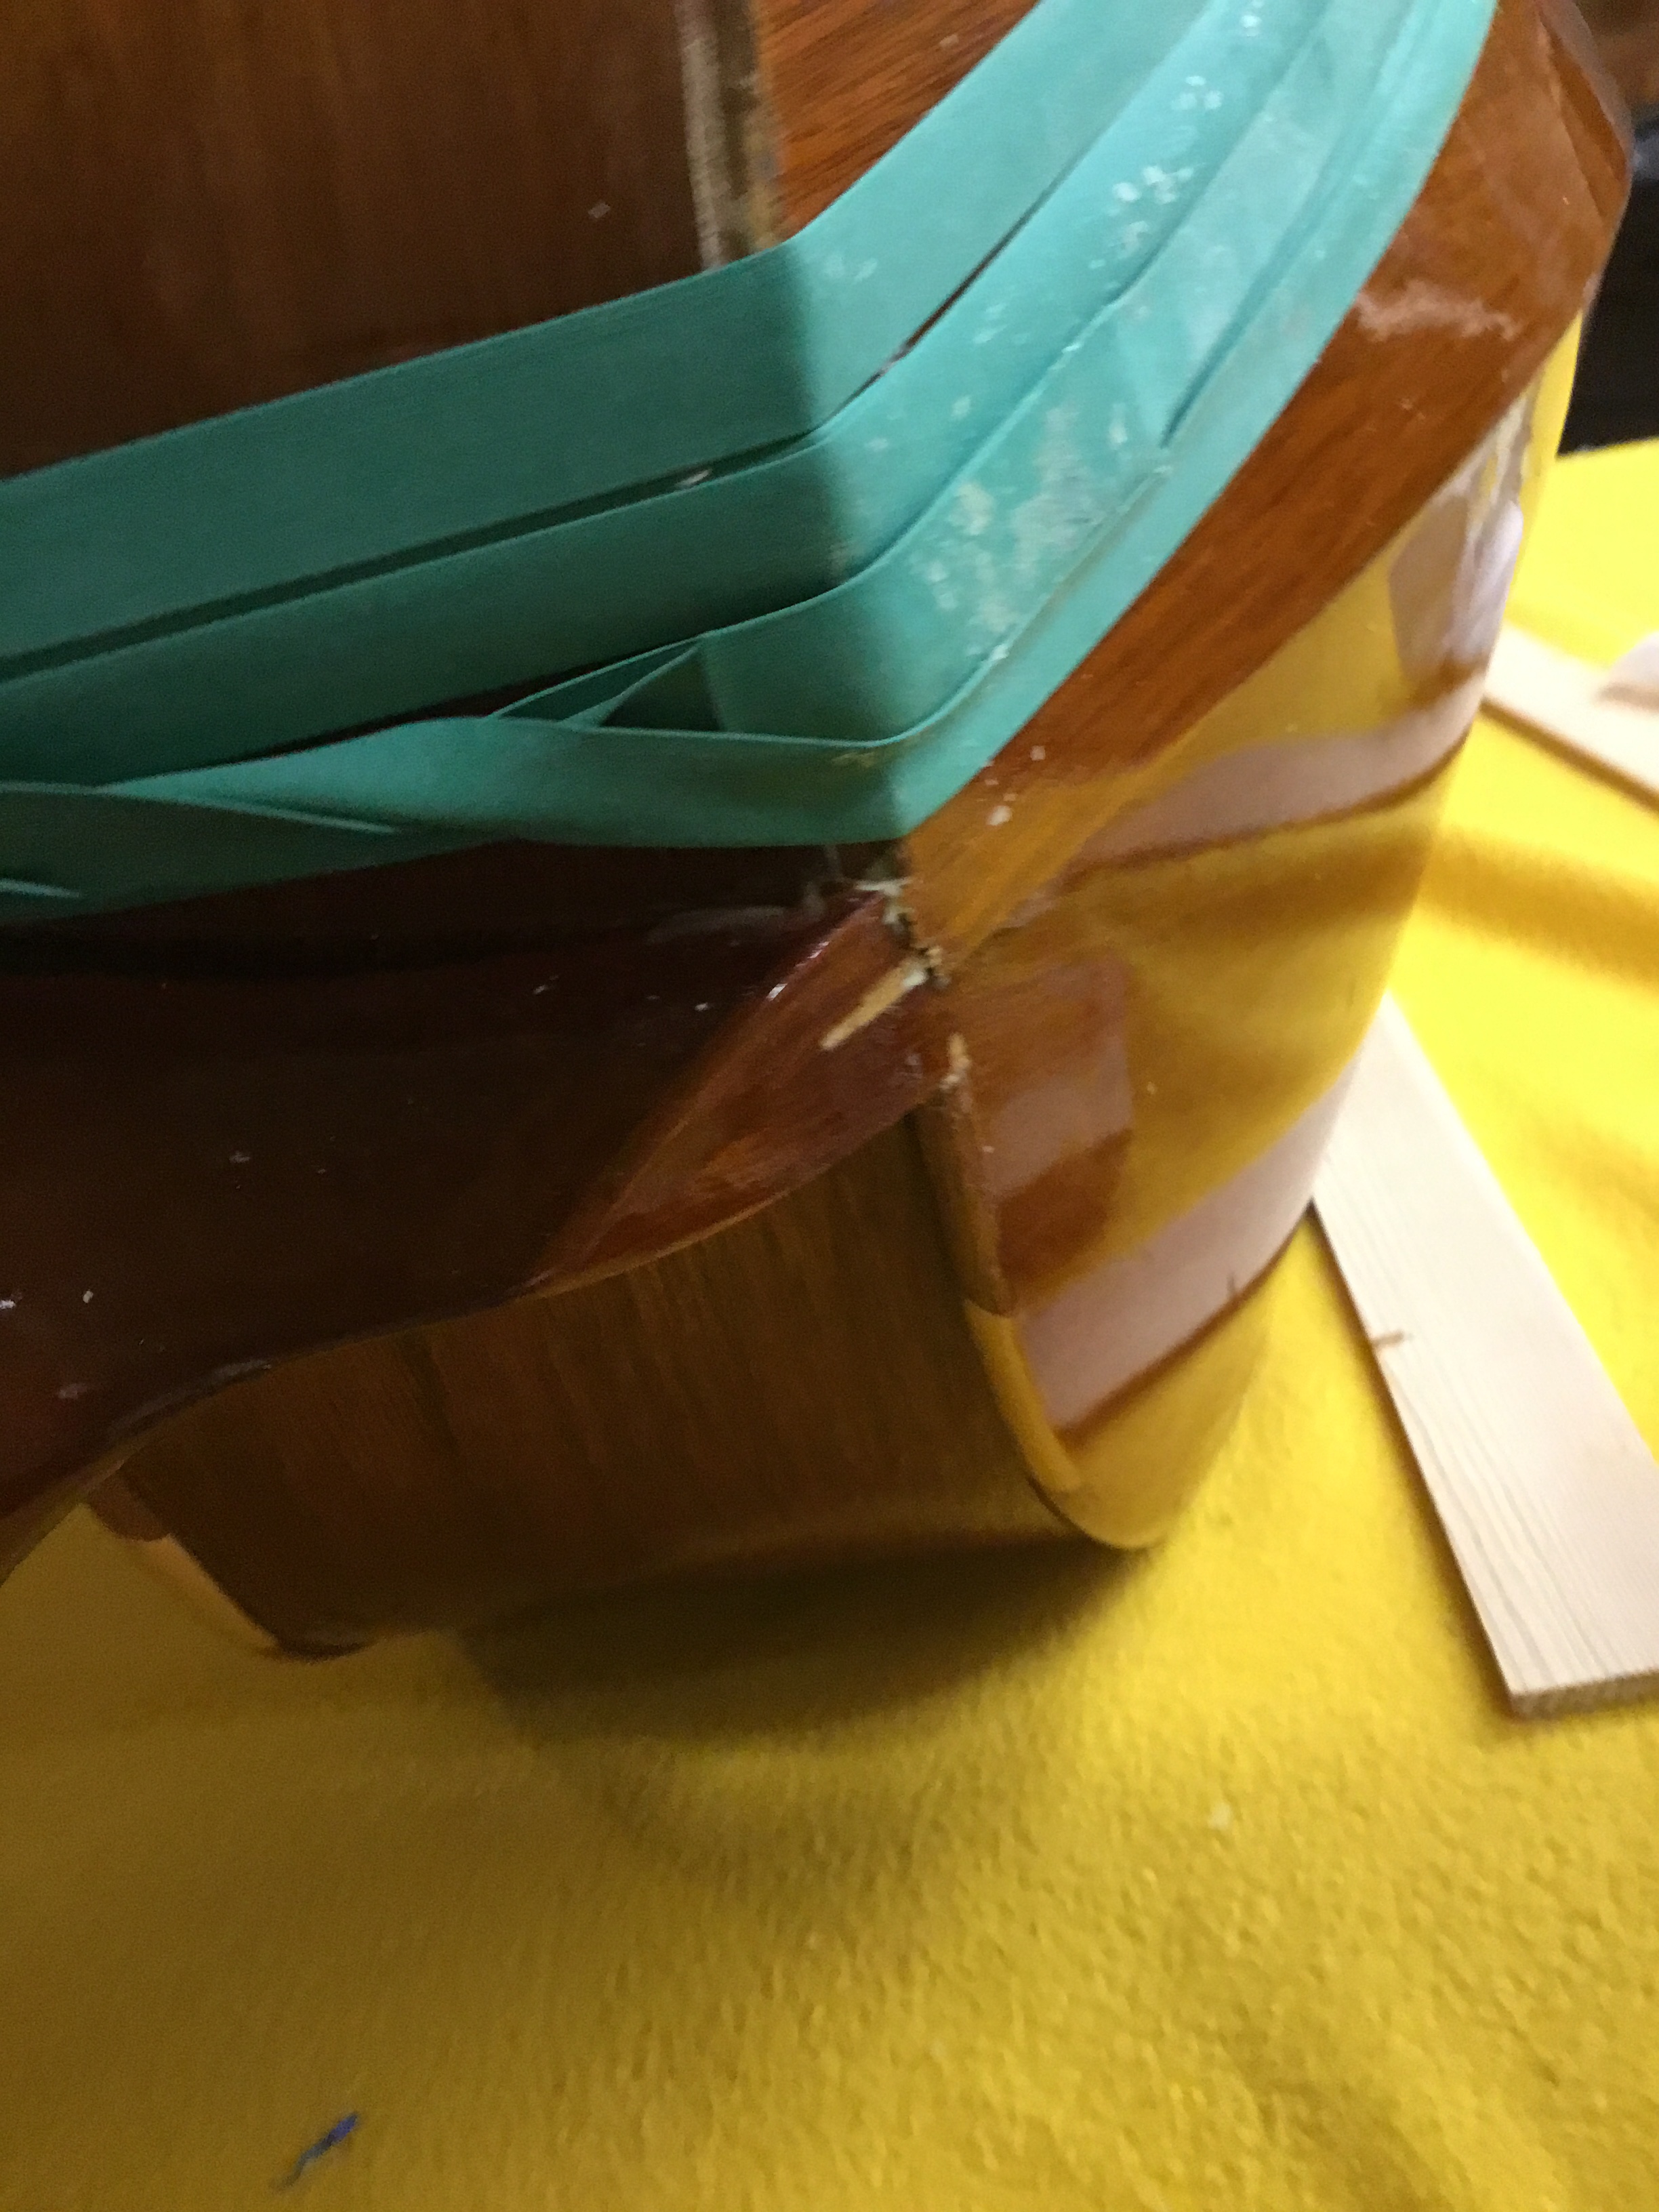
Guitars have internal bindings, called kerfing, which is glued along the seams to hold the sides to the top and back of the instrument. Kerfing is usually triangular in shape and has thin cuts every 1/4 inch so that it flexes like an accordion along the curved edges of the guitar. Guitarrons do not have kerfing, and this presented a problem. I felt I needed to added kerfing to strengthen the seam between the top and the back. But the Guitarron created a unique challenge …
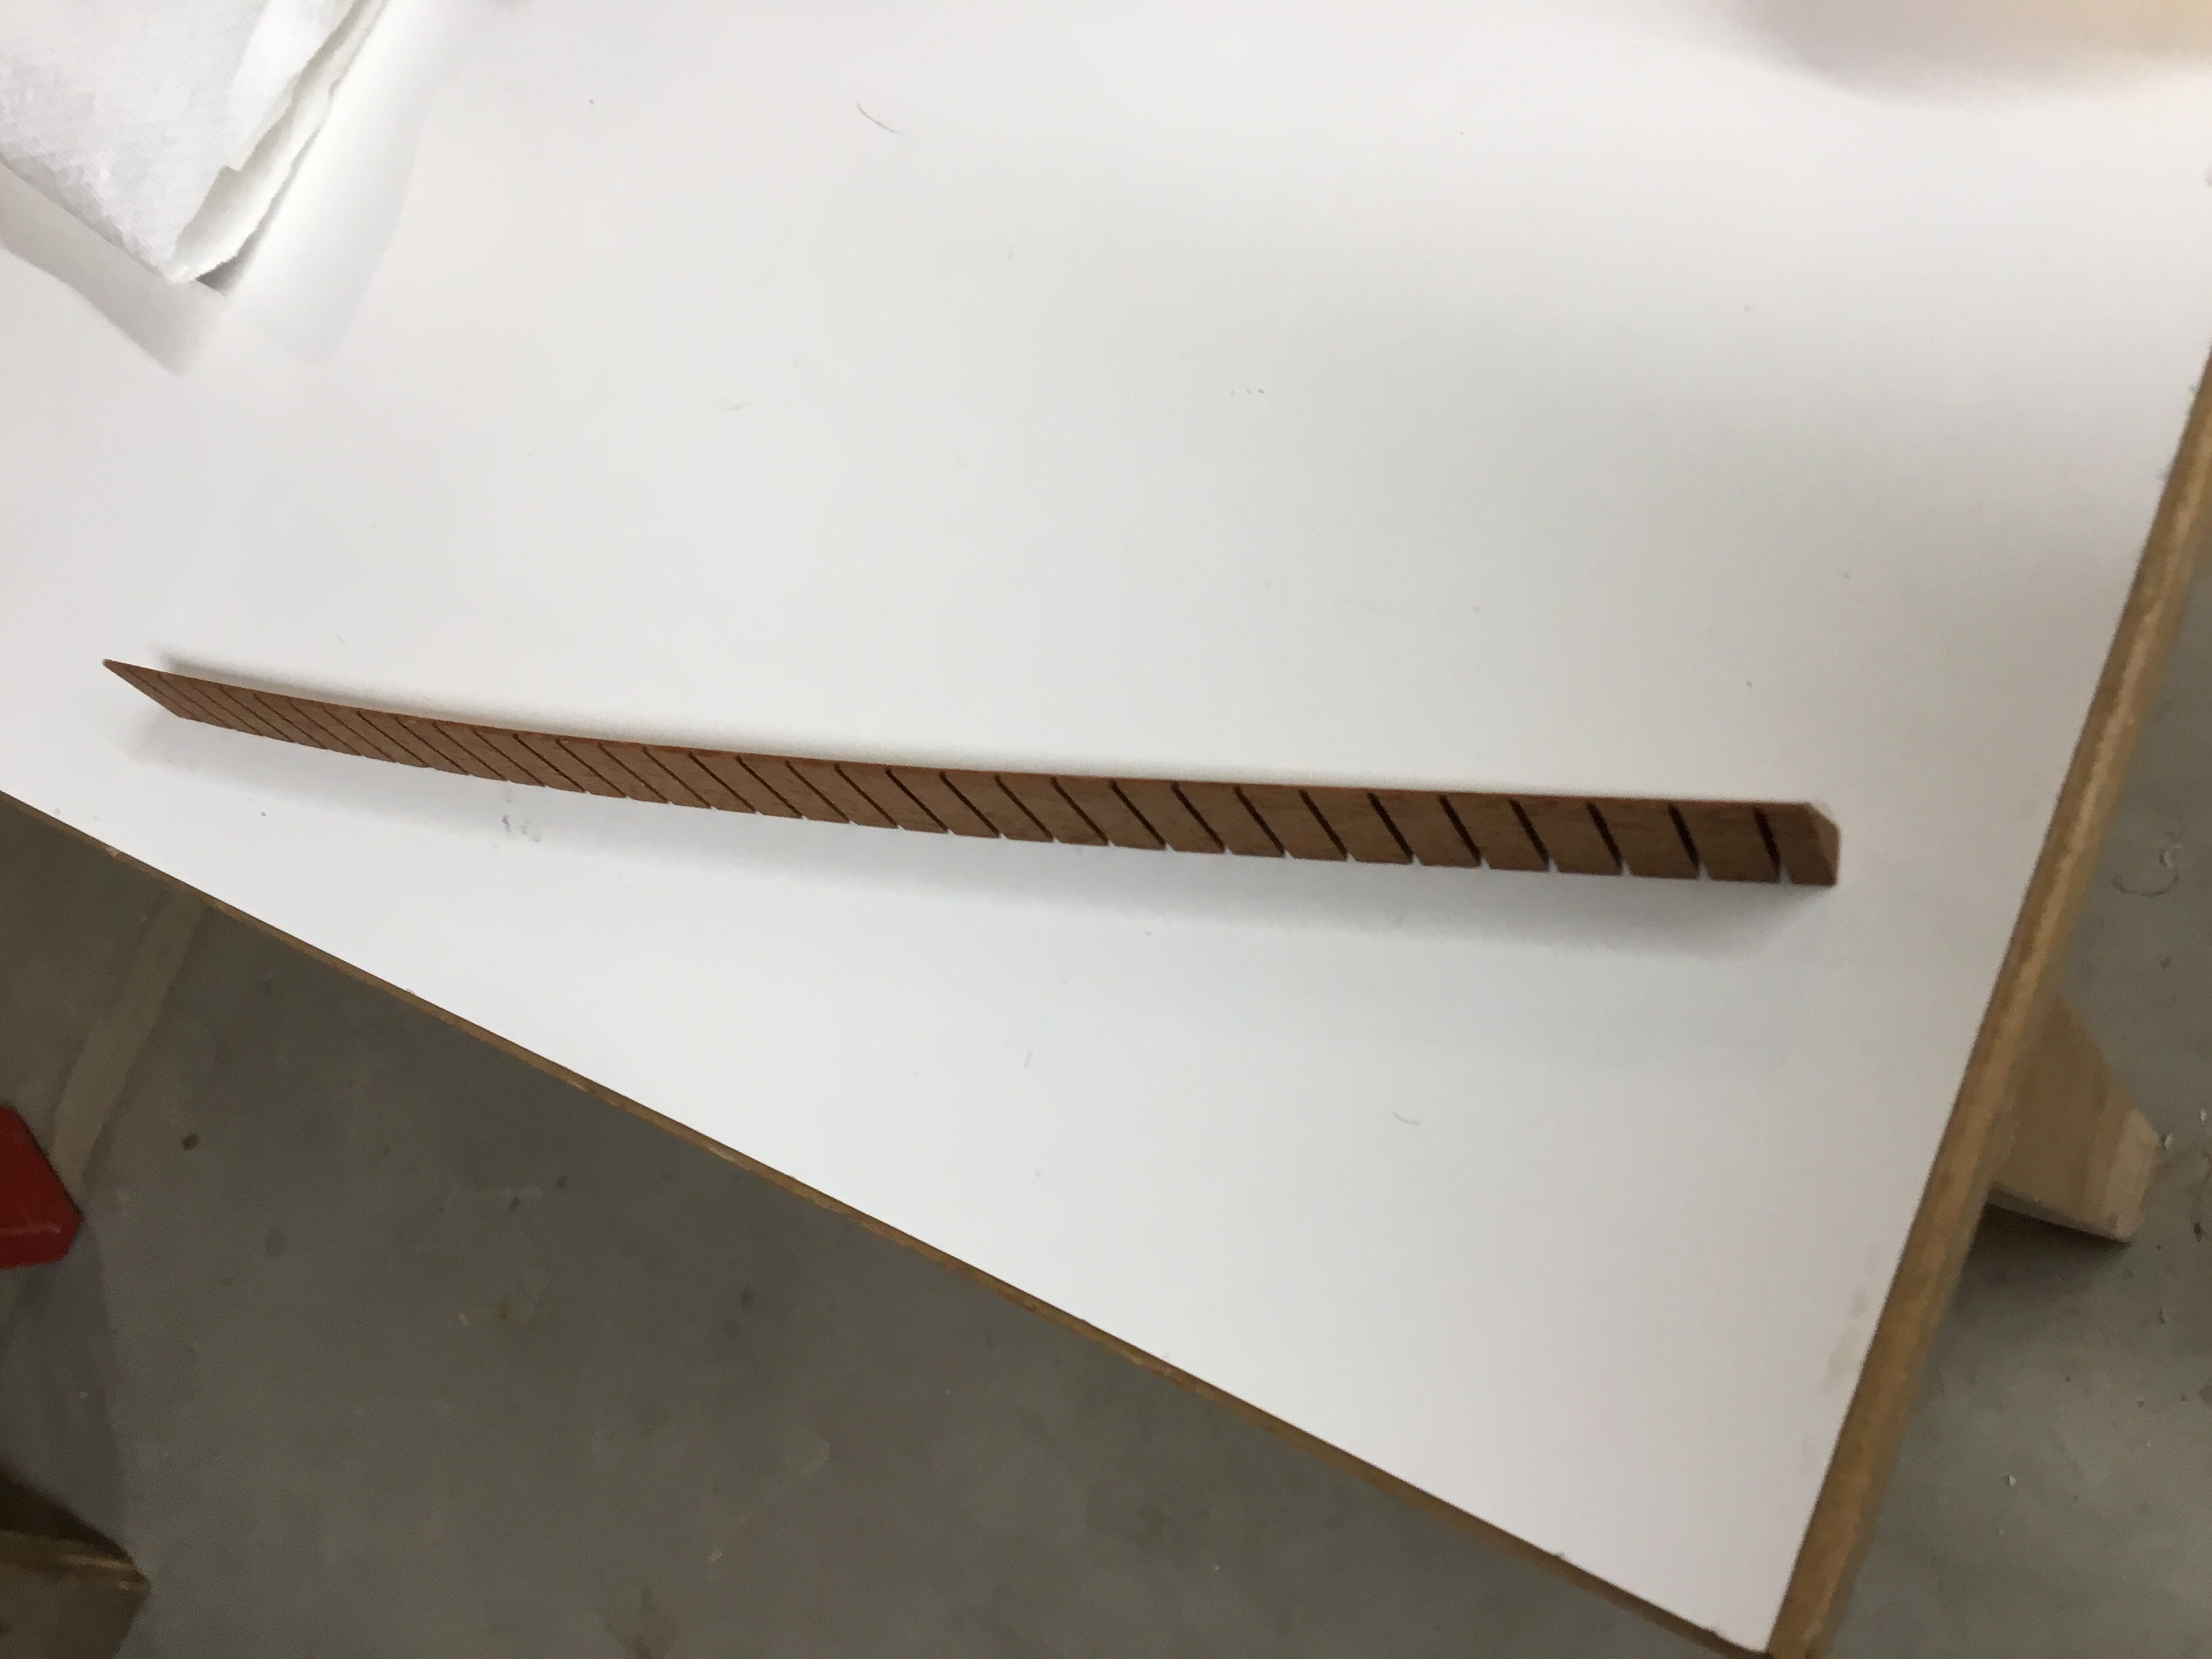
Most of my tools are designed to be used with guitars, mandolins, or violins. A Guitarron has a much different shape than a guitar because the back isn’t flat. The body tapers from the bottom to the top, and the back is rounded, with a seam running down the middle of the back. All my clamps are designed to be used on an instrument with a back that is essentially flat, and even Archtops and violins which have carved, rounded backs have 90 degree angles where the back meets the side. And kerfing is triangular in shape with the top at a 90 degree angle. And as I pointed out, the back of the Guitarron is not 90 degrees.
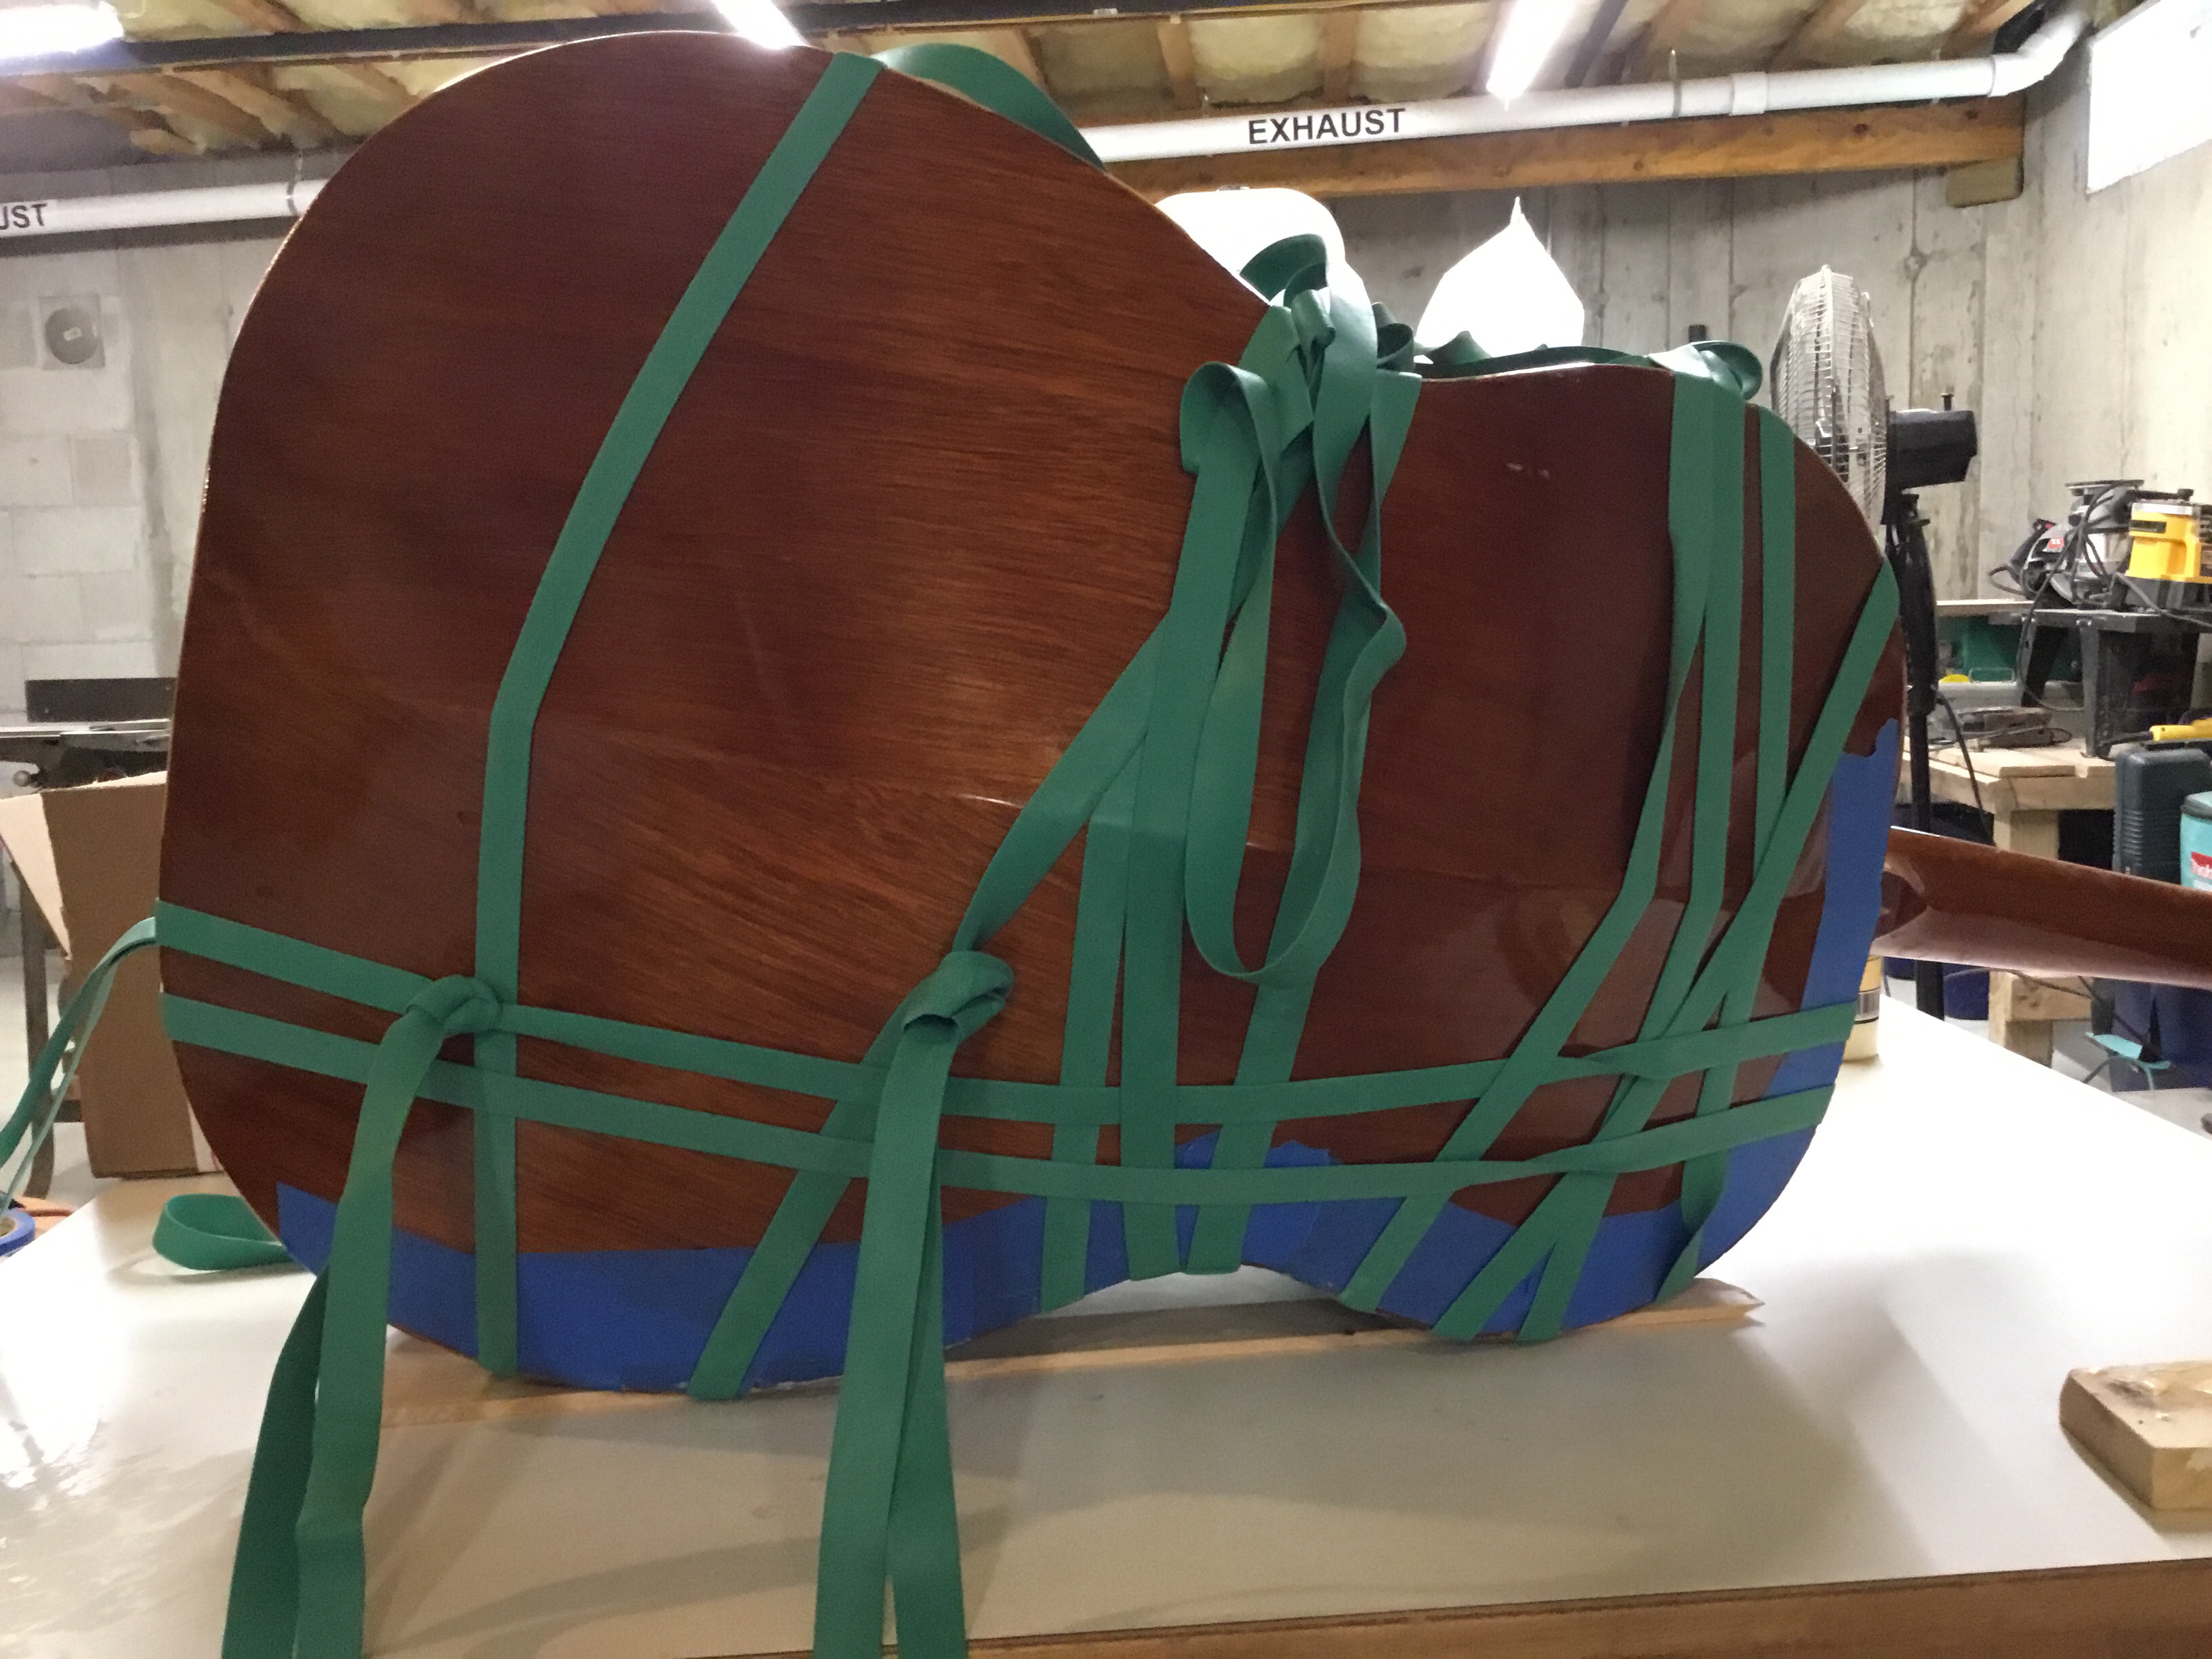
I glued the kerfing to the sides, hoping that it would provide enough of an interval to shoot some glue into the seam …. and crossed my fingers!
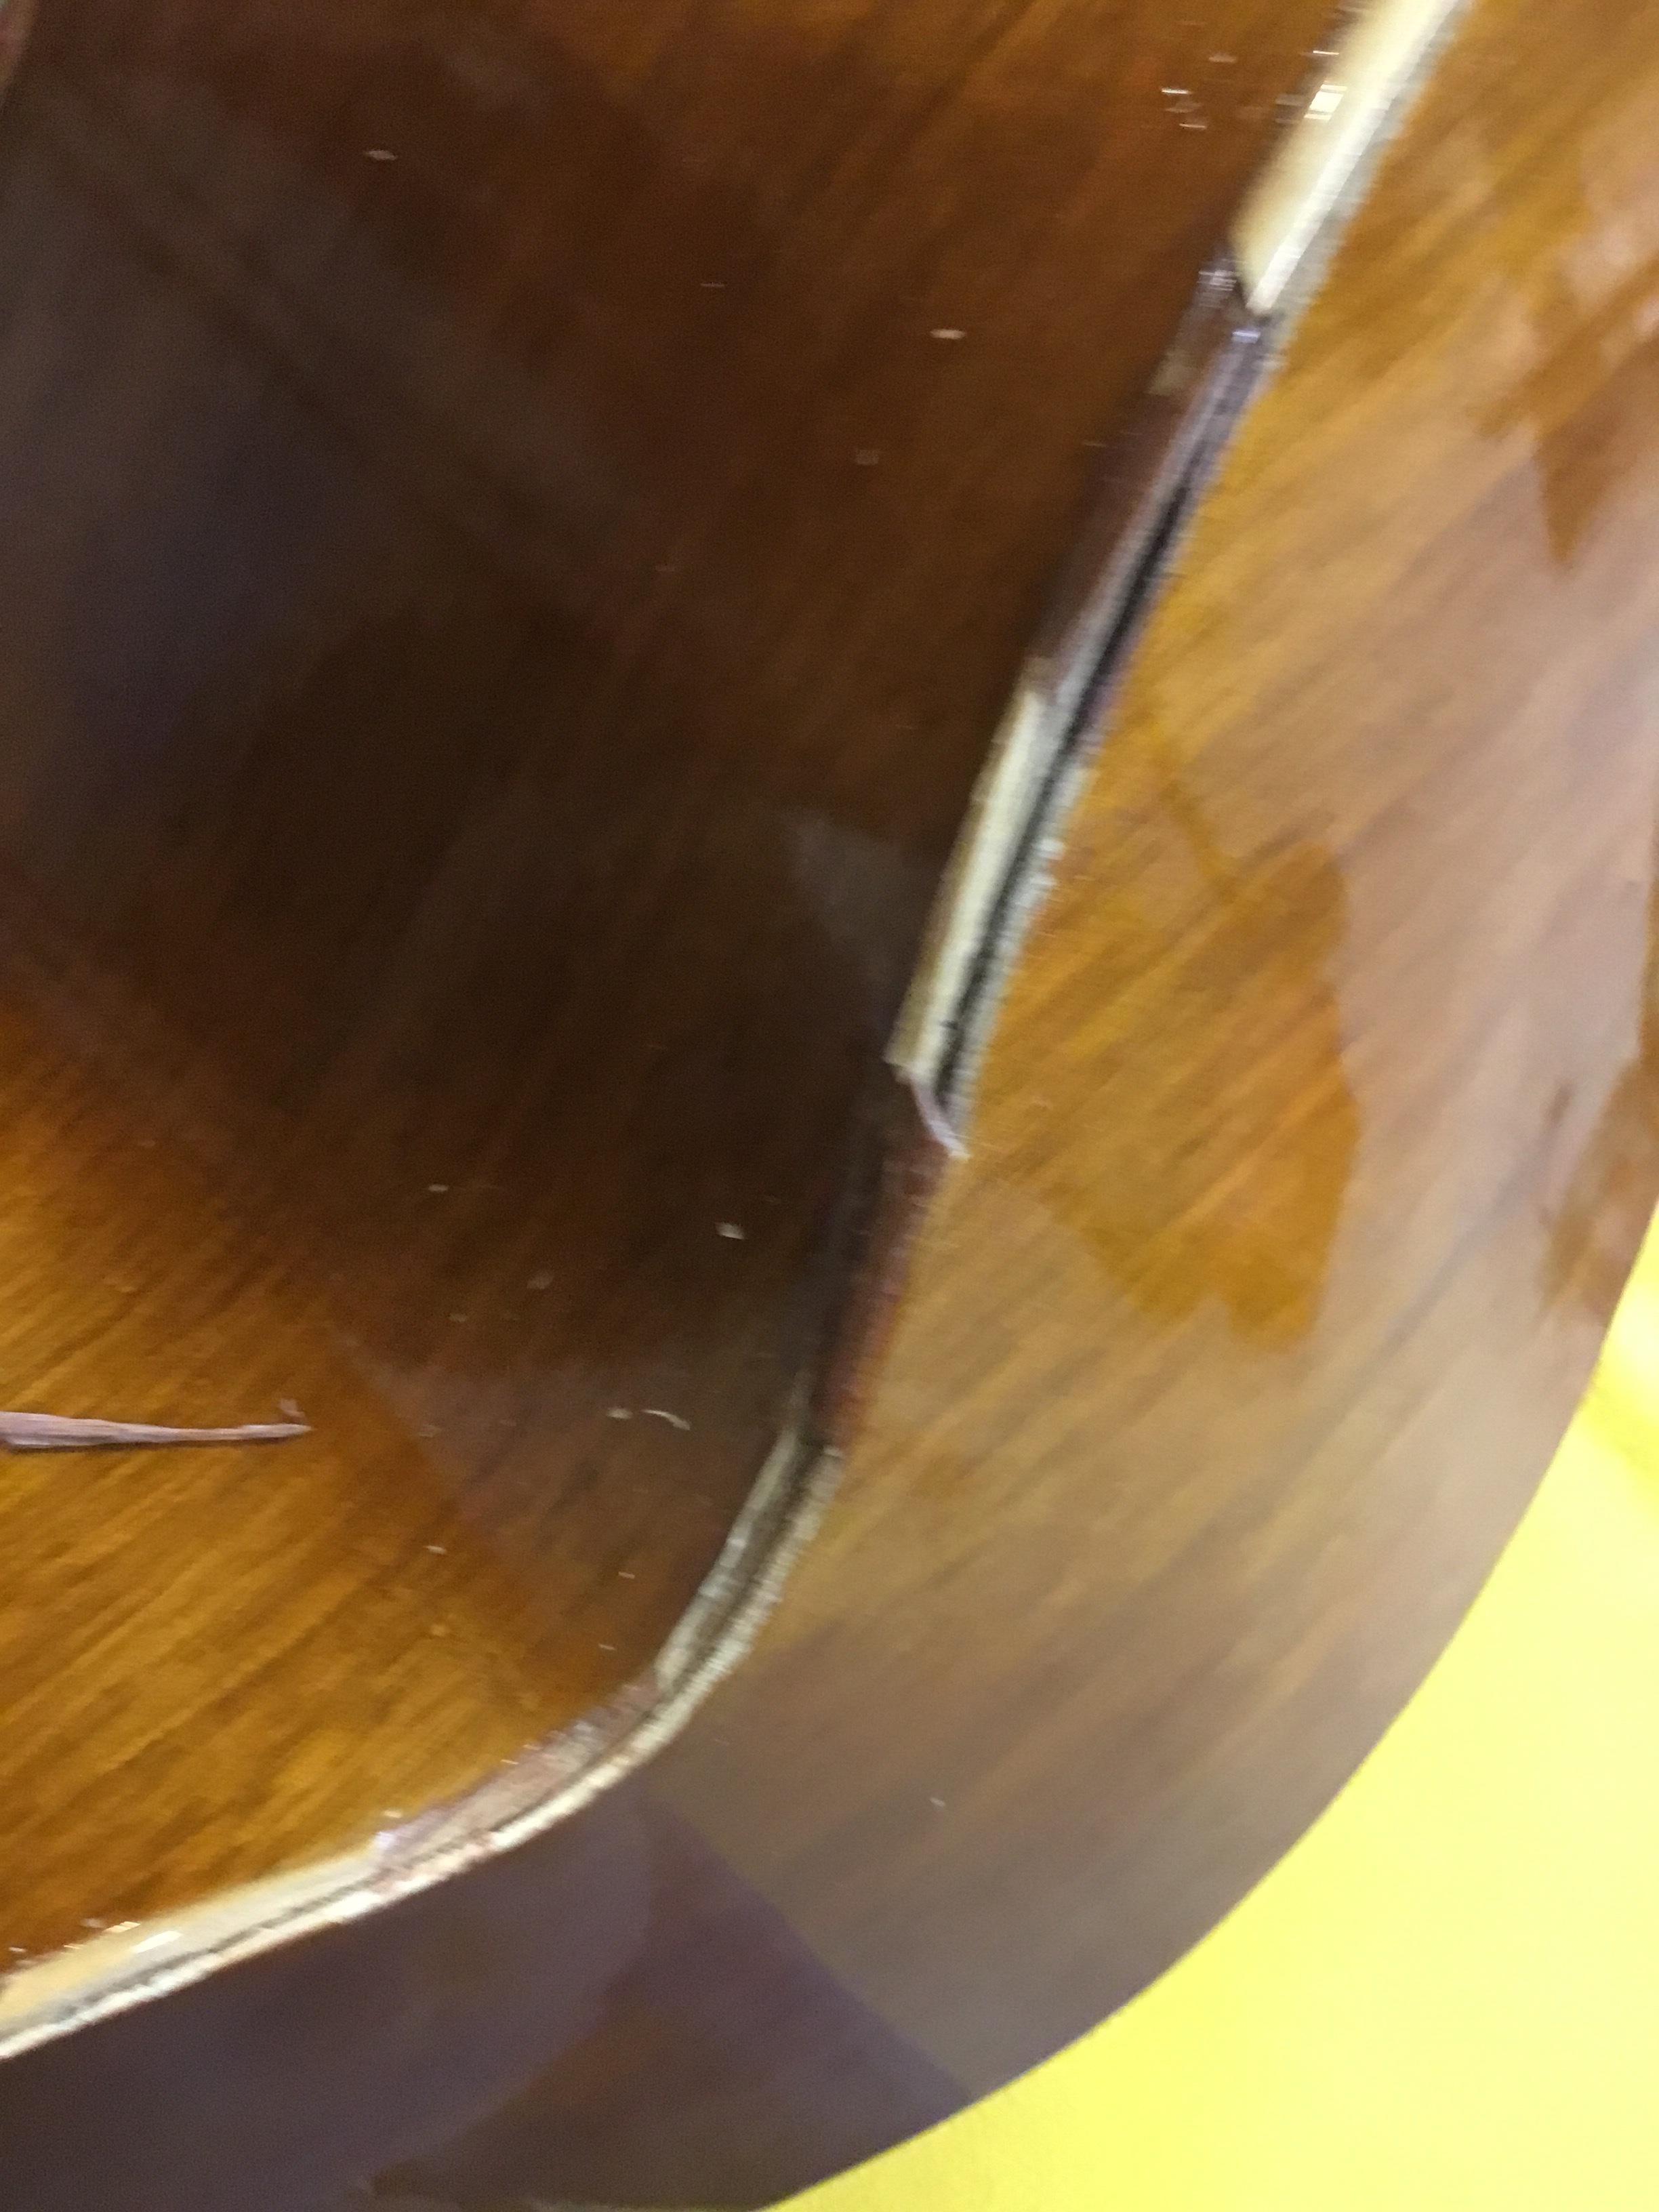
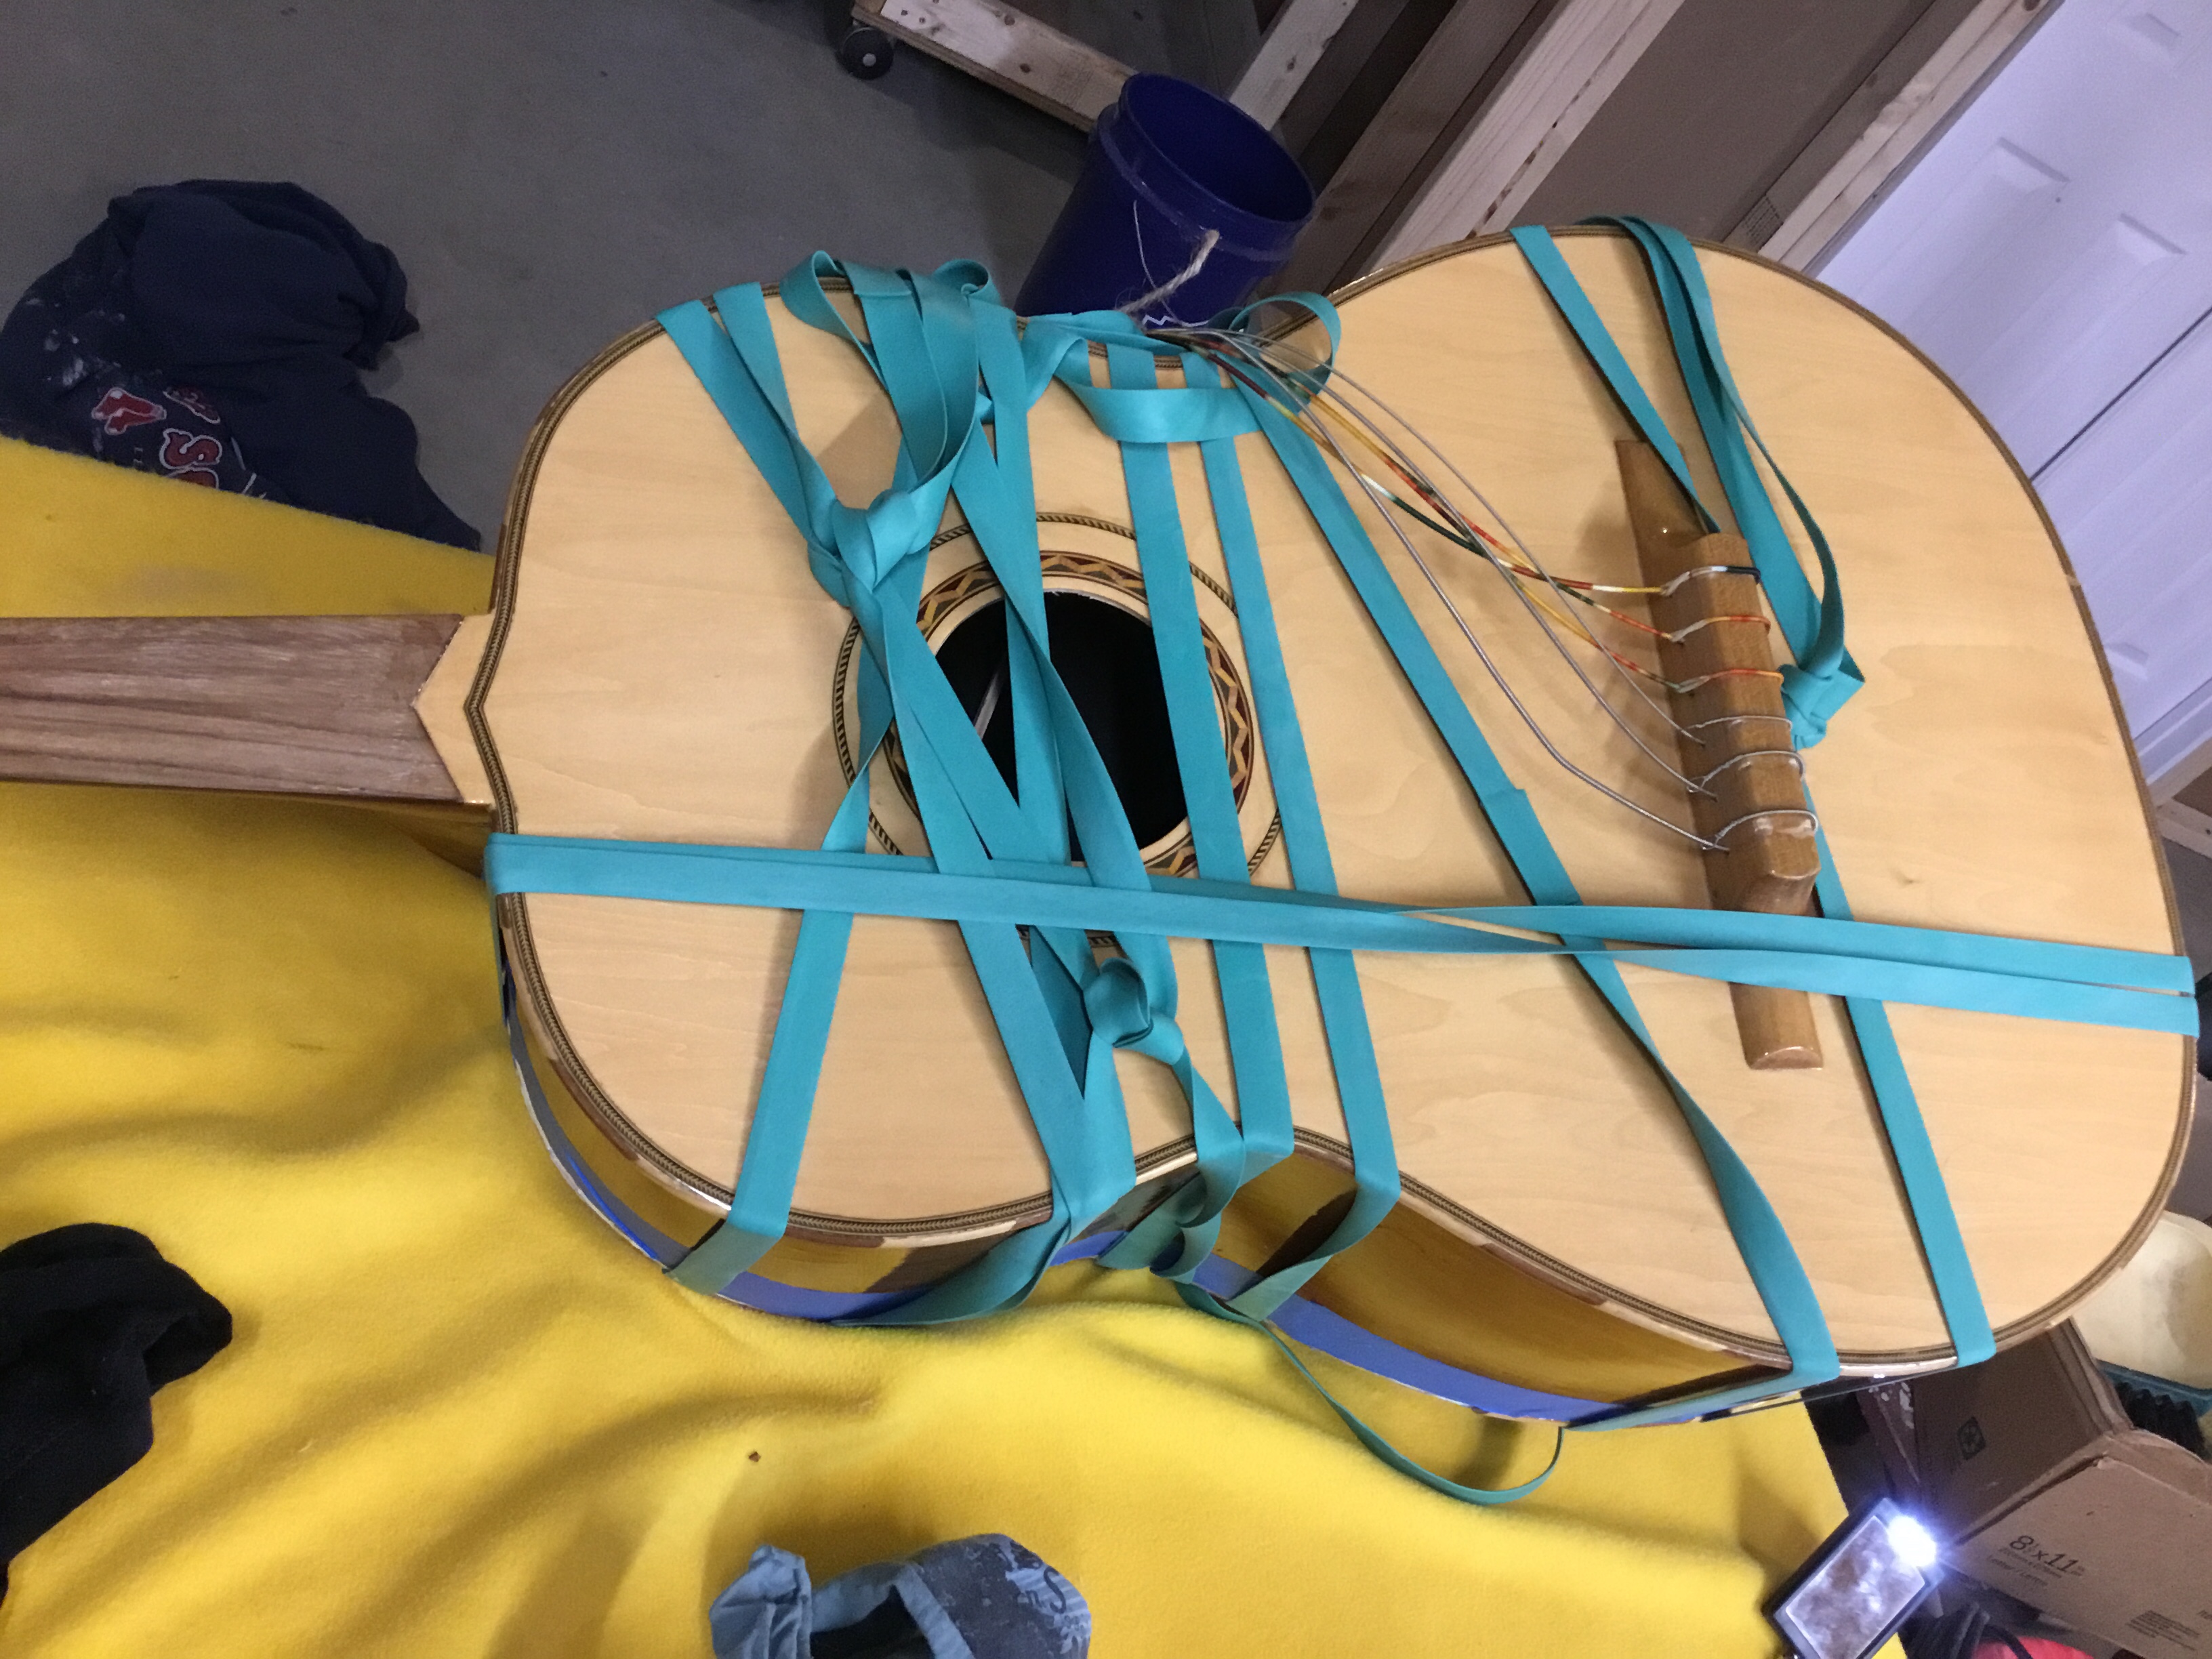
As noted earlier my tools are made to be used with somewhat more traditional instruments (aka not instruments with massive, wicked funky backs). Typically to attach sides to the back or top of a guitar a series of spool clamps are used. I learned a different technique from famed luthier William Cumpiano. He took a truck tire inner tube and cut it into a continuous strip. This was used to wrap the guitar box in a tight wrap. Fortunately for me, giant rubber bands are available from some luthier suppliers. I opted for this versus chasing down a truck mechanic! I added a decent amount of Titebond wood glue to the seam, and wrapped it up with bunch of gigantic rubber bands. This worked well on the contour of the Guitarron and the back held quite well. I added extra glue to the kerfing and the back to add stability.
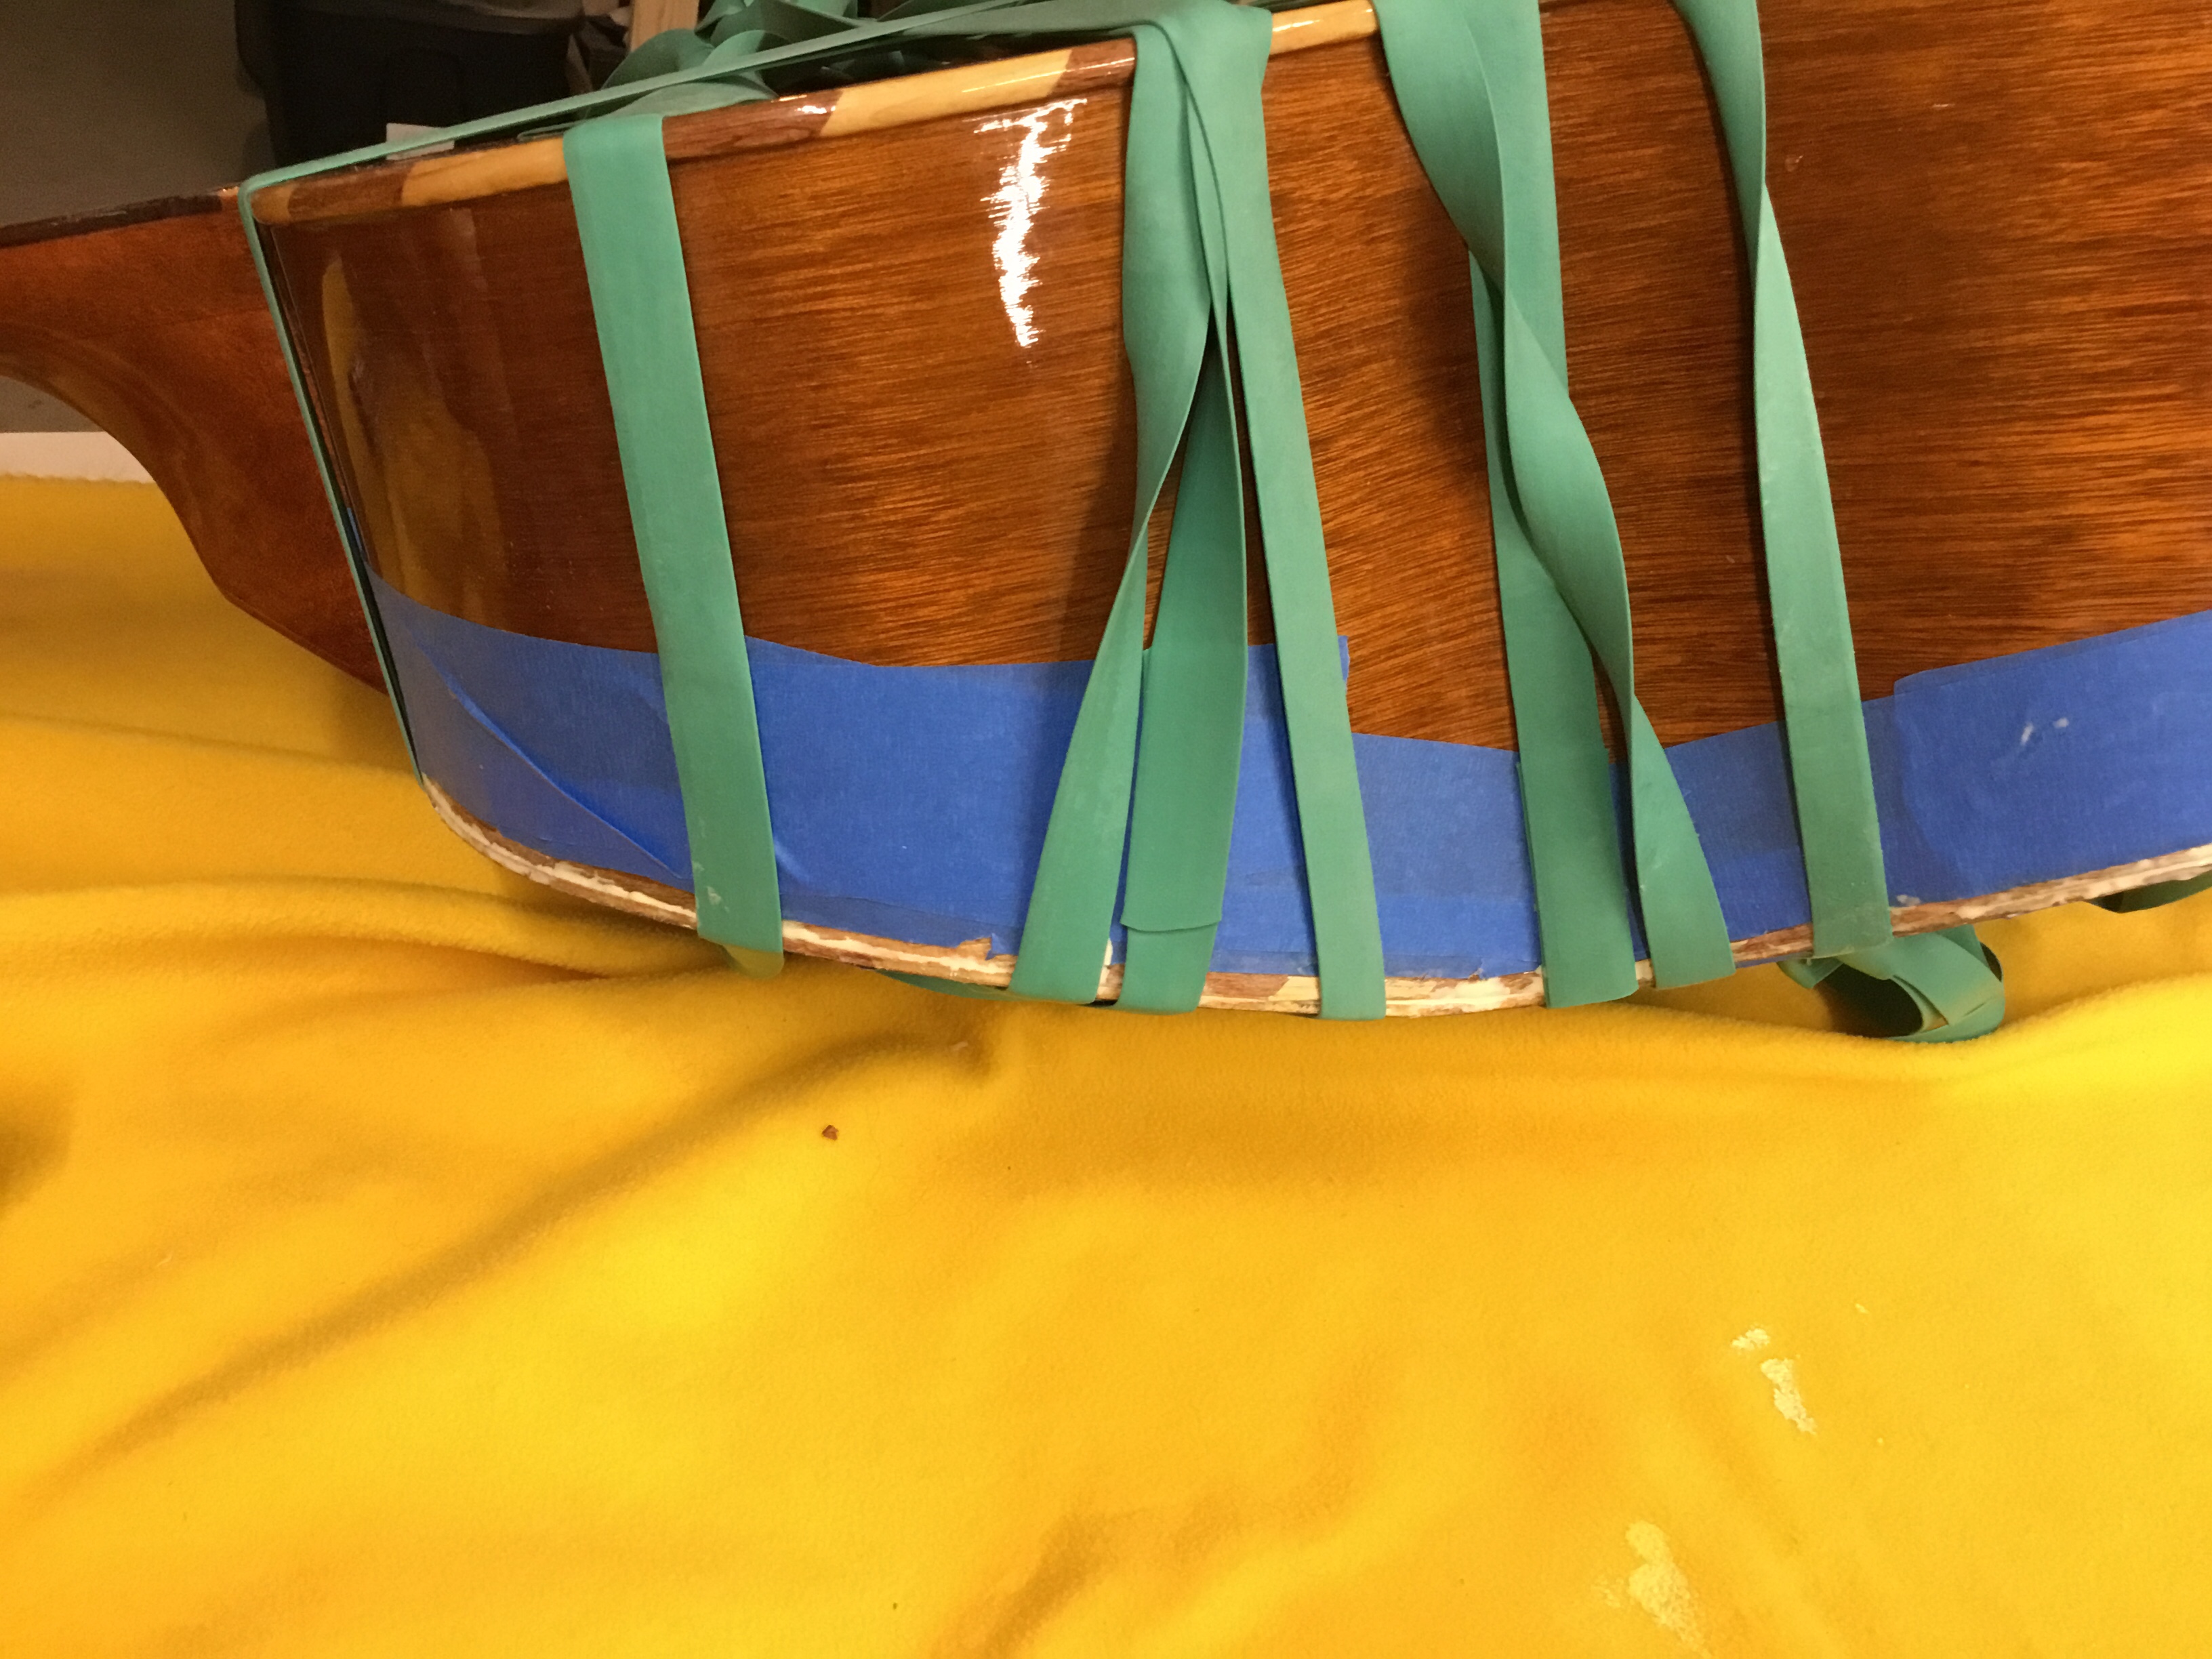
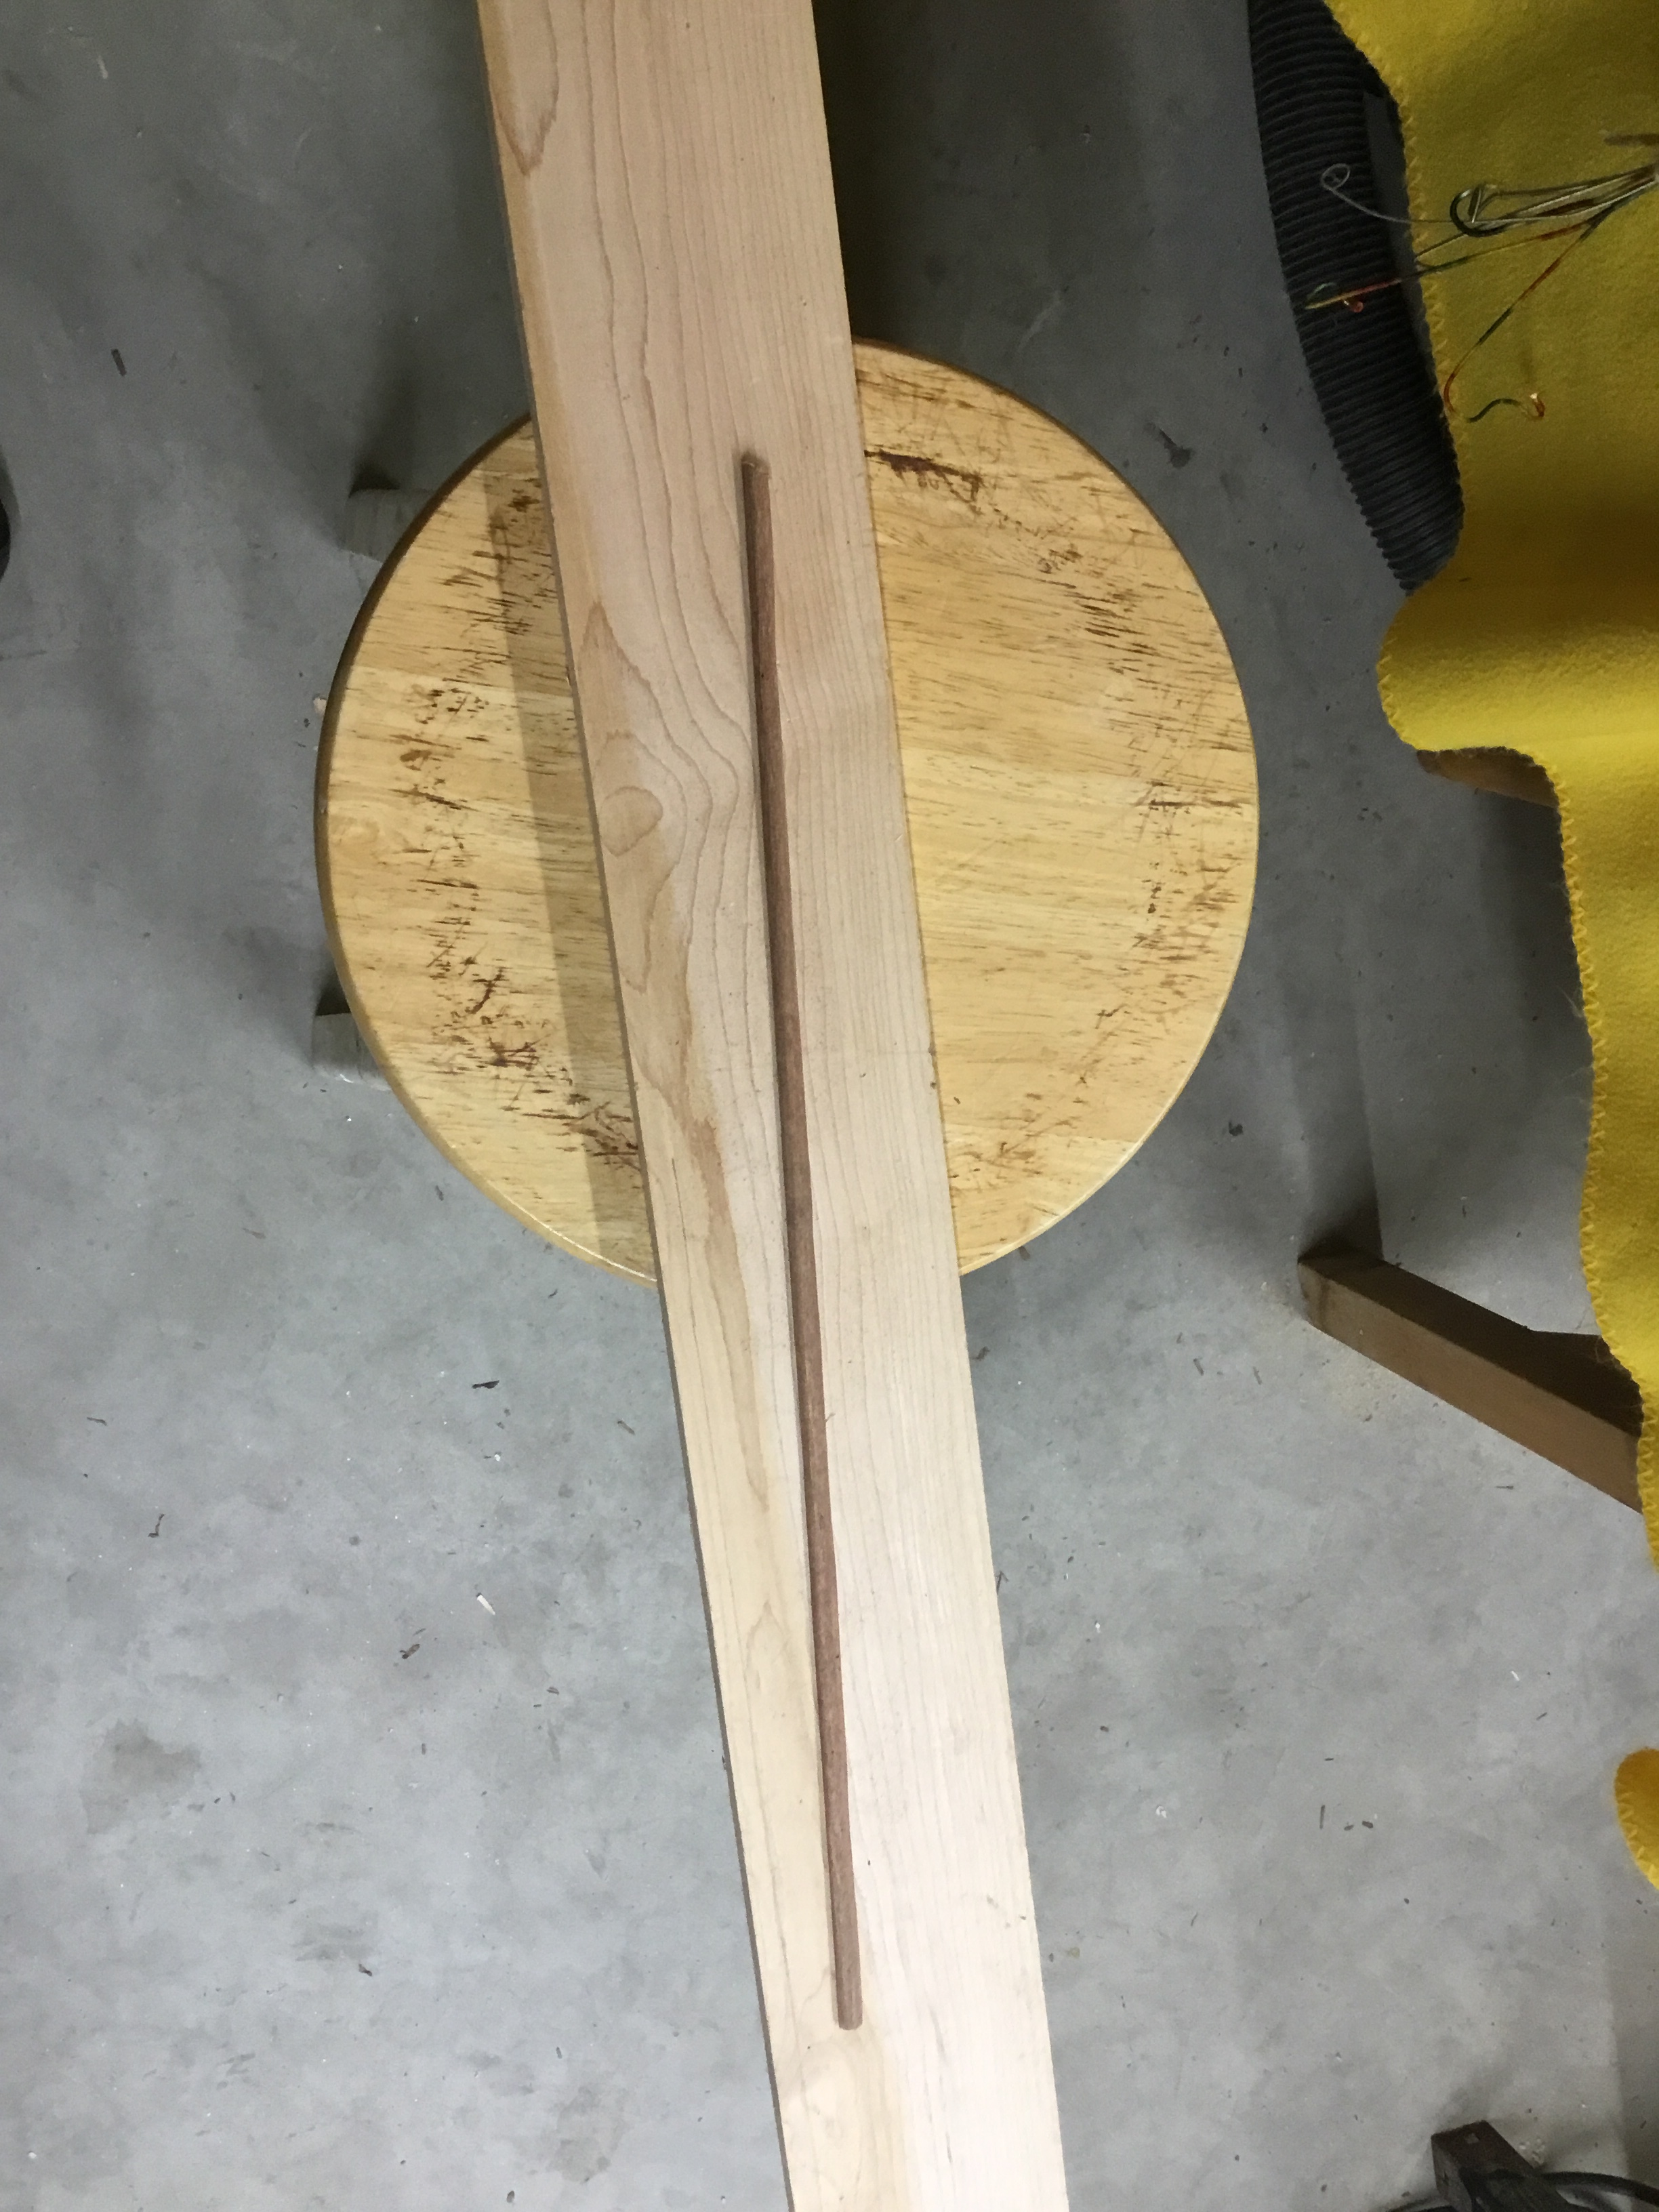
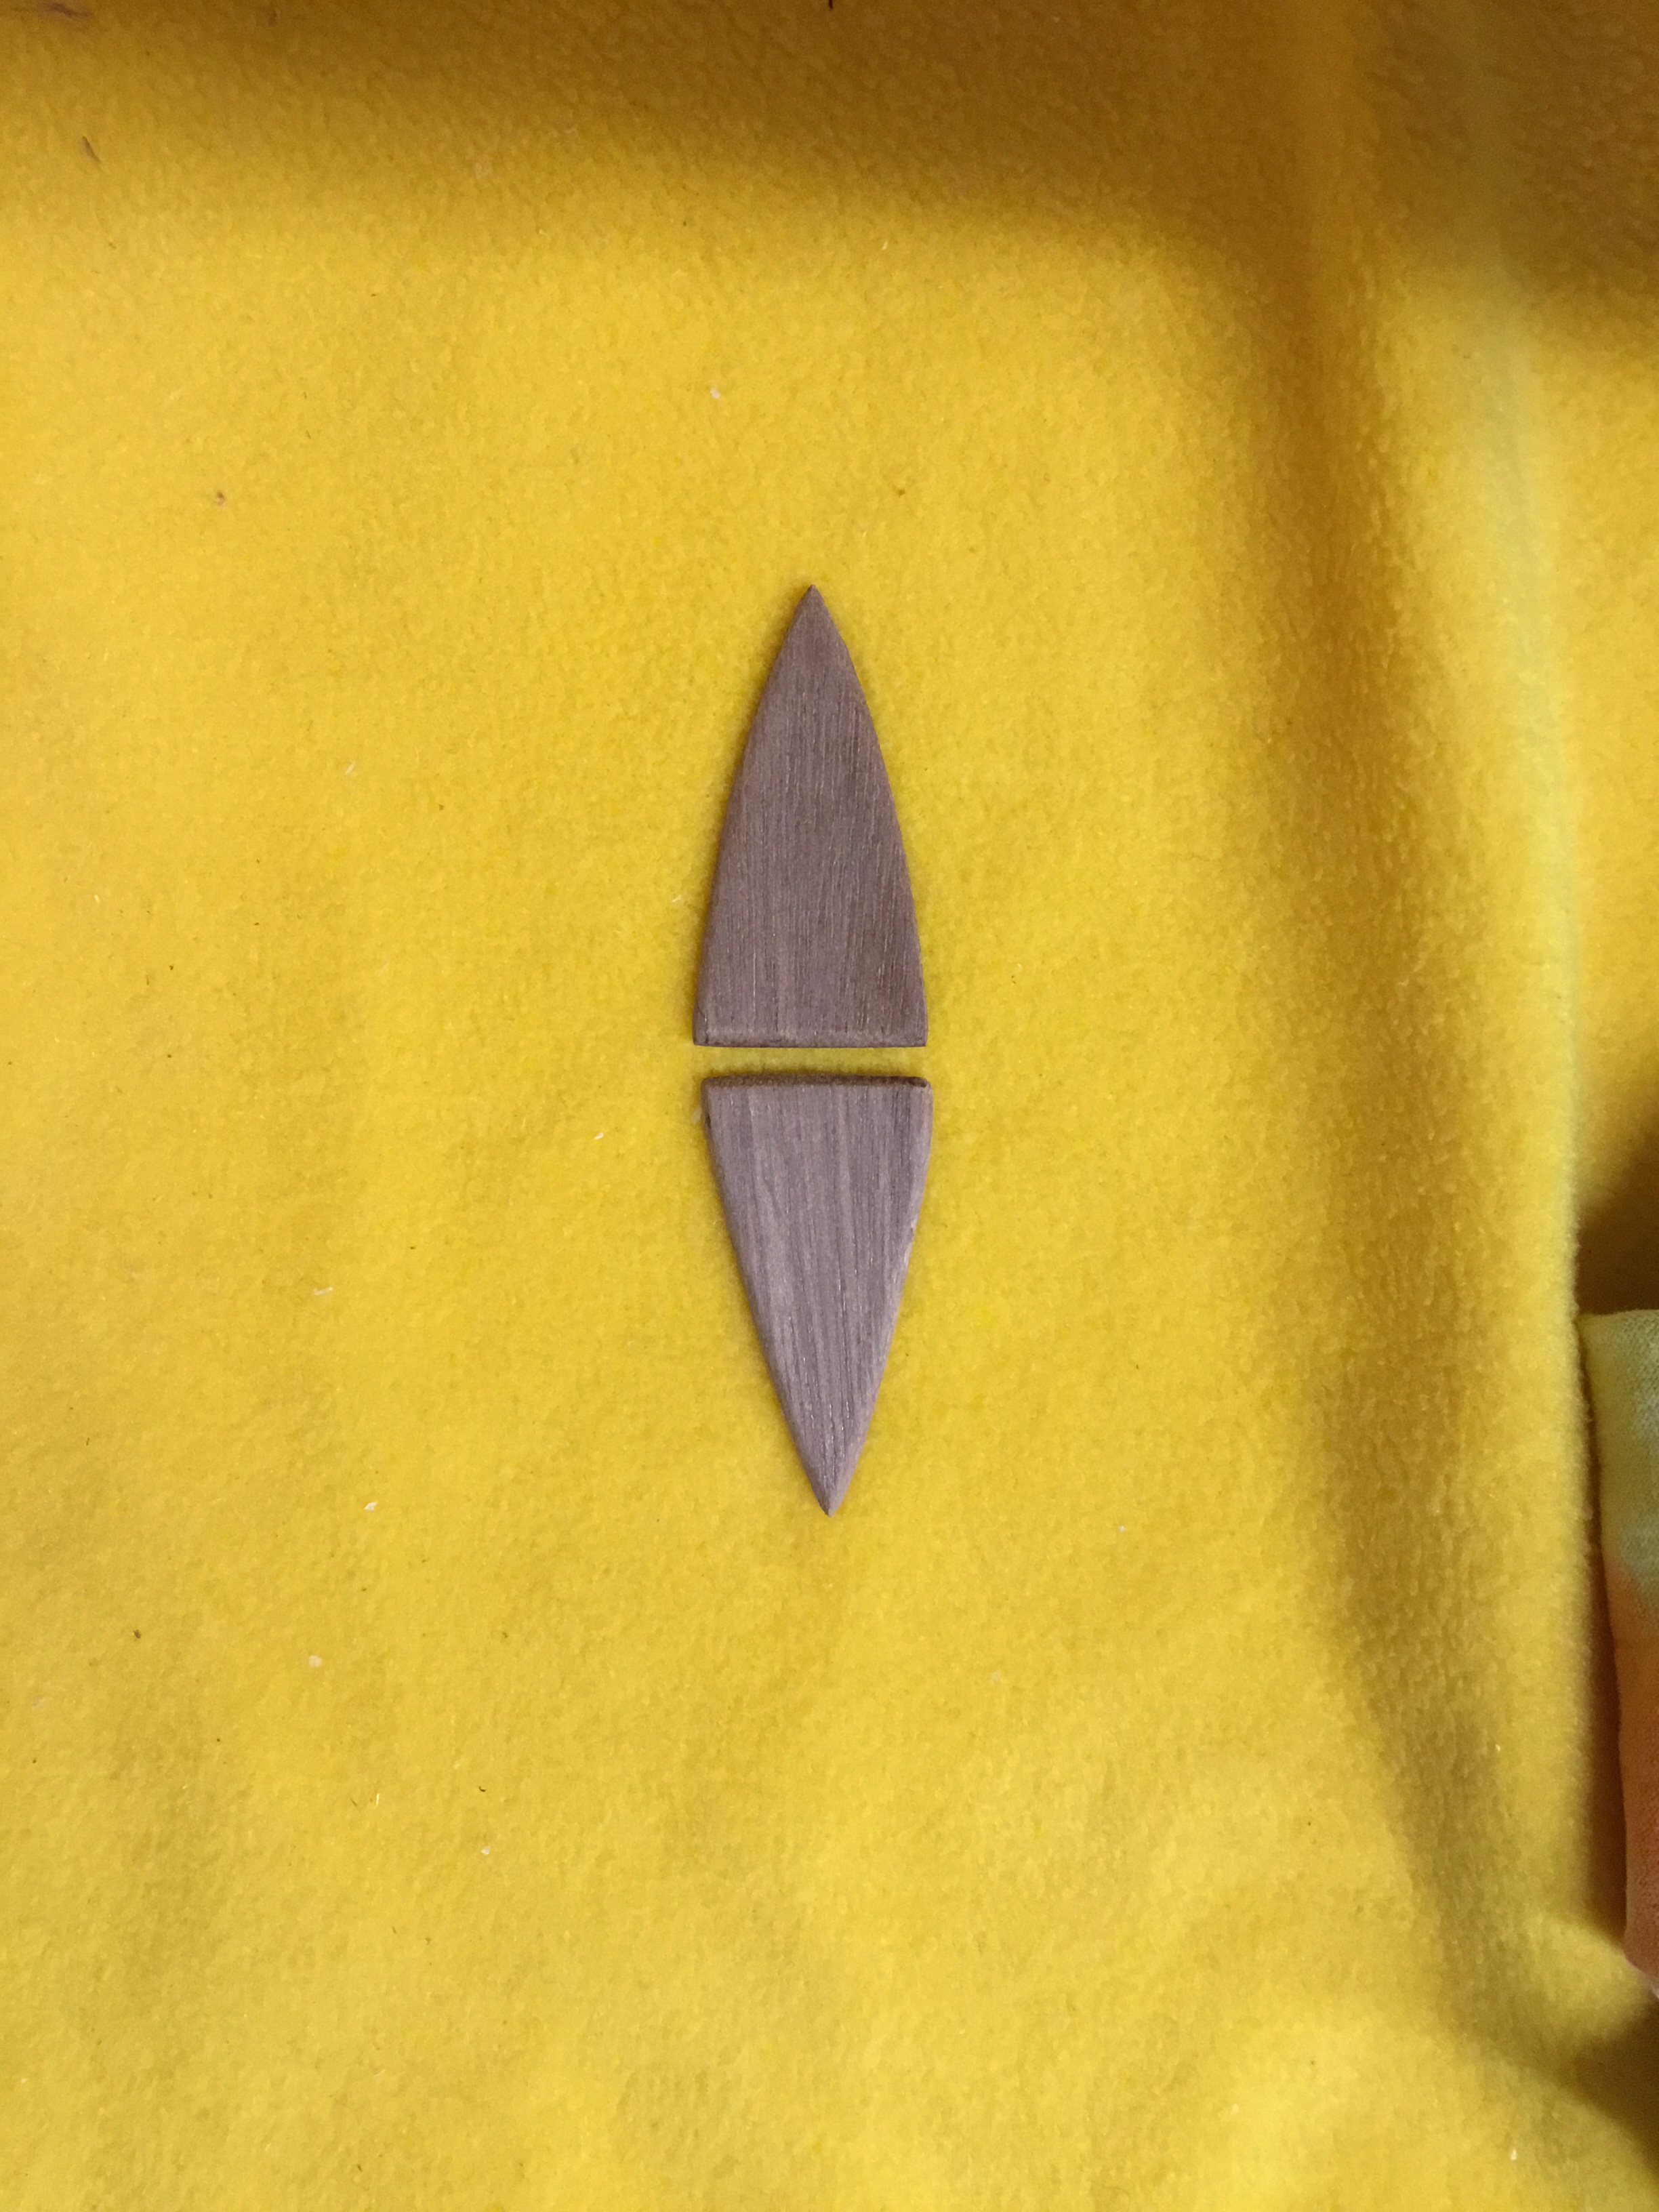
After the back was reattached to the side, it was time to address the crack along the back where the 2 pieces of the back came together at the neck. I cut a piece of mahogany about 1/2 inch wide, 3 inches long, and 3/8 inch thick and glued it diagonally across the 2 back pieces near the neck where the angle of the back was not severe. This provided the support necessary to keep the 2 back pieces from separating anymore. I then cut a thin piece of mahogany about a 1/2 inch wide, 5 inches long, and maybe 1/16 thick and glued this along the spine of the back. Since it was so thin it made it possible to press this into the contour of the seam, sealing the deal. Titebond wood glue is a wonderful thing.
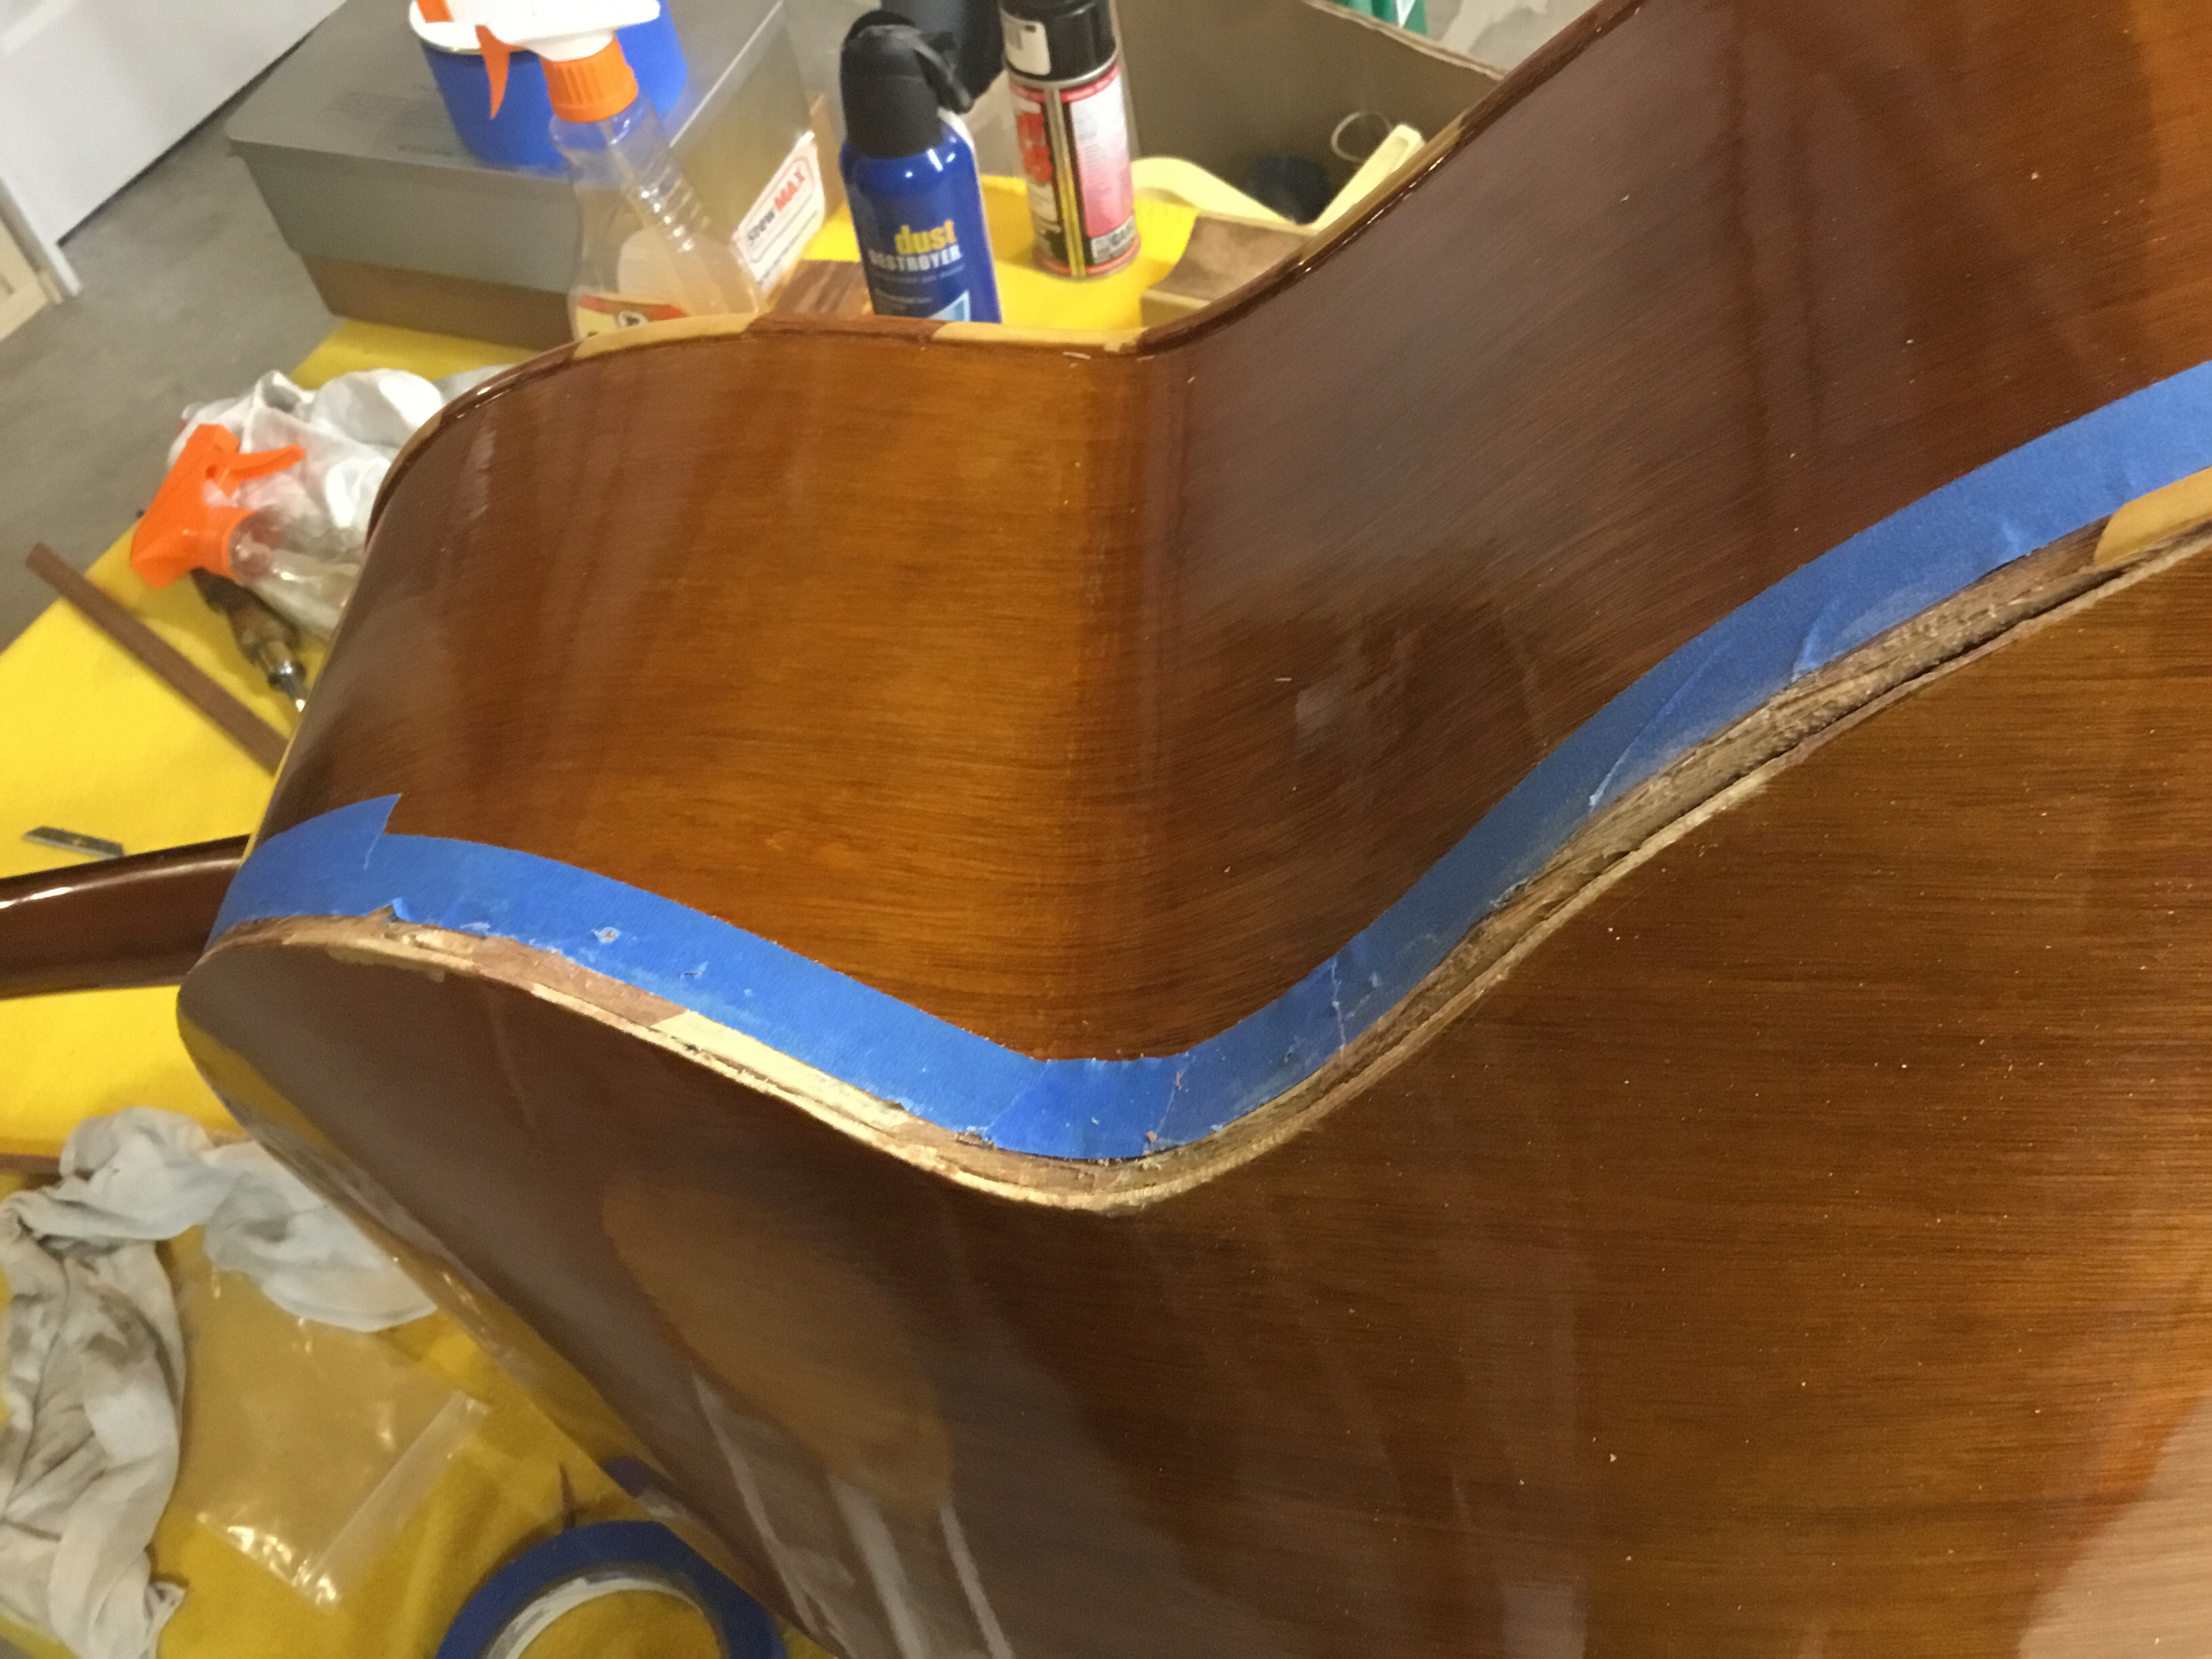
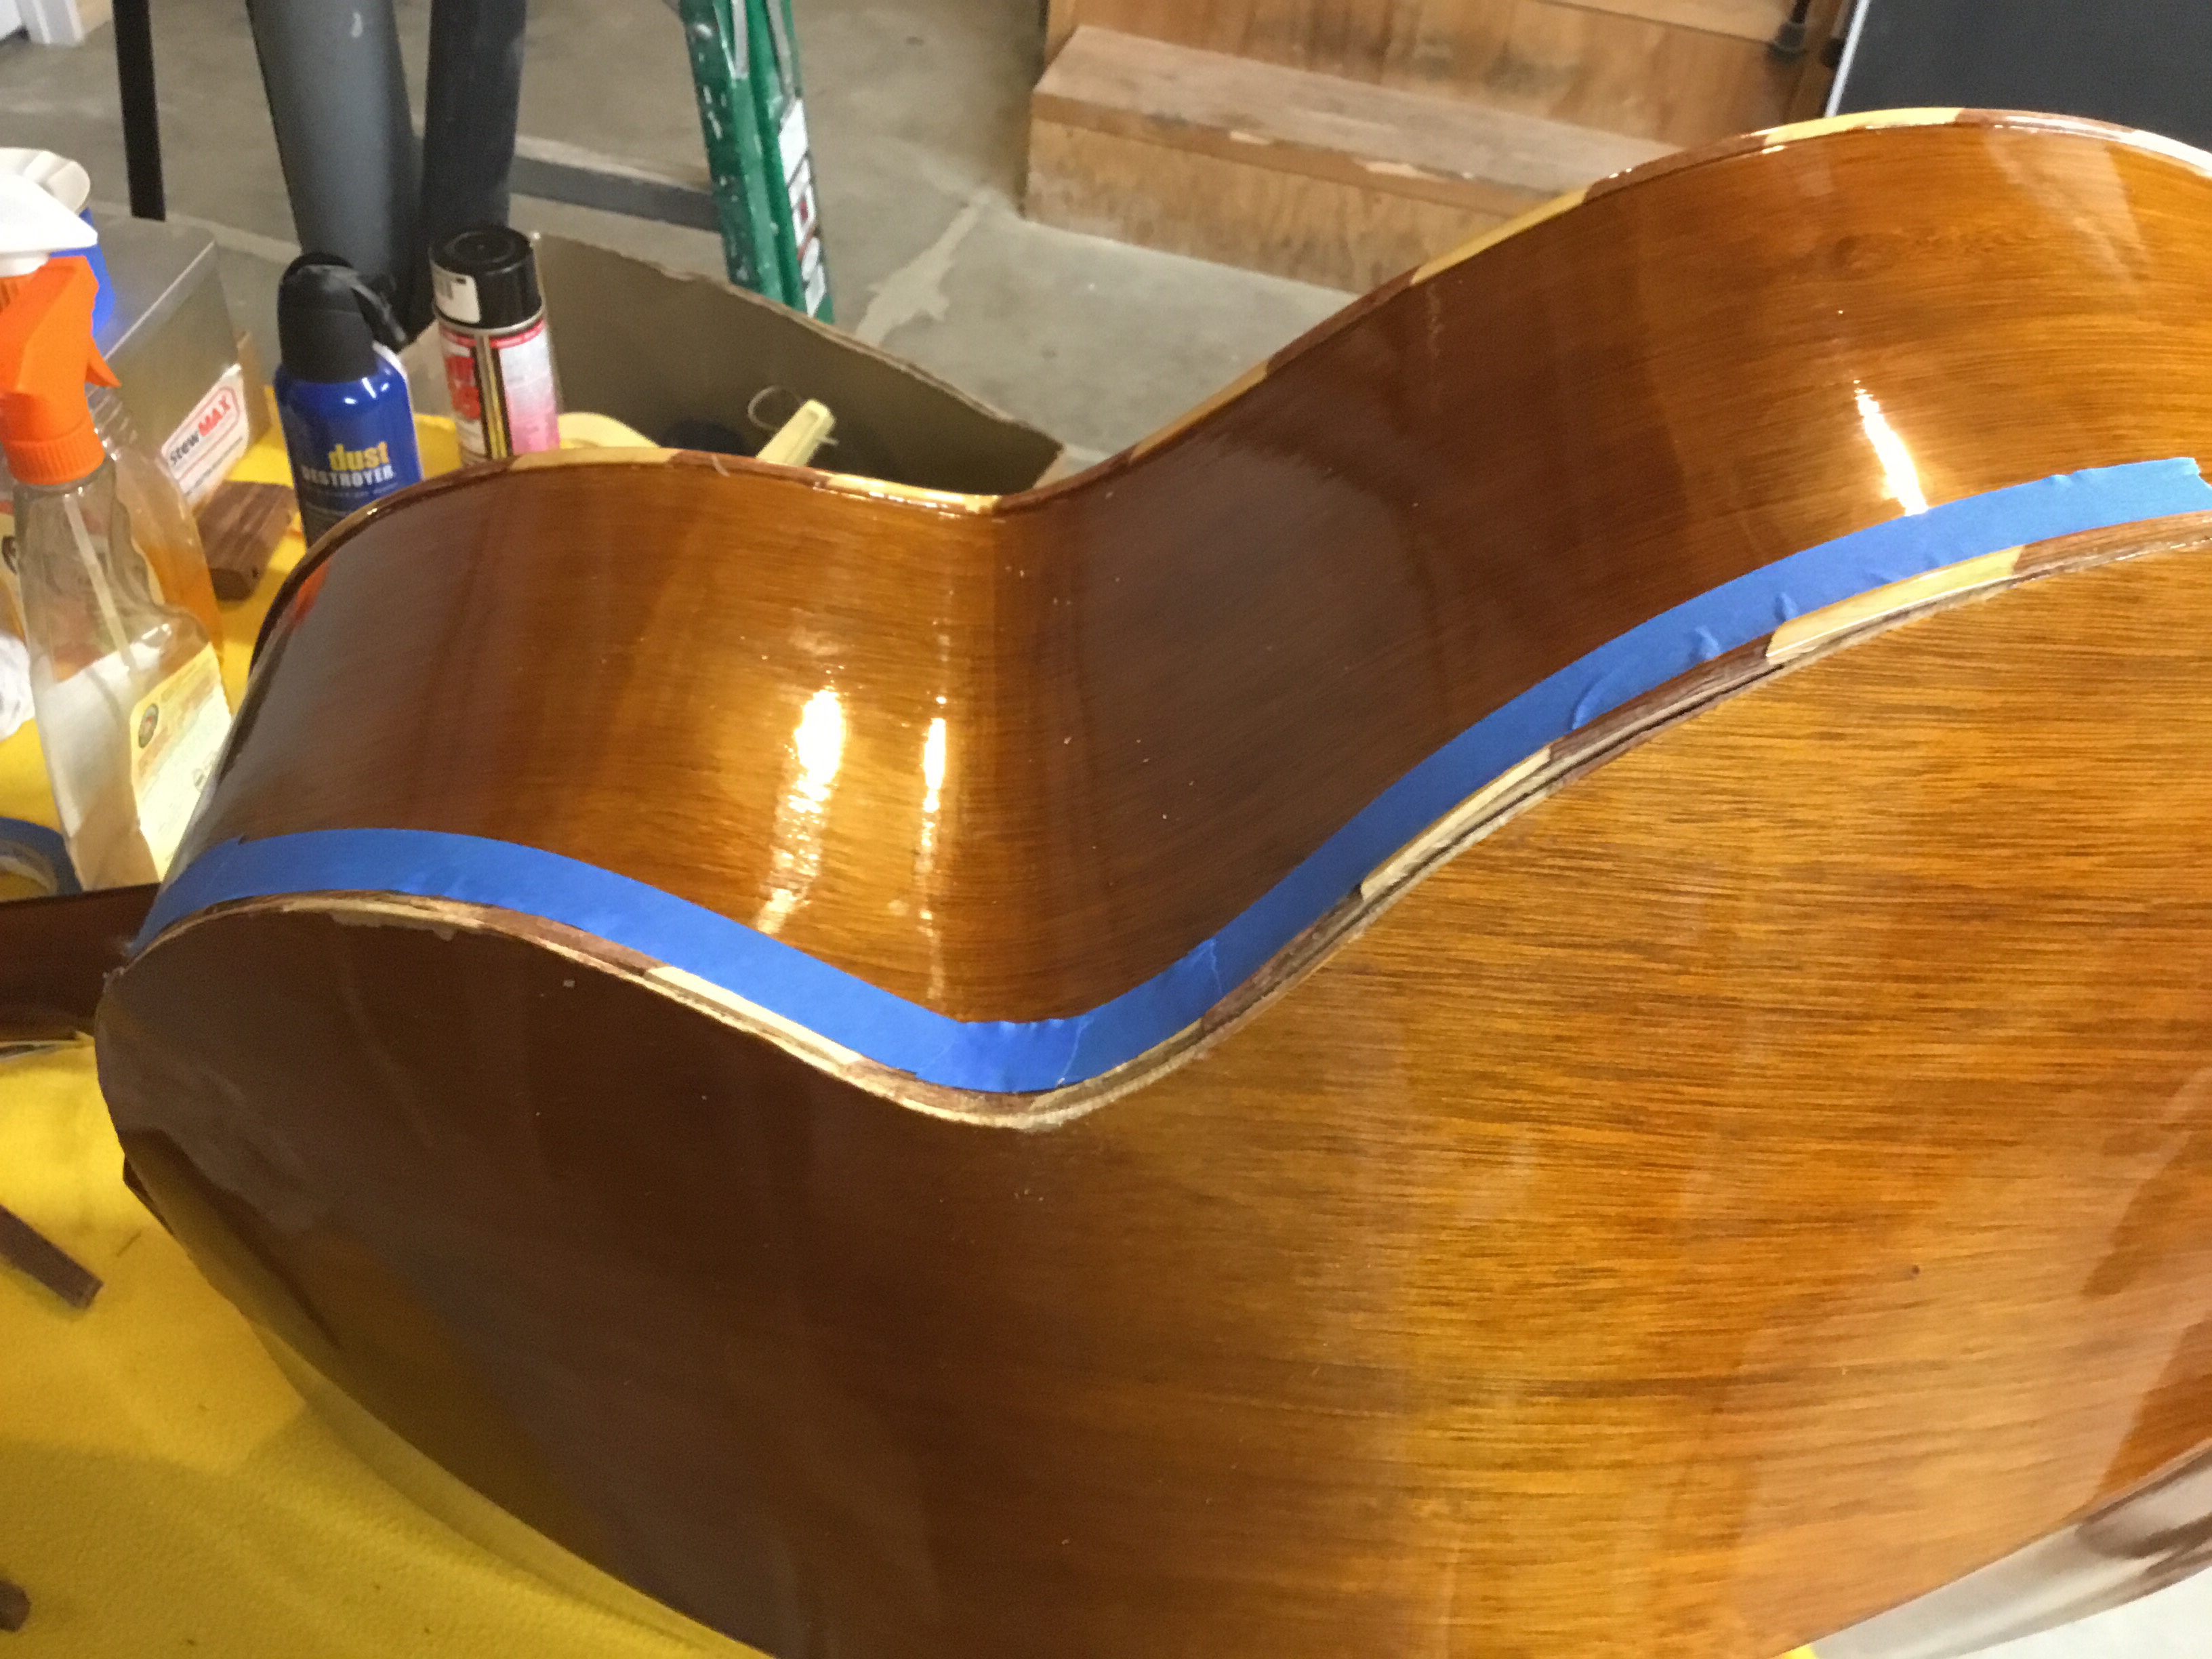
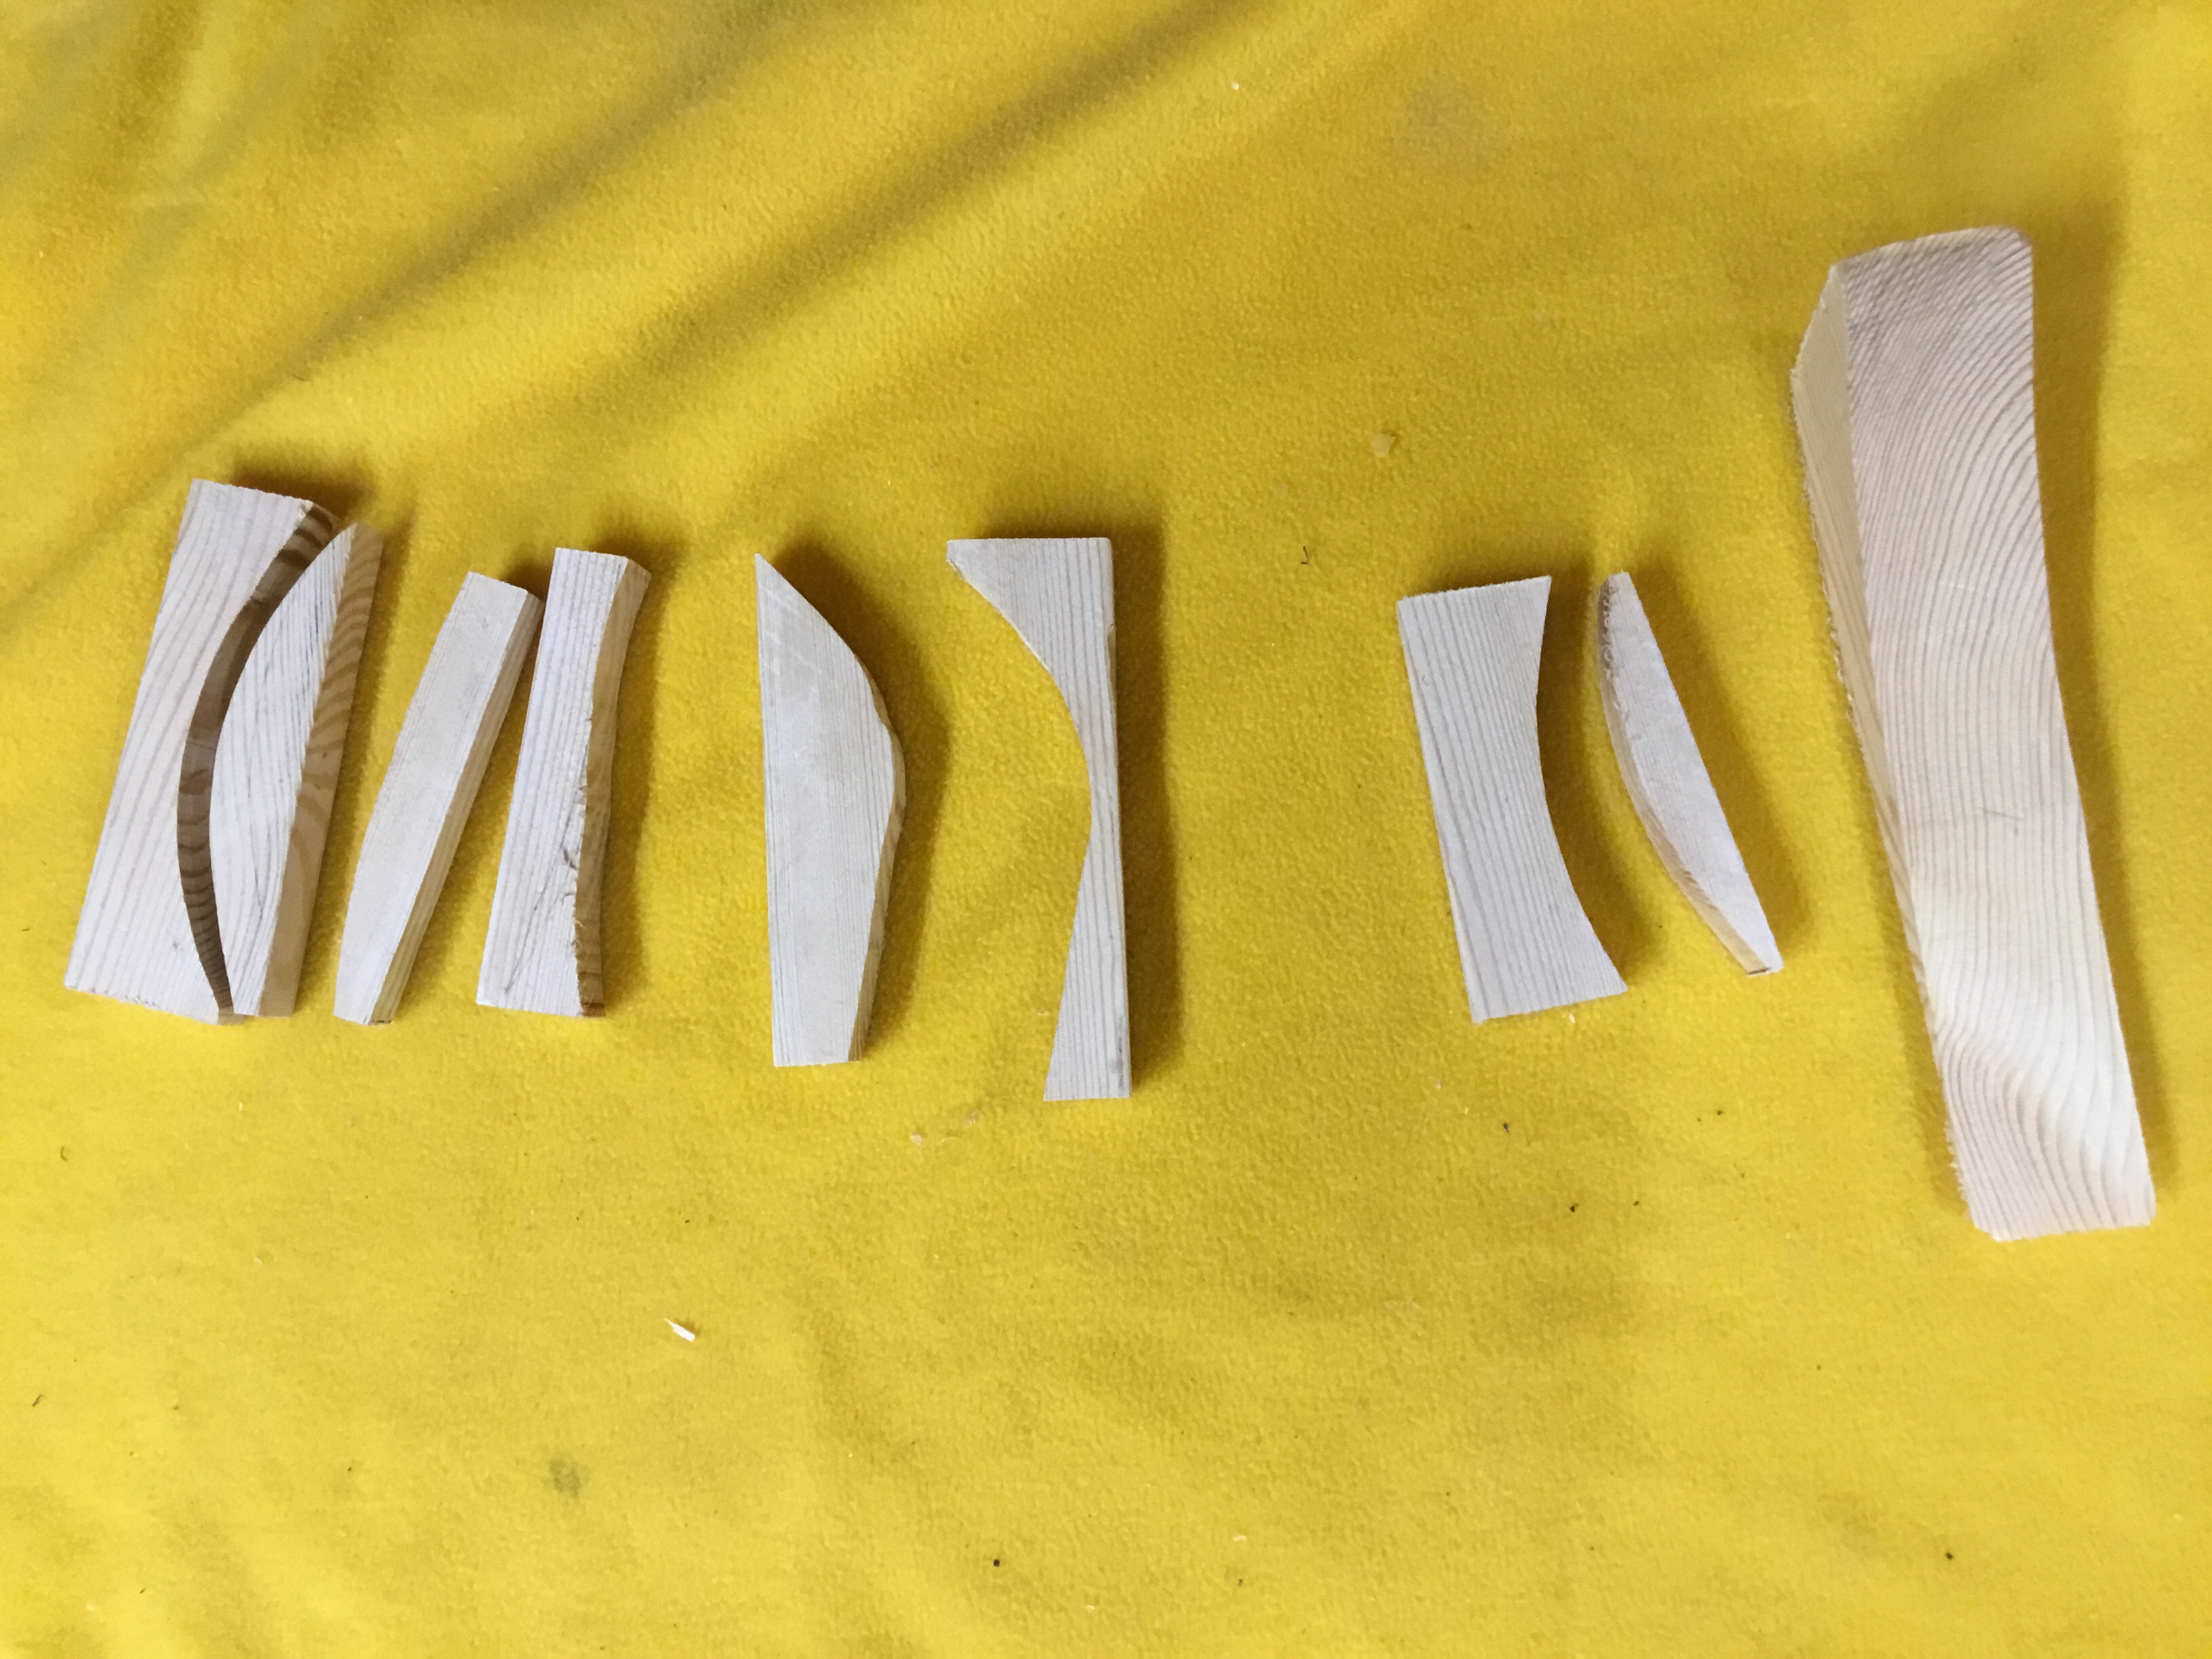
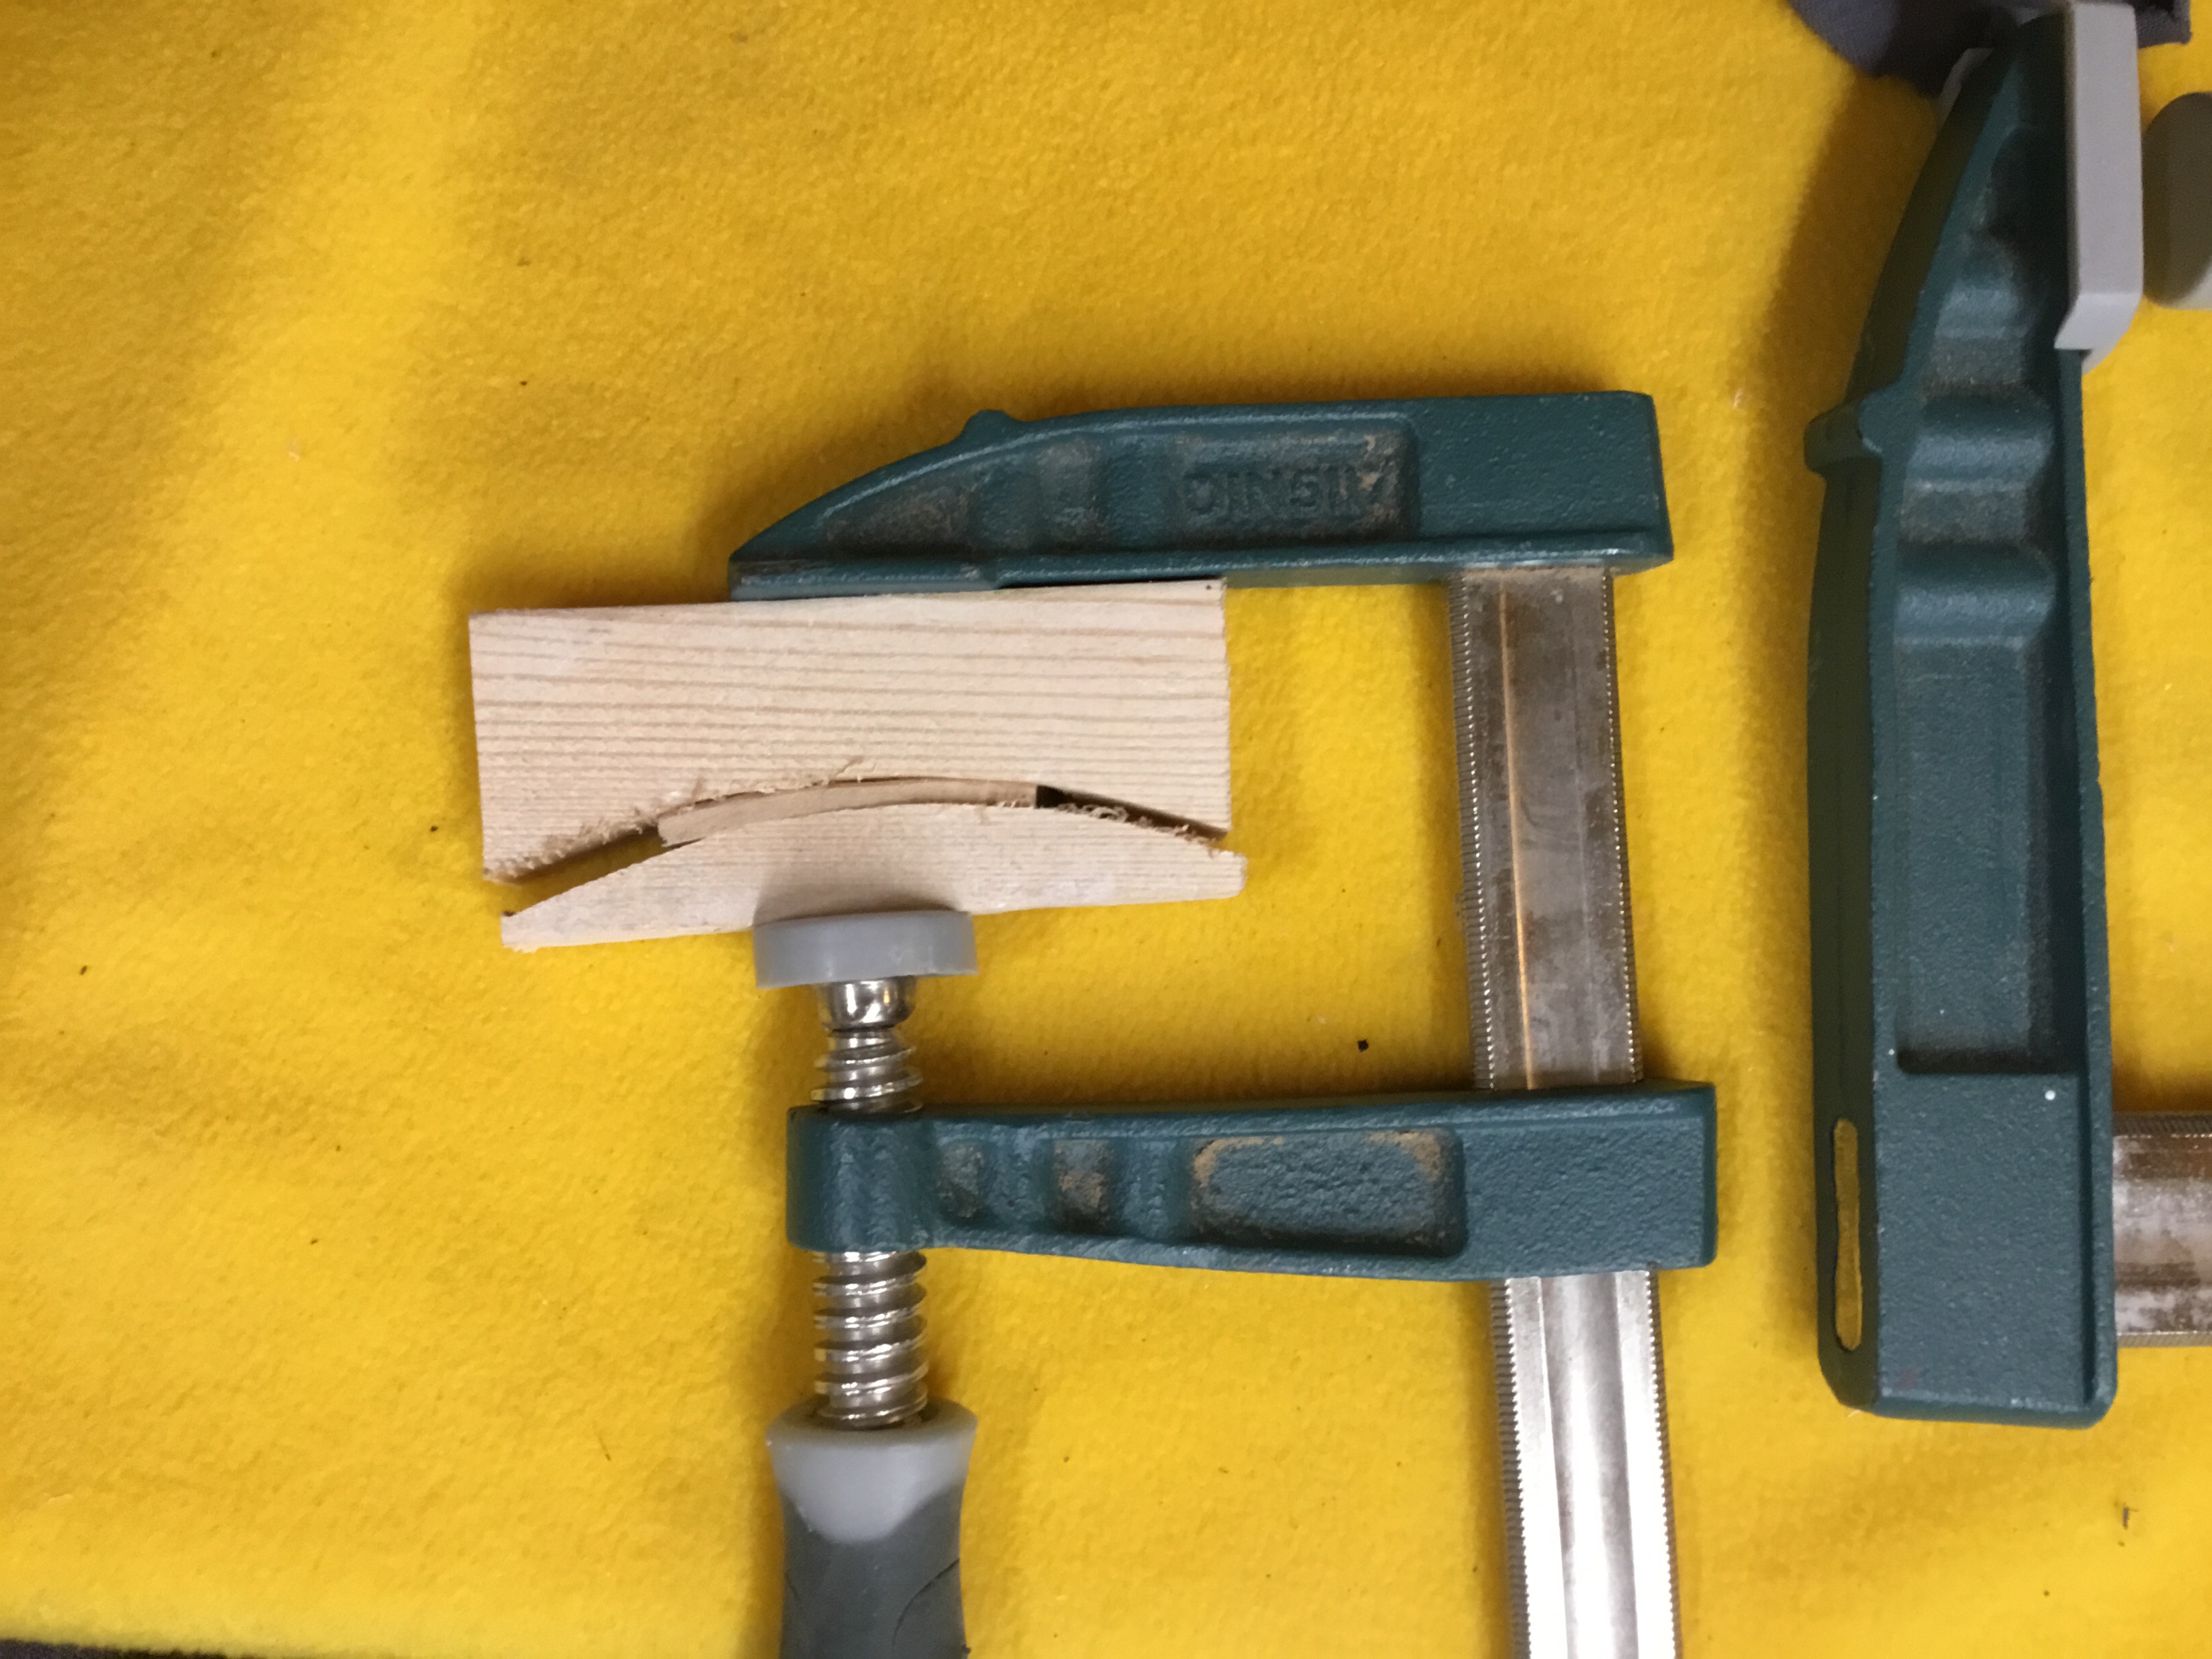
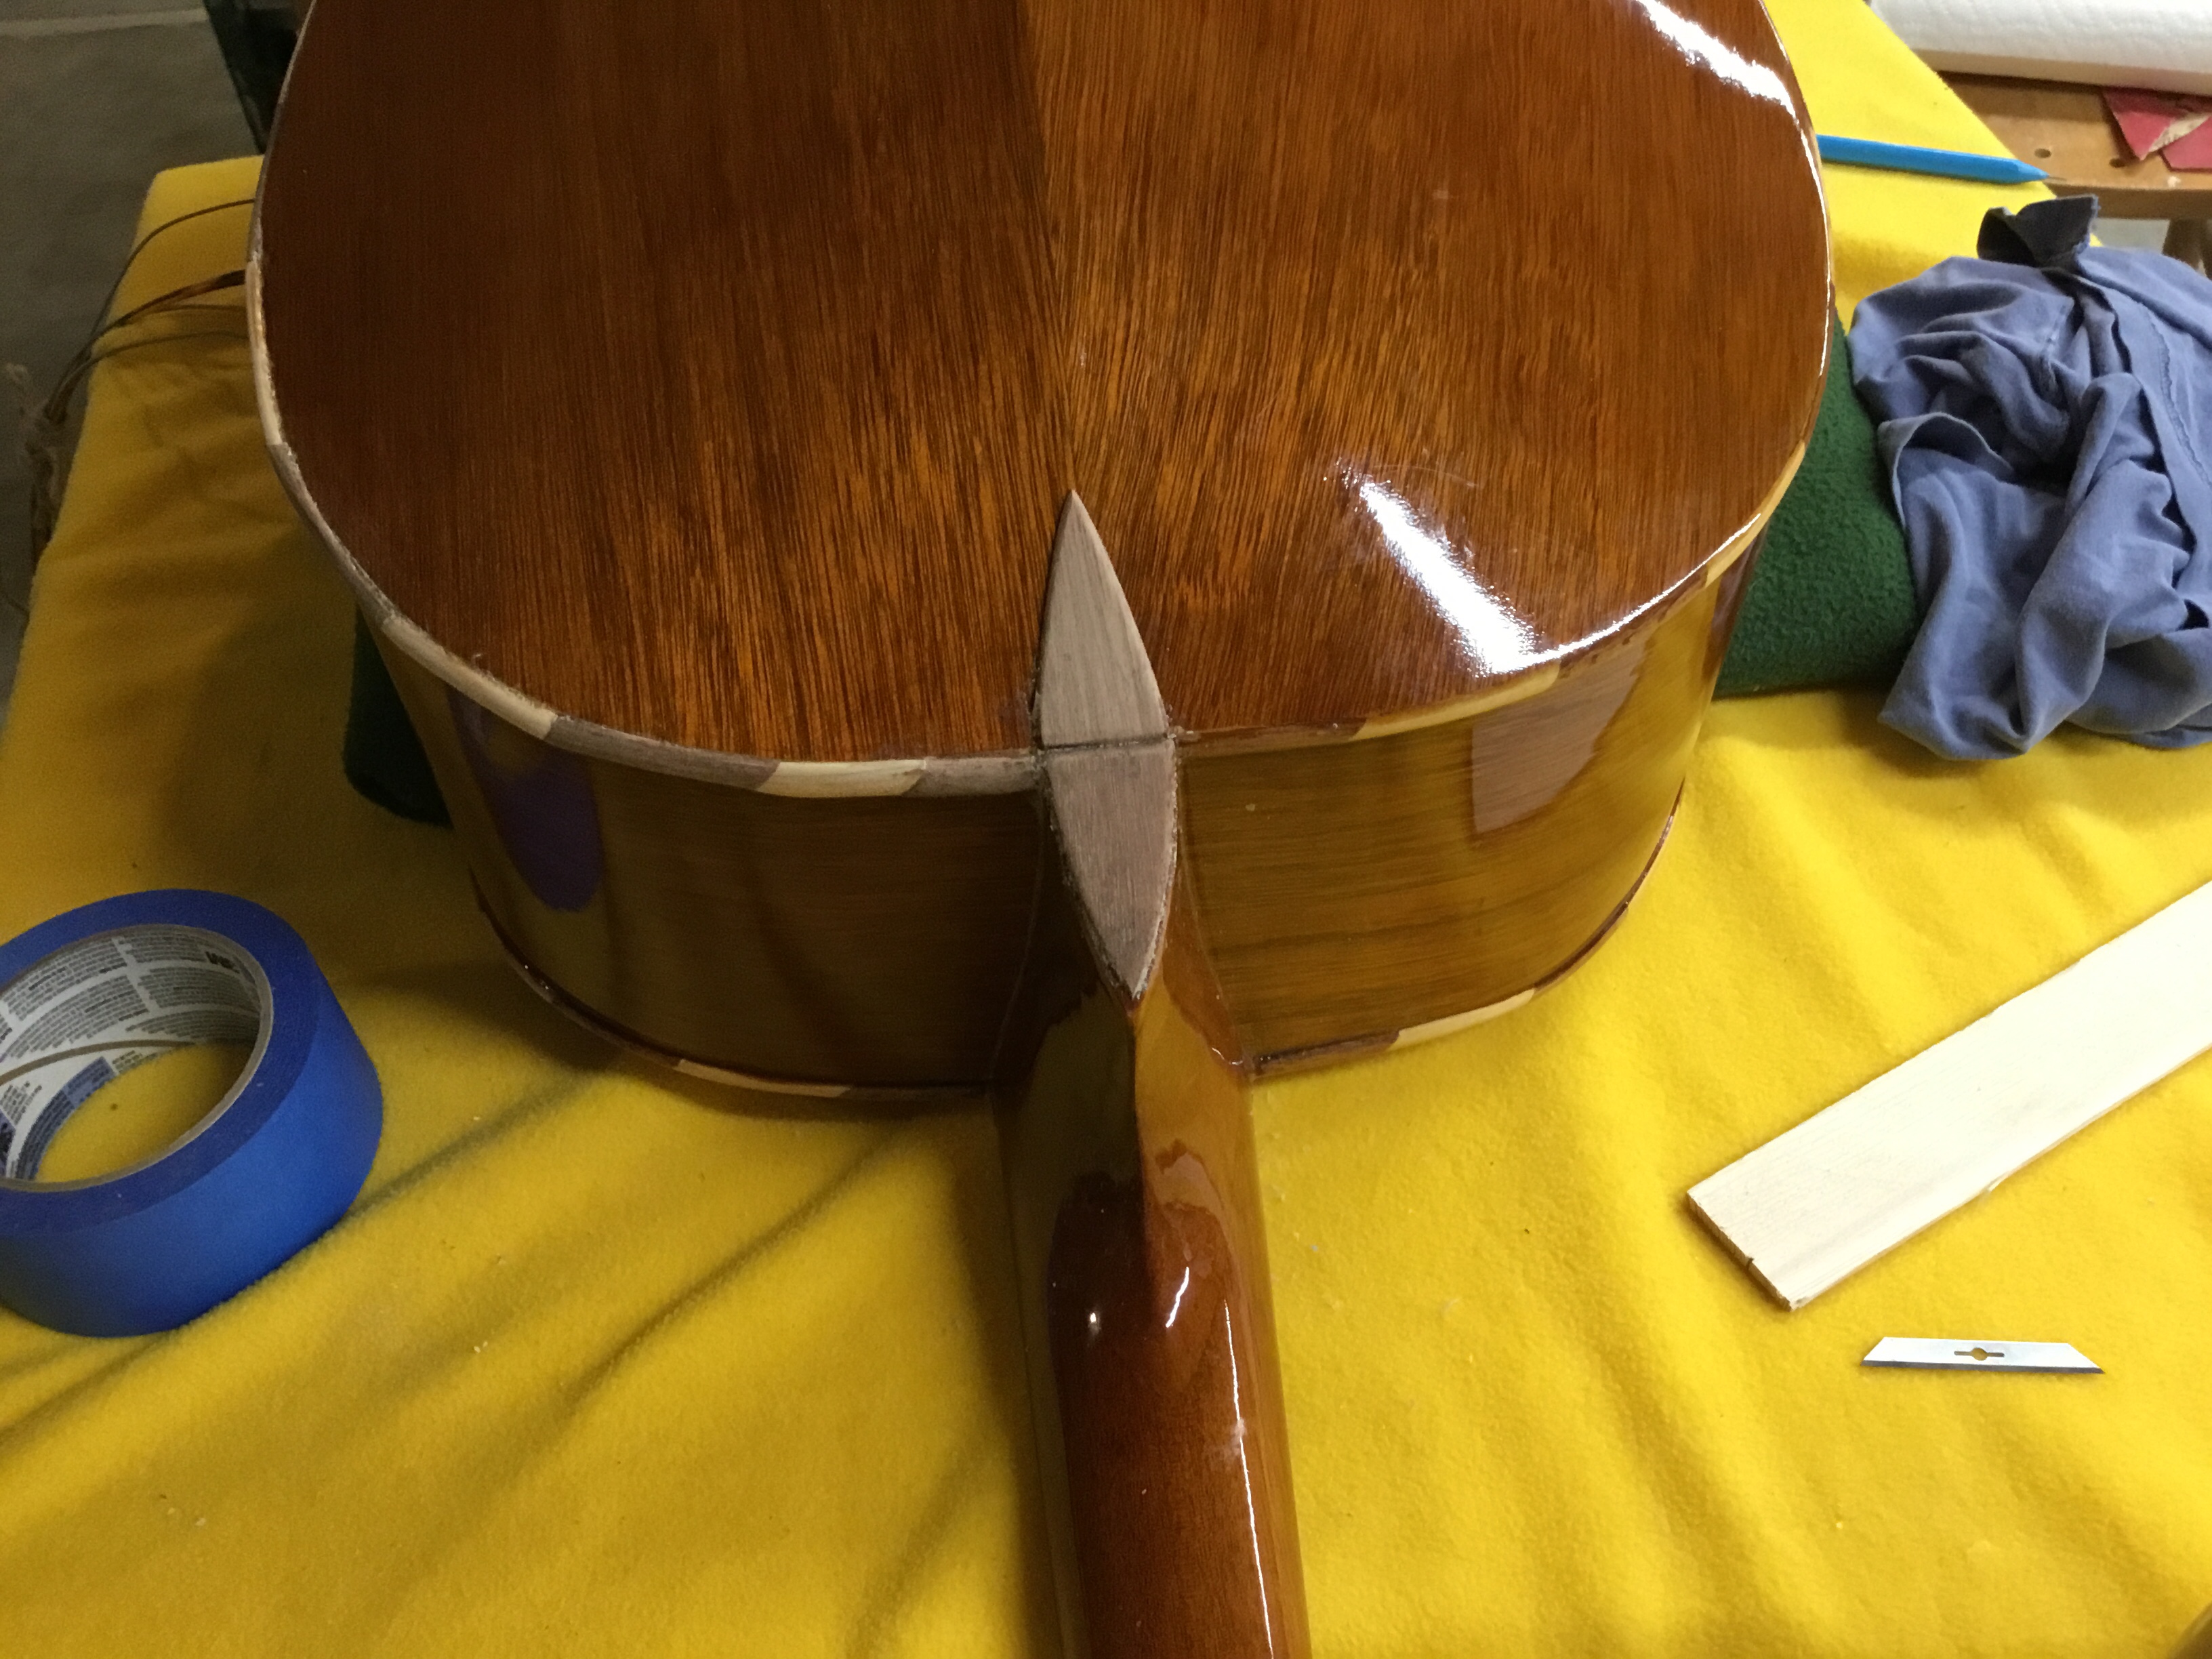
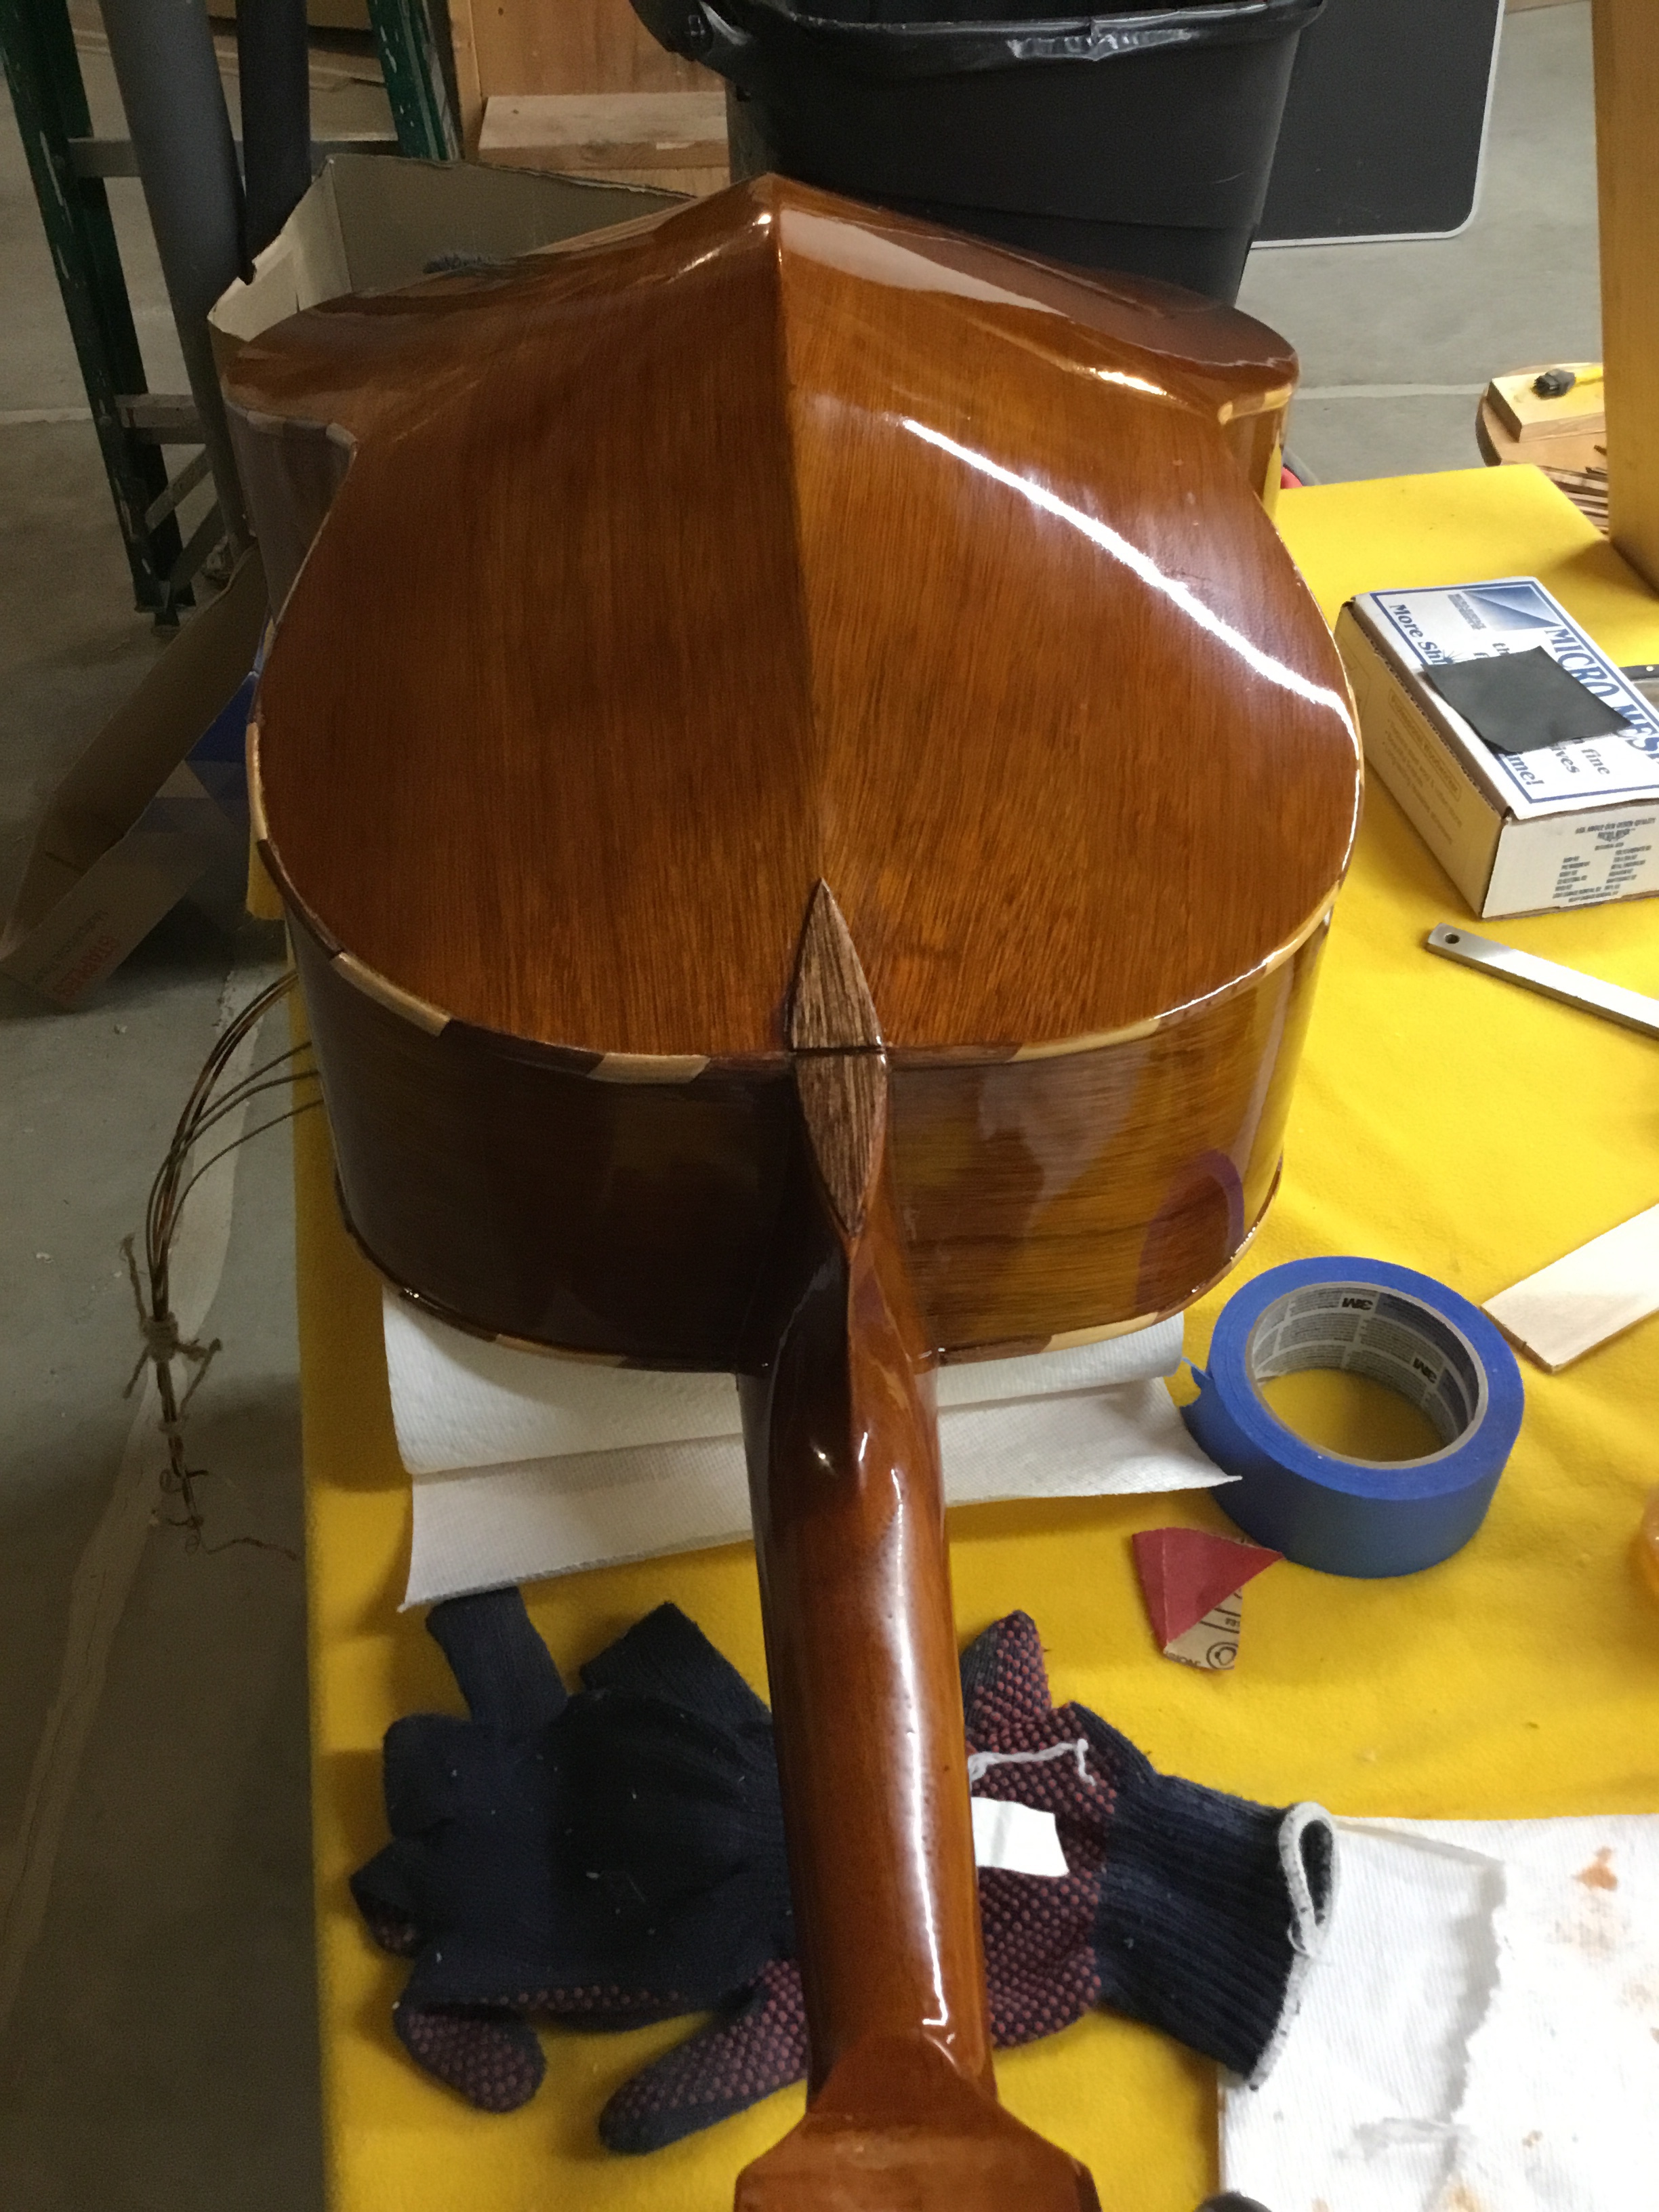
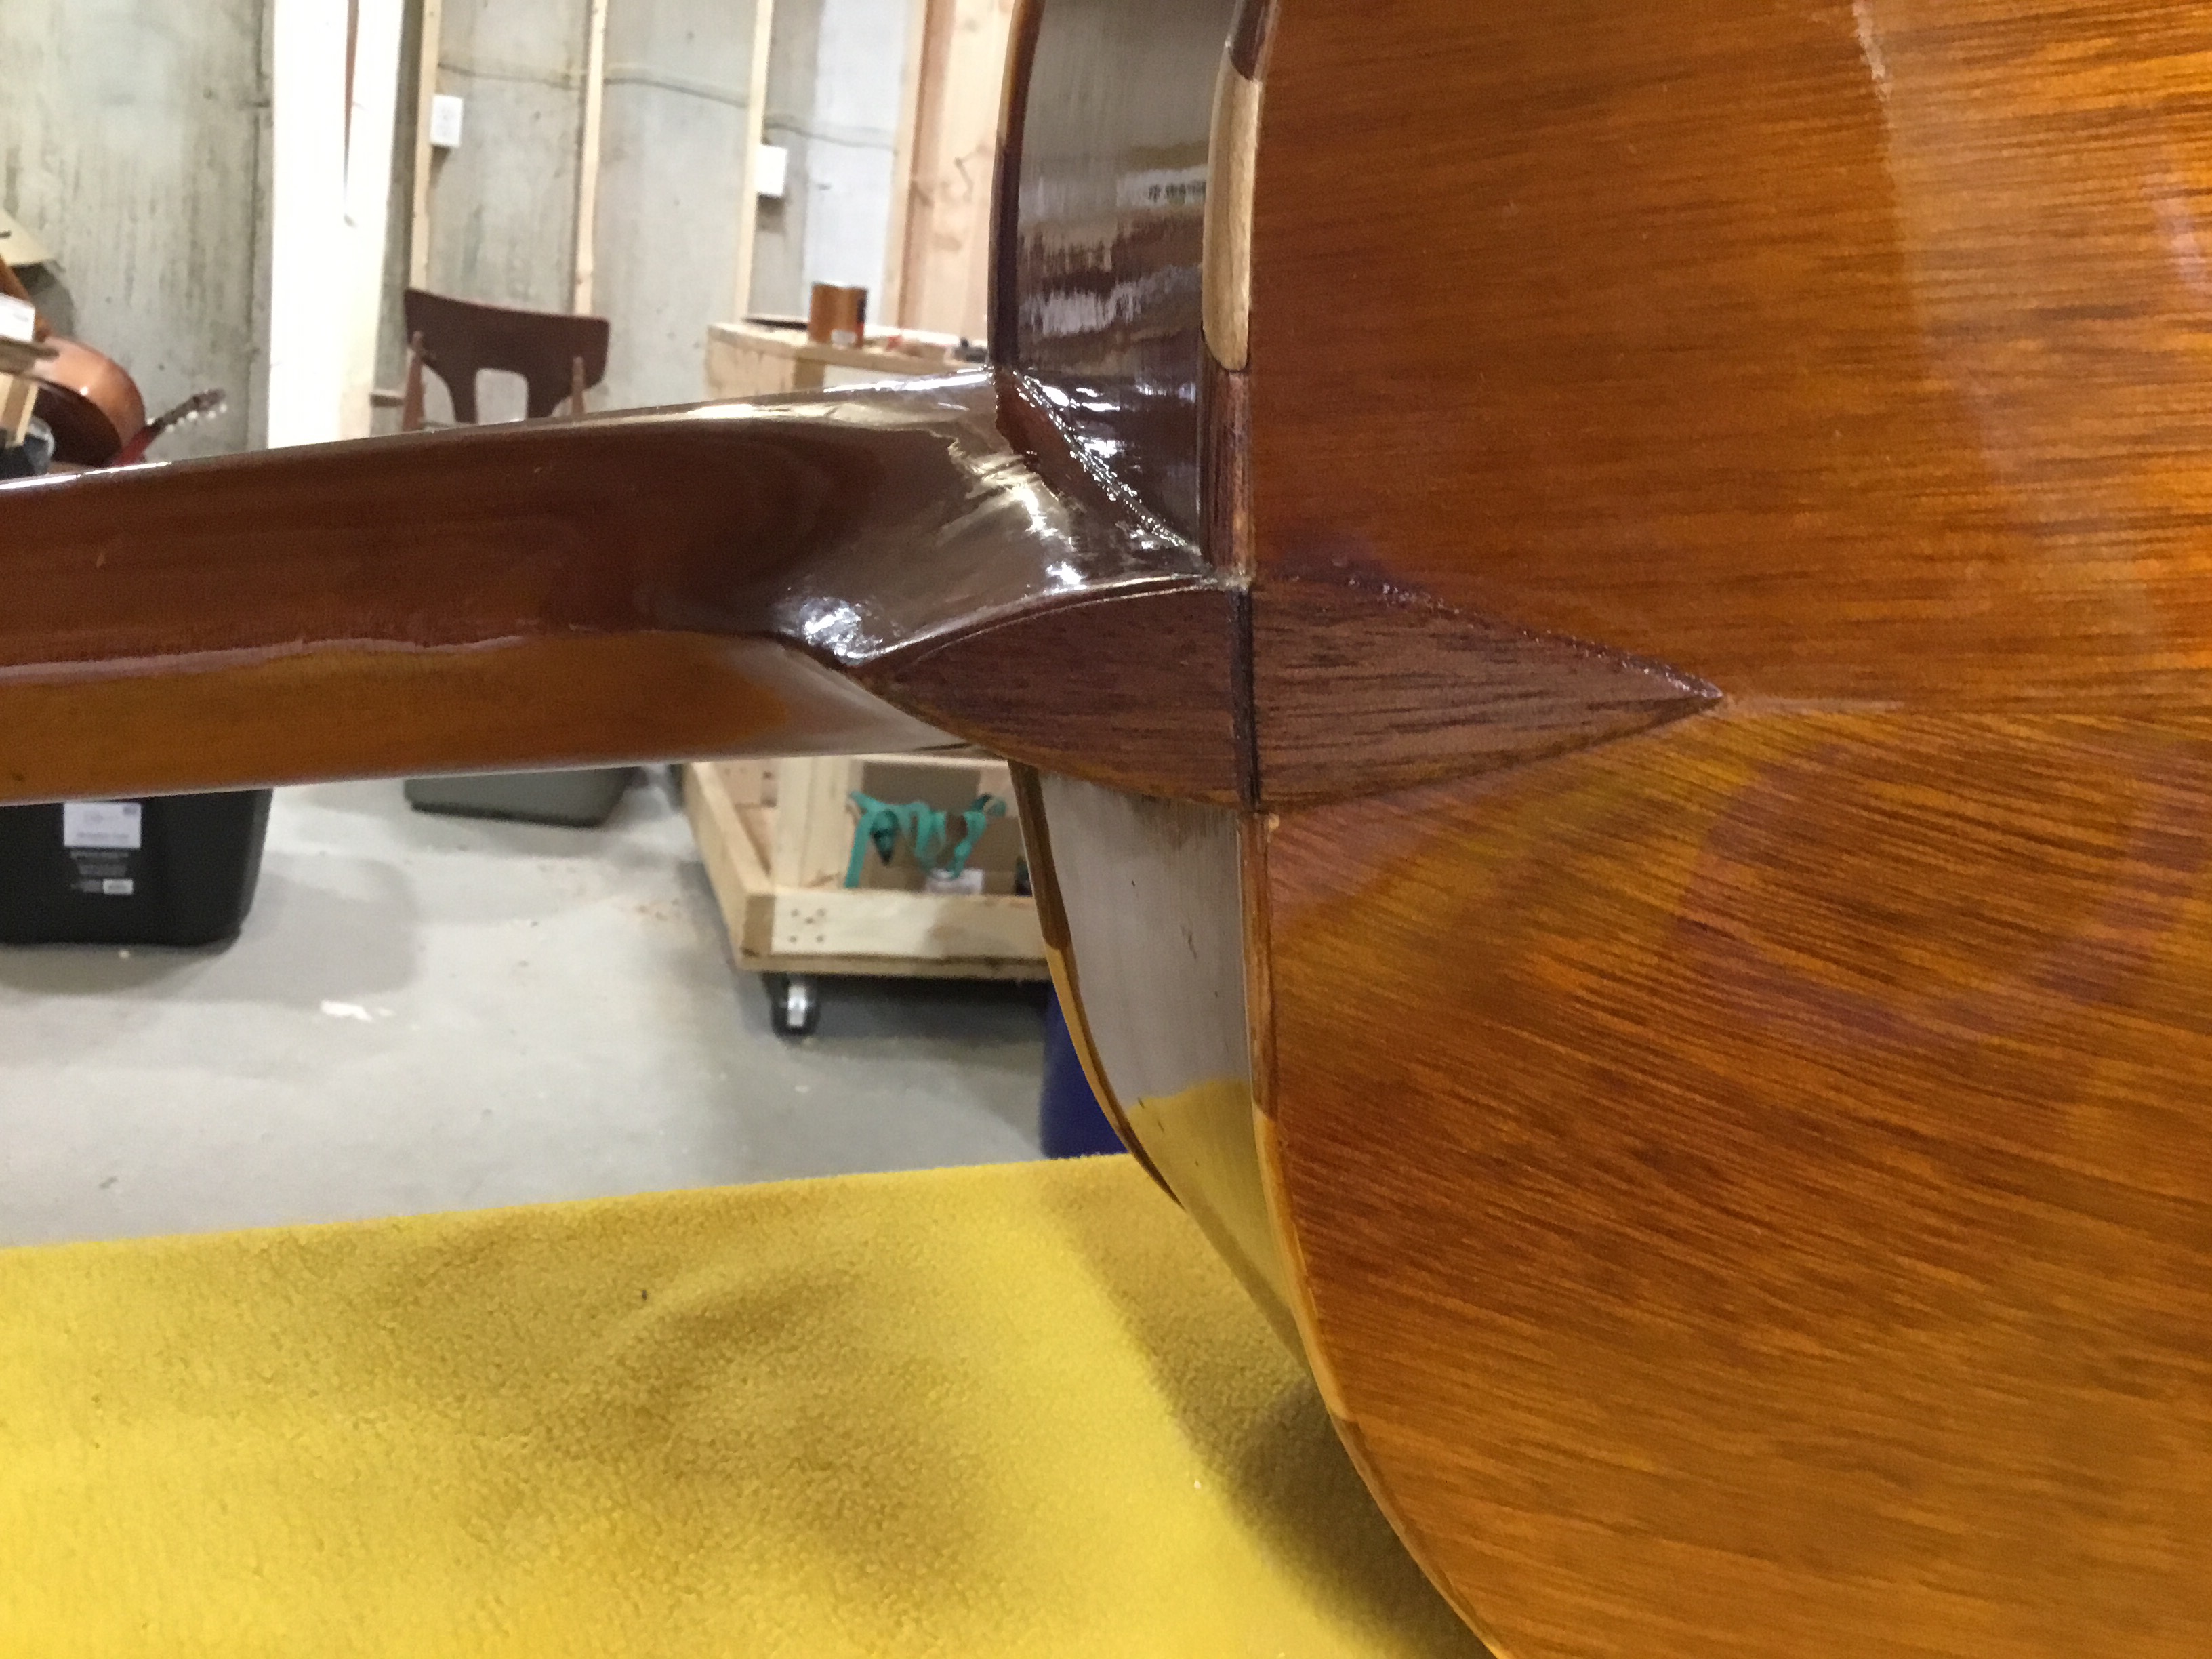
Now that the back and sides were reattached, it was time to address the bindings. This Guitarron has bindings that alternate between mahogany and maple. The challenge with this is that the bindings are curved, really in 2 directions at once. Since the Guitarron is tapered in width, from wider in the lower bout to less wide in the upper bout, and the instrument is shaped like a guitar. This Guitarron was made in China and I’m pretty sure the factory it came from has CNC machines and other automated methods to make these bindings. An advantage I don’t have. So I decided I would fashion these bindings by cutting and shaping the bindings to the correct contour, and then bending the bindings to shape. Bent wood is stronger than non bent wood, so i felt it was the best decision. I created small molds in the shapes of the side, and slowly bent the wood to their final shape using clamps. This took a long time, but the results were very satisfactory. There are a couple ways to bend wood. Soaking the wood and the bending it (not ideal), using heat to bend the wood (typically how guitar sides are bent), or dry bending the wood (what I settled on). I slowly clamped the pieces into shape, and left them overnight to retain shape. Then I glued the bindings onto the edges of the side.
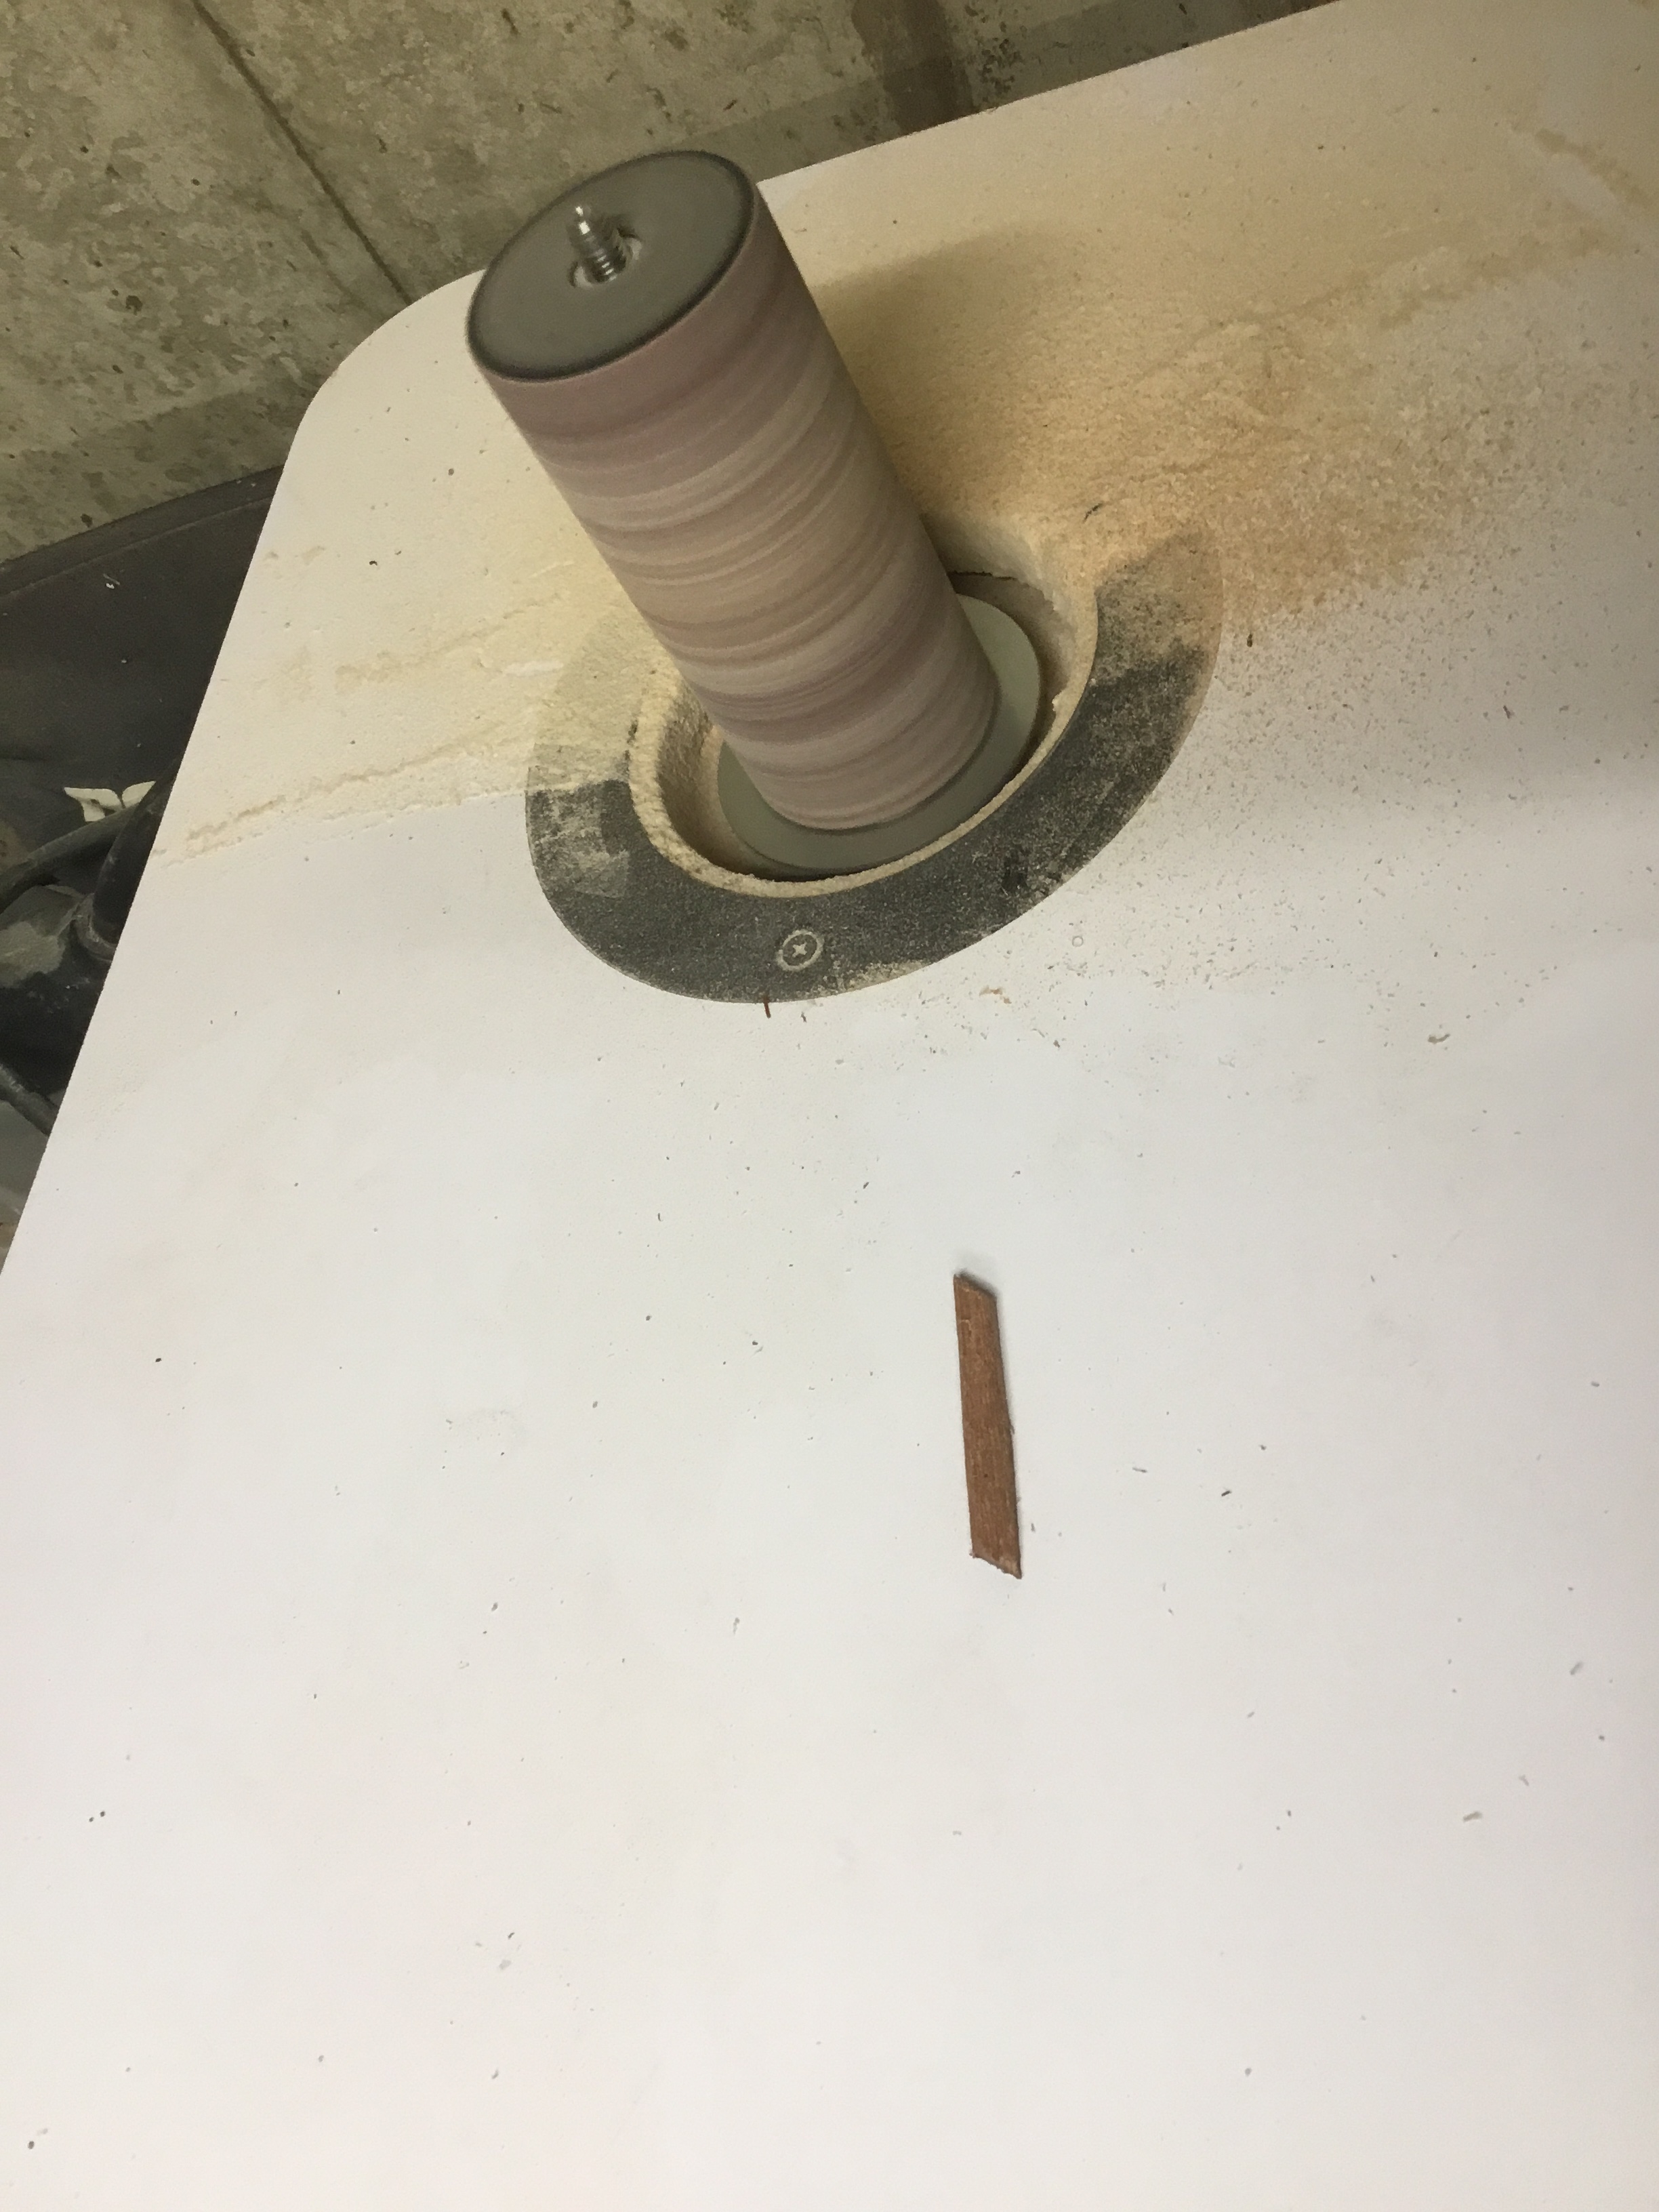
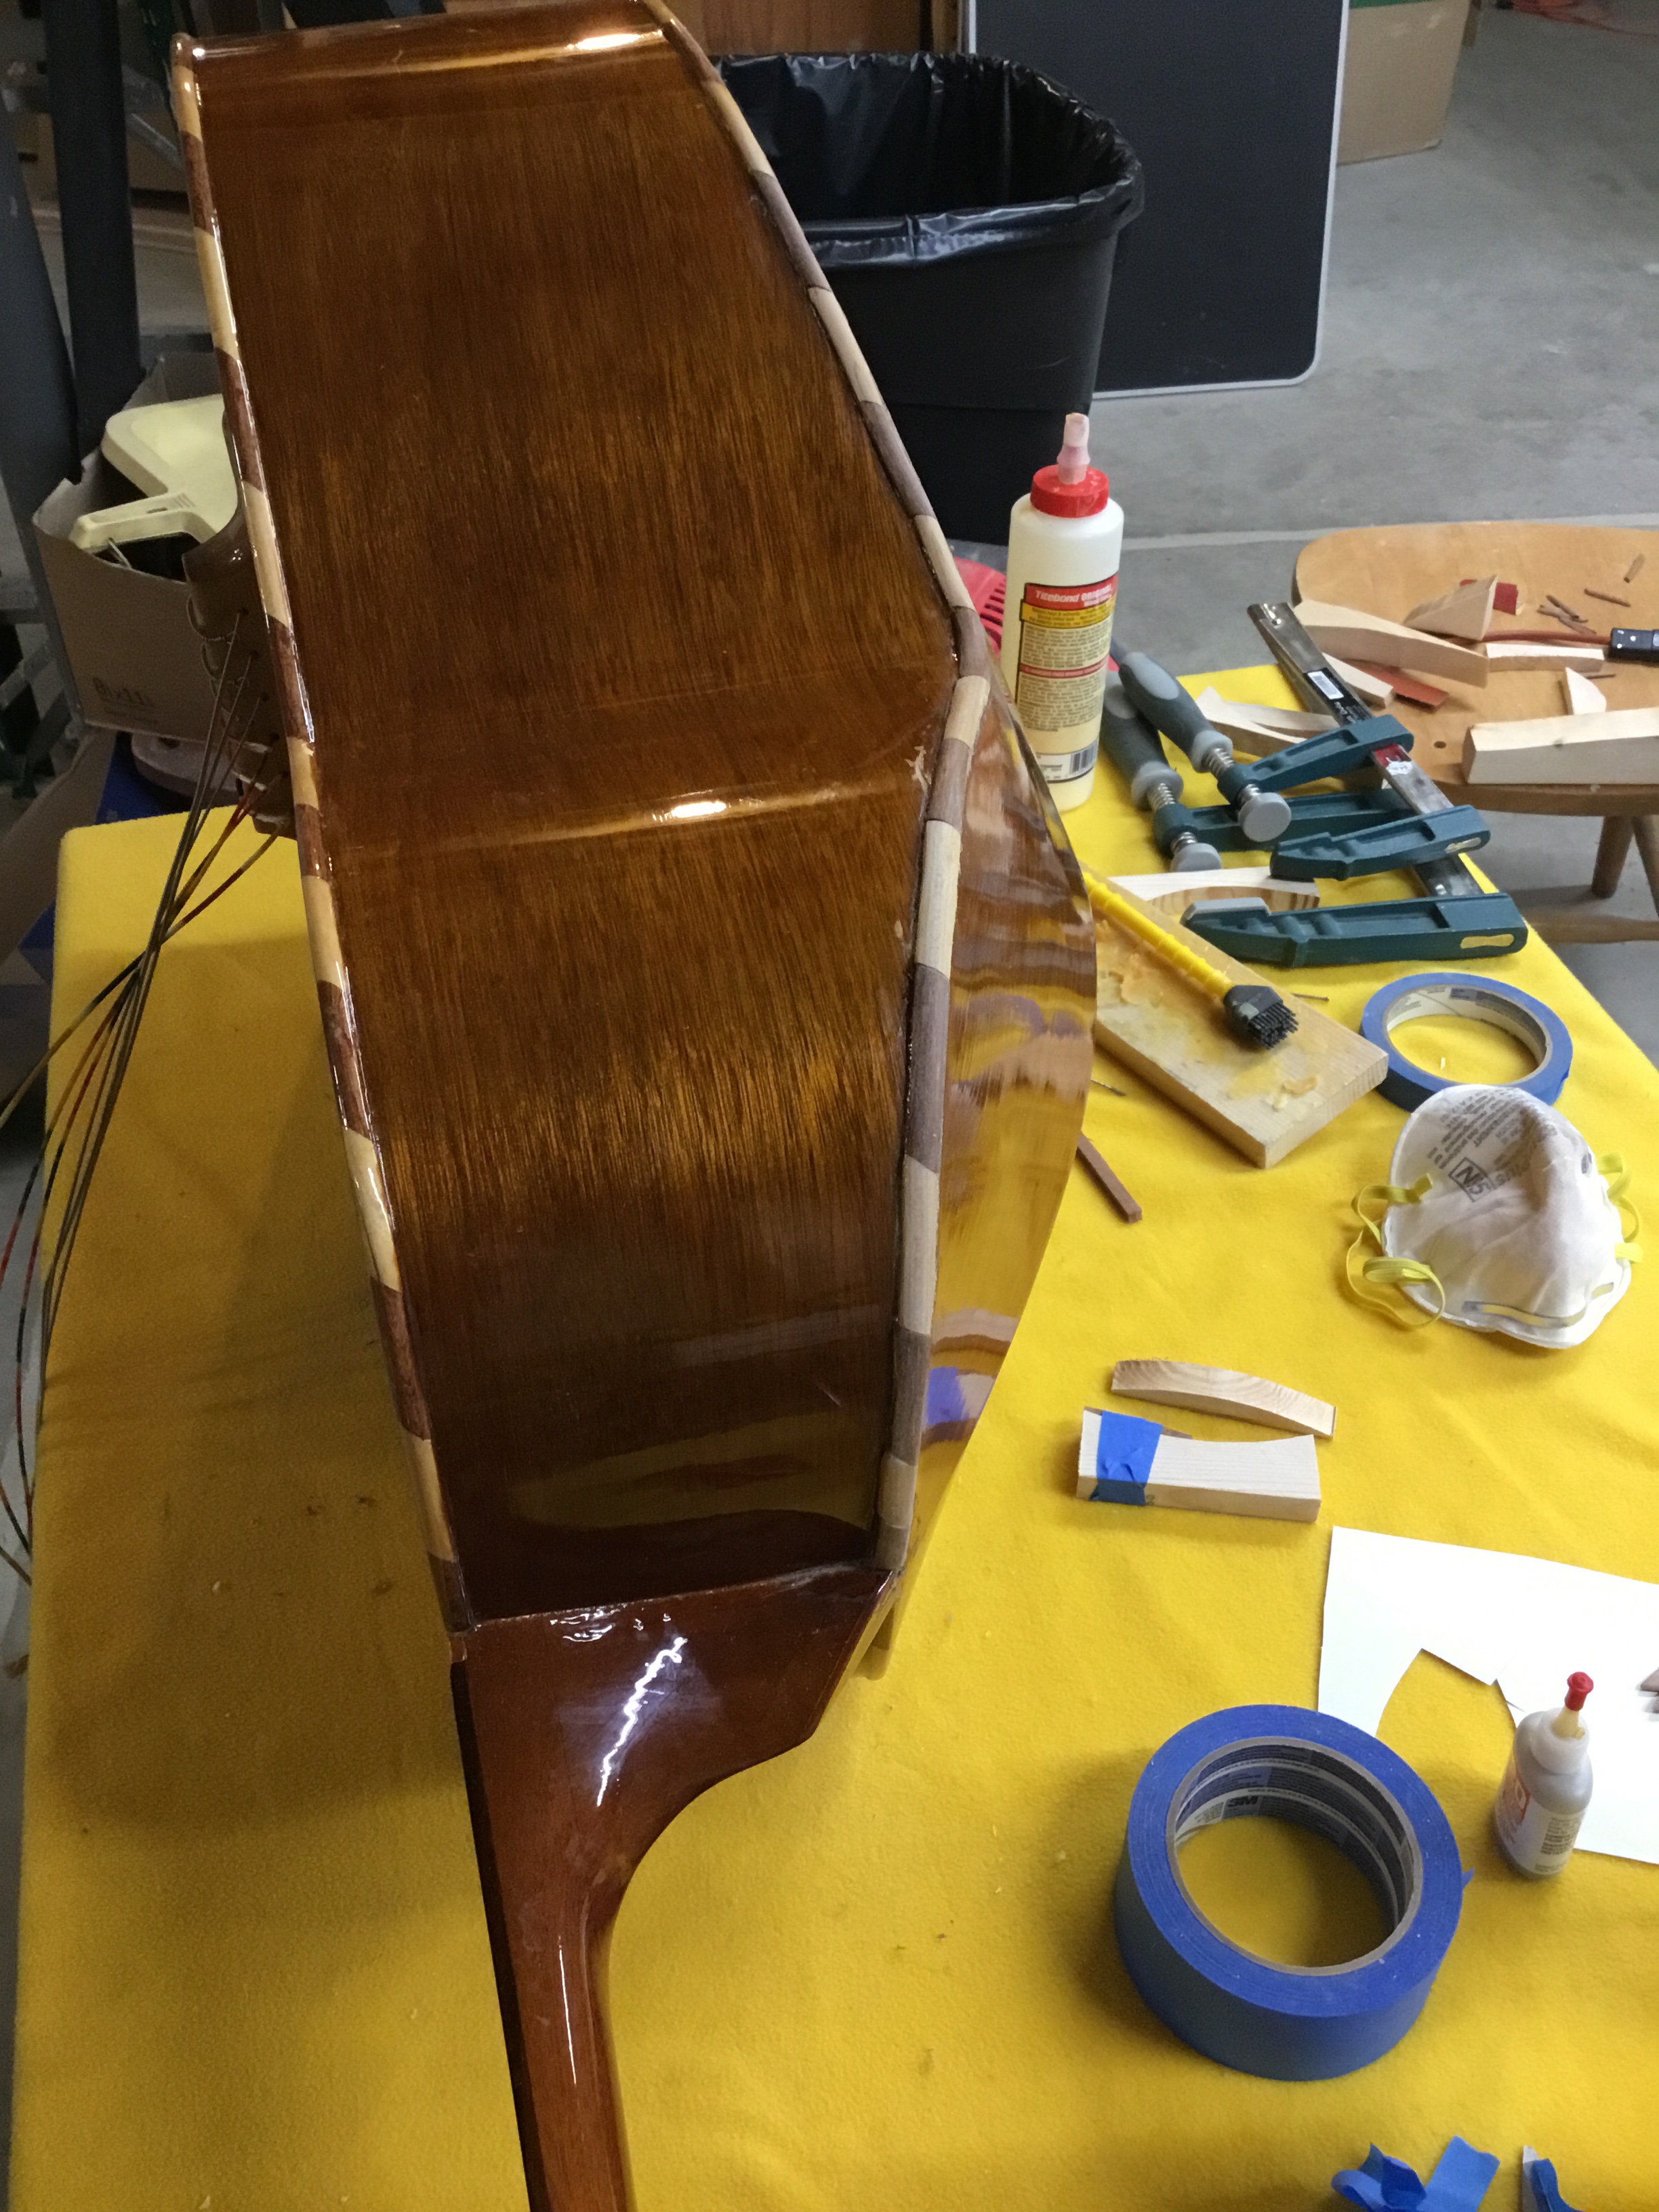
The next thing that needed to be done was to create heel caps to provide stability and hide tear out on the bottom of the neck. This would hide tear out, but more importantly keep the repaired seam on the back from ever separating again. I created these using thin pieces of mahogany, cutting them to shape on my band saw, and sanding them smooth on the spindle sander. Since I was attaching these directly to the finished guitarron, and this guitarron is finished with polyurethane (versus the more traditional nitrocellulose lacquer), I needed to use a polyurethane glue (again I chose Titebond …. much better than the more popular Gorilla glue).
The final step was to use wood stain to repair any spots where the finish was compromised …. or as mentioned earlier, gouged out by yours truly not being careful enough. And then apply a couple of coats of polyurethane to the new wood.

I was hoping I would be able to save the strings, but unfortunately the top 3 strings are nylon wrapped with wire. There was very little slack when I removed the strings and they were unraveling. I told Mitch I could buy some new Guitarron strings ($30 for a set) and charge him to string it up, but that was something he could probably do himself and save a few bucks. Fortunately he agreed!
And that folks is how I repaired Mitch’s wicked cool guitarron. All that was left was to string it back up and start jamming the mariachi mambo!
It was a really challenging, fun, and rewarding project and, most importantly, my customer was very happy.

Love that mariachi music!
LikeLike
Hello. How much does a repair like this cost?
LikeLike
For this repair I charged $85. I don’t do this for the money!
LikeLike
Hi. I’ve been using a Mariachi for several years, but restrung as a 4-string bass.
Finally grew tired of strings being too slack to perform well, so carefully trialled and fashioned a new extension to the neck, making it 33″ in scale length. Good improvement in sound and dynamics. Now a great instrument for acoustic sessions with a few other musicians. Nice article. Best wishes, Richard, Cardiff, UK.
LikeLike